Hi lovelies! Welcome to a journey back in time to an era of grunge, glamour, and all things fabulously funky: the 90s! As we dust off our scrunchies and break out our platform sneakers, let’s not forget one essential element of 90s fashion: nail art. The 90s were a treasure trove of nail trends, from the iconic French tips to the bold and neon experimentation that defined the decade. So, in this article, we’re diving deep into the world of 90s nail designs, exploring the trends that captivated a generation and continue to inspire nail artists today. Get ready to revisit the days of glitter, grunge, and everything in between as we explore the vibrant and eclectic world of 90s-inspired nail art. So grab your favorite nail polish and let’s take a trip down memory lane to discover the nail trends that defined an era!
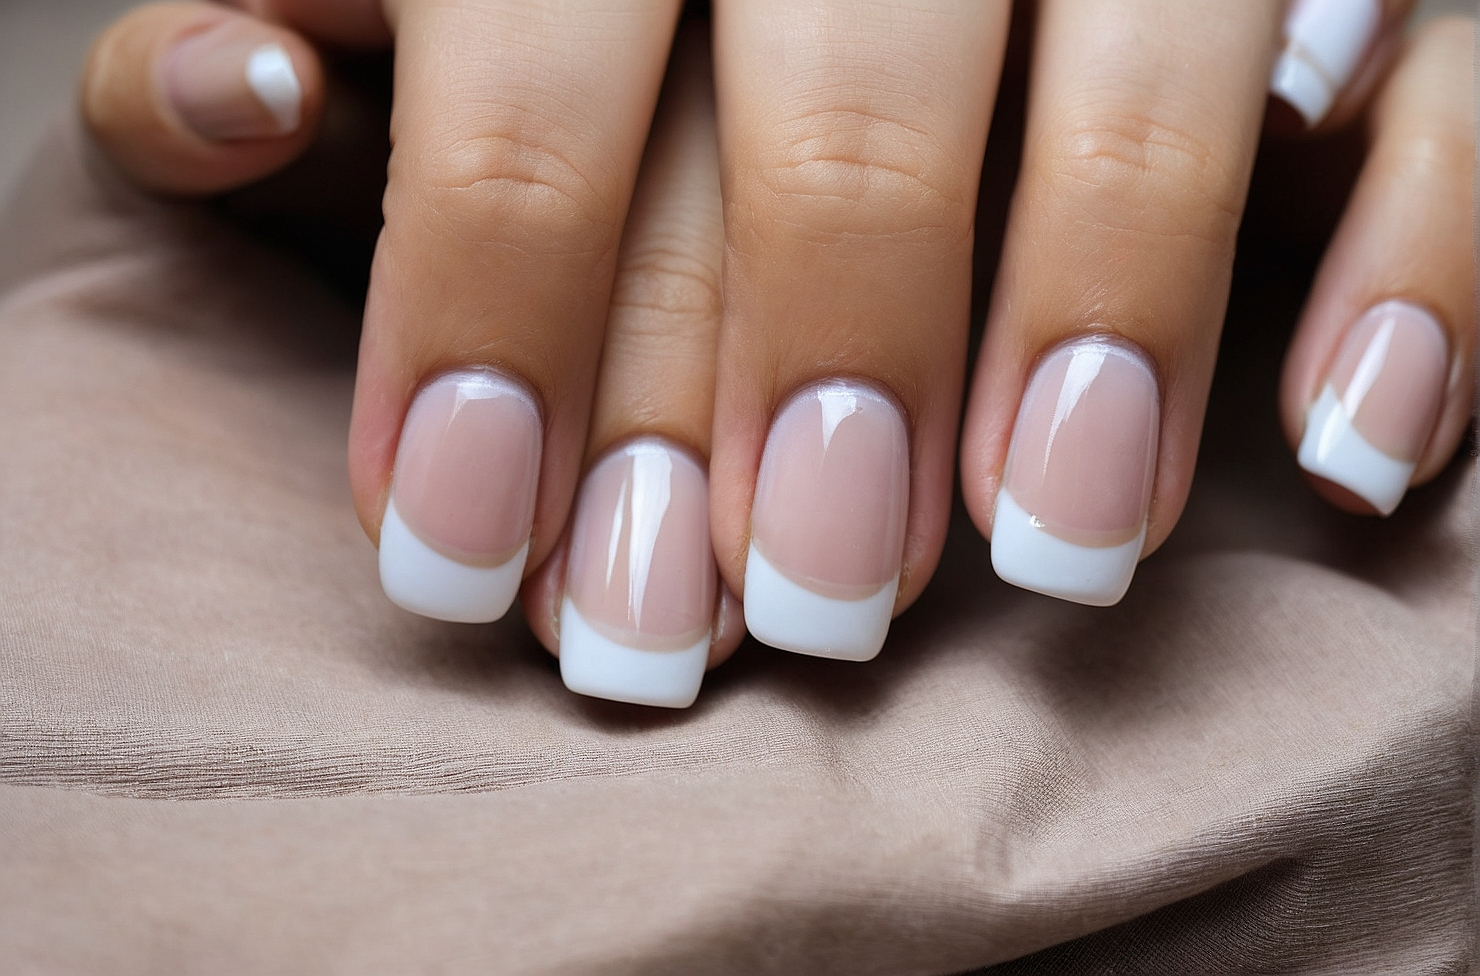
French Tips 90s Nail Designs
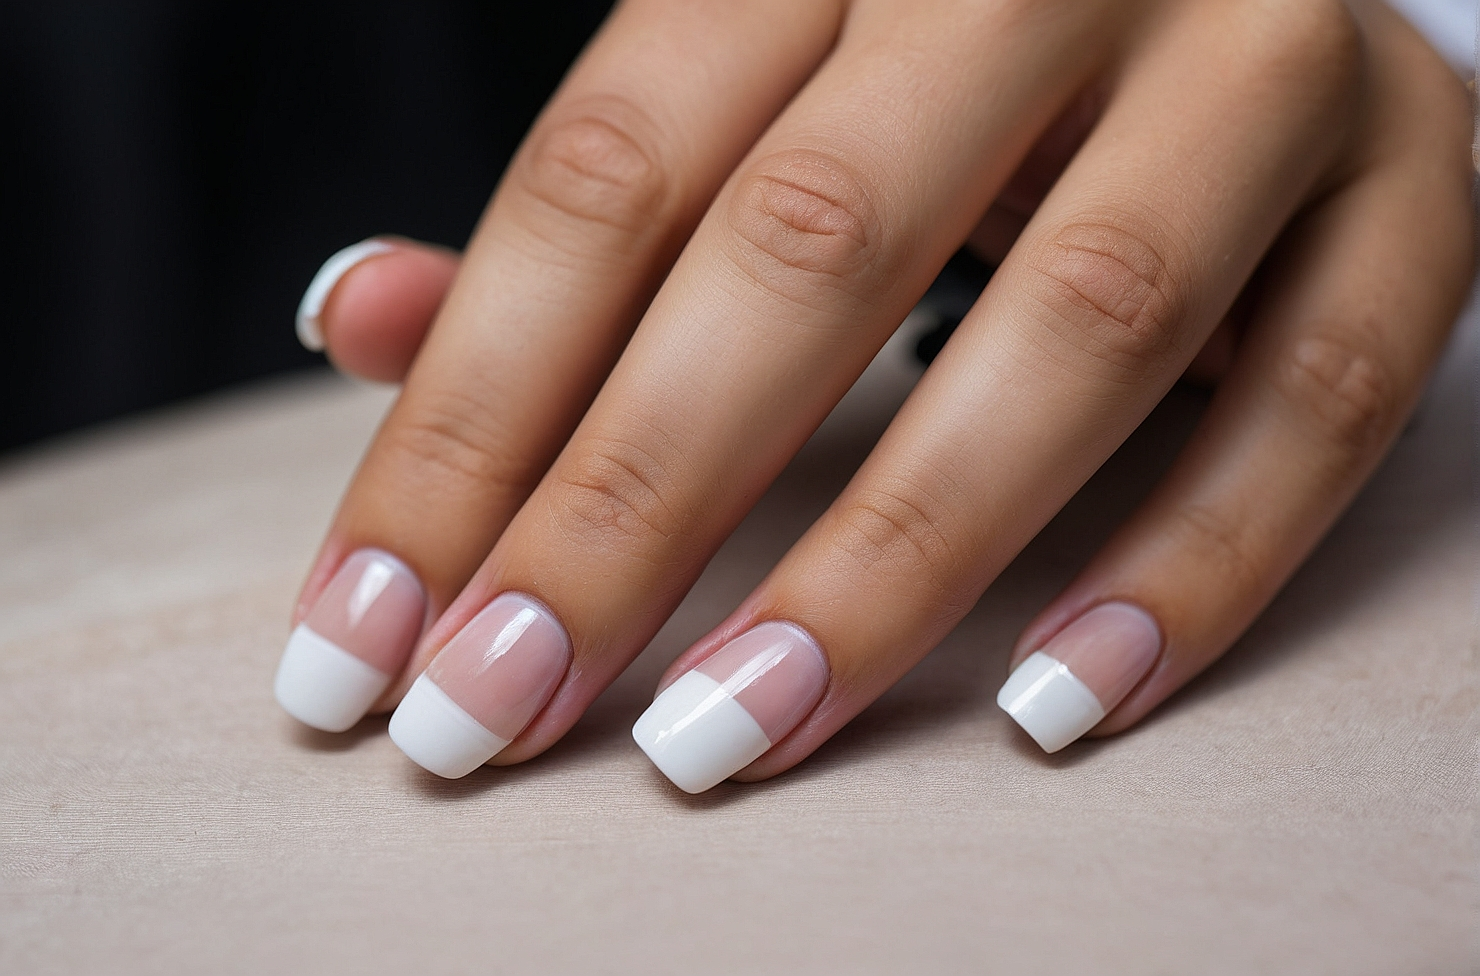
Firstly, to create the classic French tips that were popular in the 90s, you’ll need a nude polish for the base and a bright white polish for the tips. So, start with clean, trimmed nails and apply a base coat. Once dry, apply the nude polish evenly over each nail. Then, carefully paint the white tips using a steady hand and thin brush or nail tape. Aim for a slightly squared-off shape for that authentic 90s look. Finally, let the white polish dry completely before adding a glossy top coat to seal in the design. There you have it; a chic and timeless manicure inspired by 90s elegance!
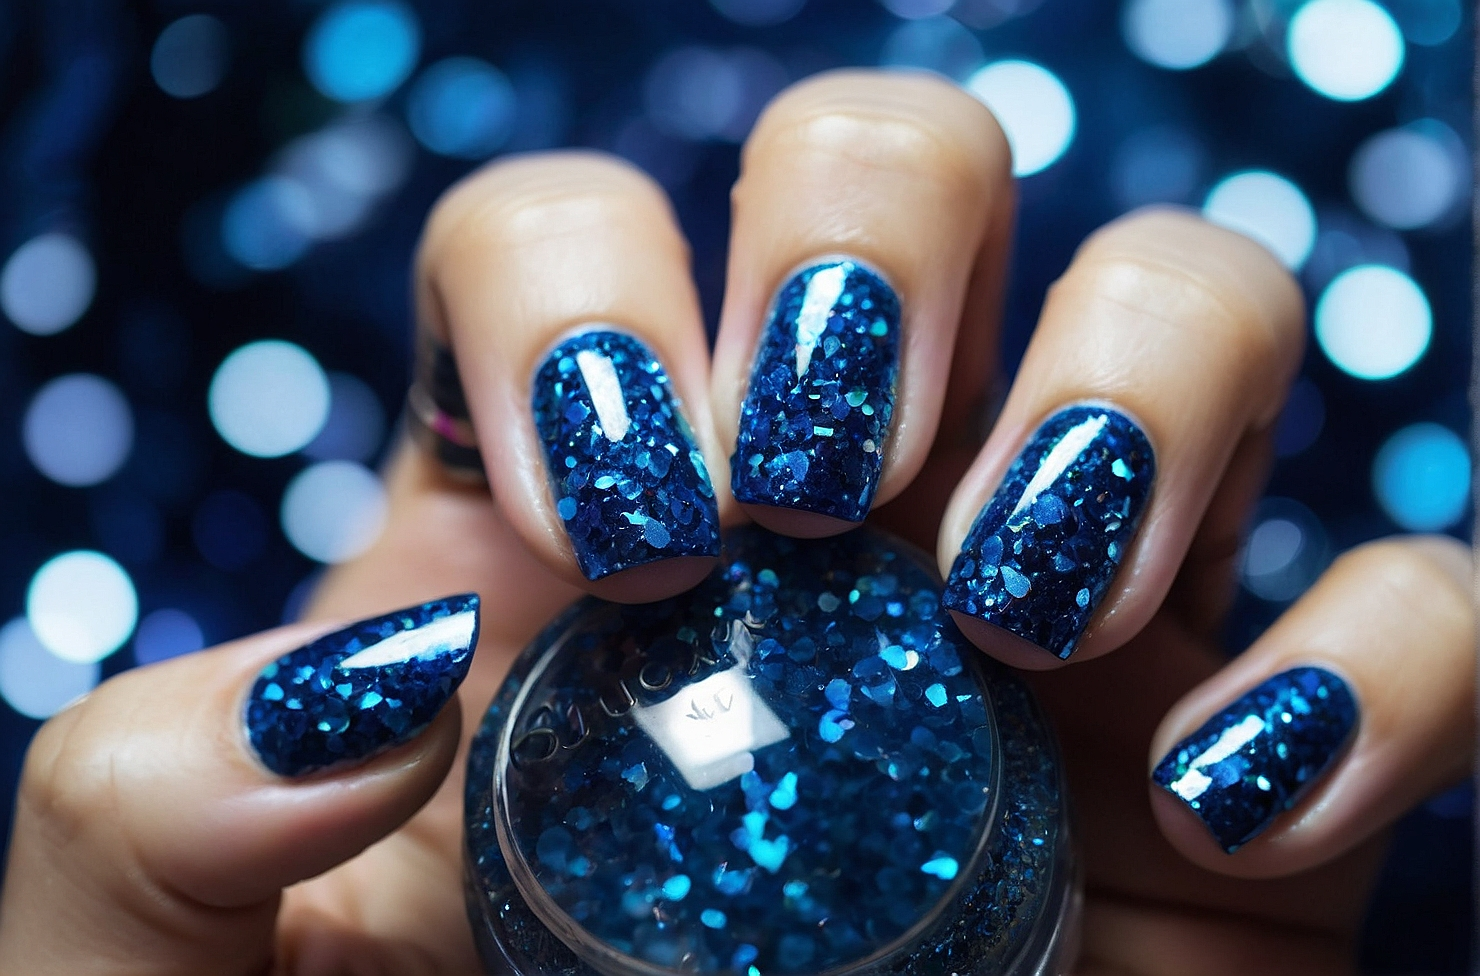
Chunky Glitter Nails
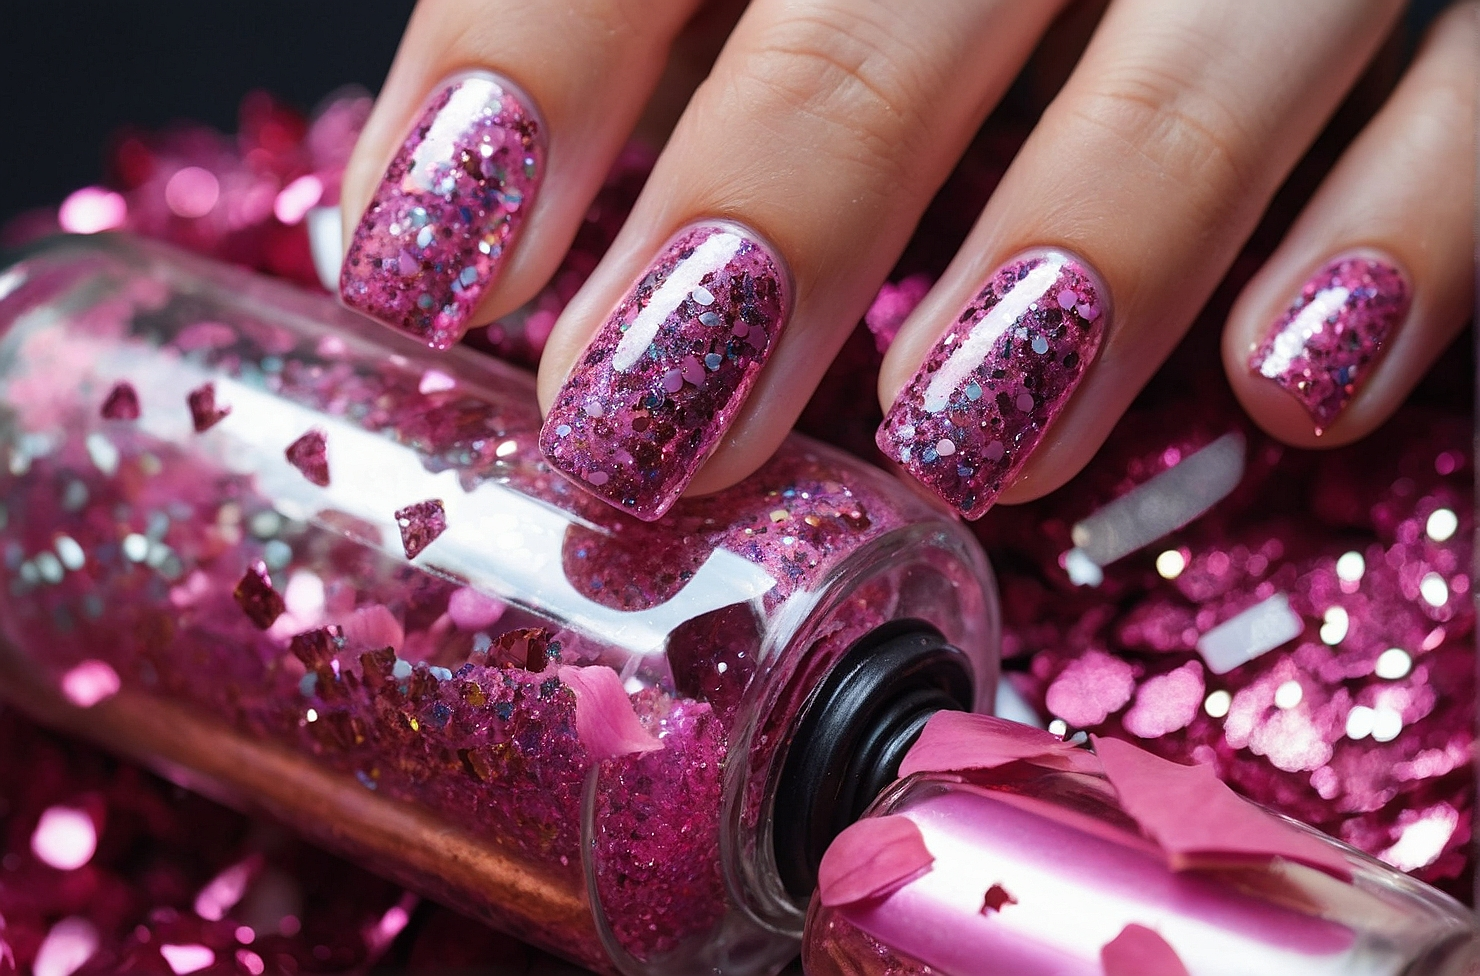
Get ready to sparkle with chunky glitter nails—a beloved 90s trend that’s back in style! Firstly, choose your favorite chunky glitter polish in vibrant shades like blue, pink, or silver. Then, start with a clear base coat for protection and a smooth surface. Once dry, apply the glitter polish with the brush applicator, layering it for extra sparkle. Don’t hold back, go bold with the glitter! Let each layer dry to avoid smudging. Finally, finish with a clear top coat for a glossy finish. Get ready to shine with your chunky glitter nails, a fun throwback to 90s nostalgia!
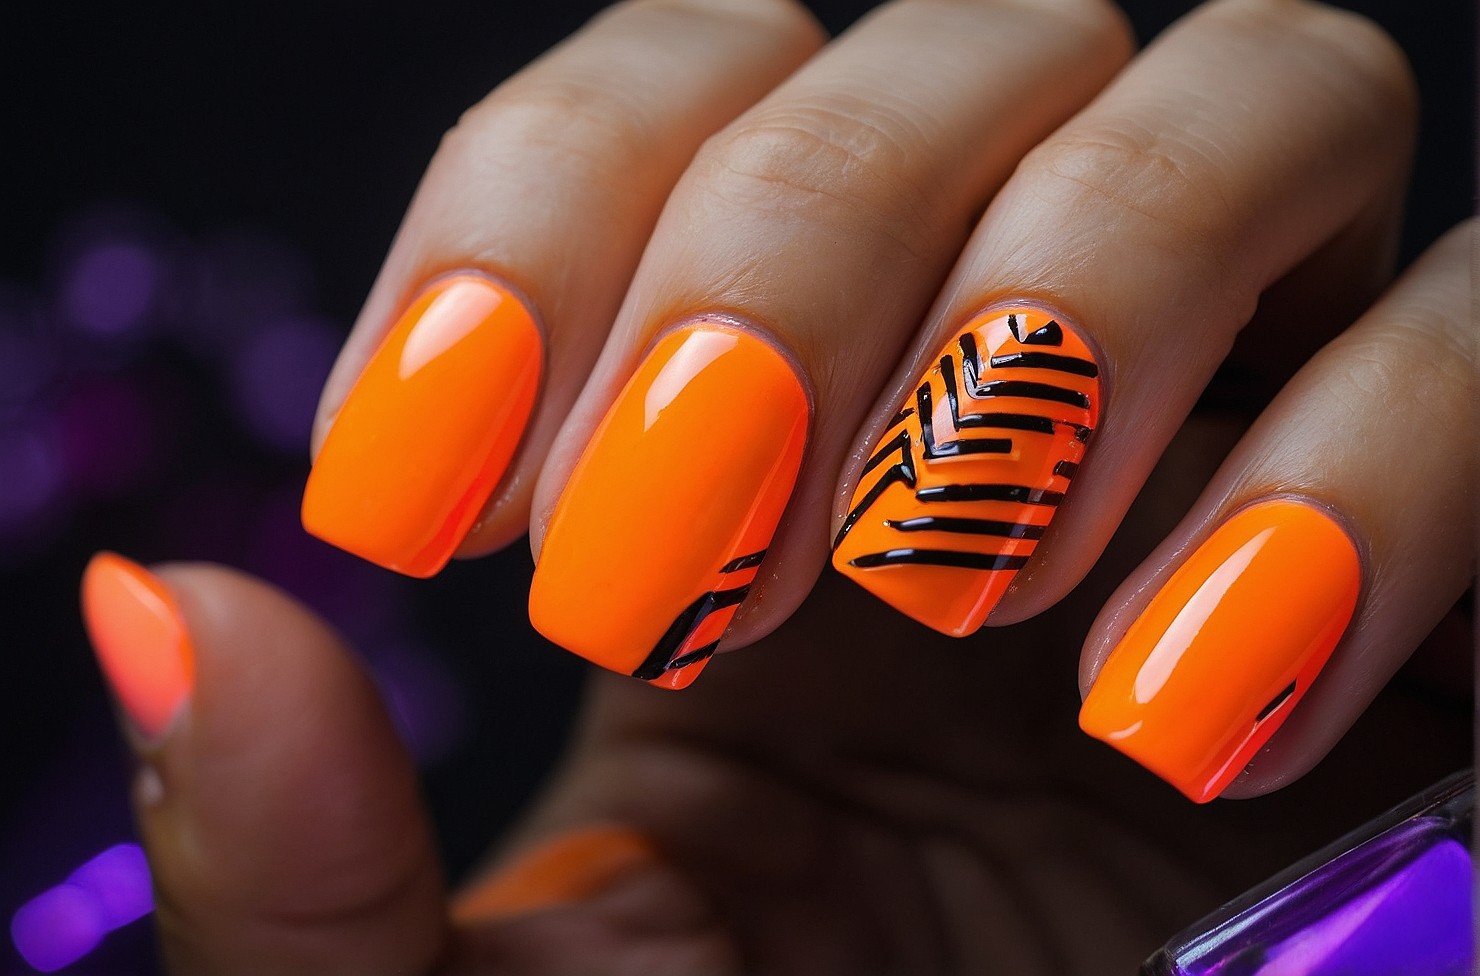
Neon Colored Nails
Ready to rock vibrant neon nails that scream 90s cool? Let’s dive into this electrifying tutorial! Firstly, choose your favorite neon shades like pink, green, or orange. Start with a clear base coat for protection. Once dry, get creative with your designs, go for solid neon nails or funky patterns. Embrace the bright and bold 90s aesthetic! Use thin nail art brushes or tape for shapes and patterns. Mix and match neon shades for extra fun! Finish with a clear top coat for a glossy finish. Get ready to turn heads with these nostalgic neon designs!
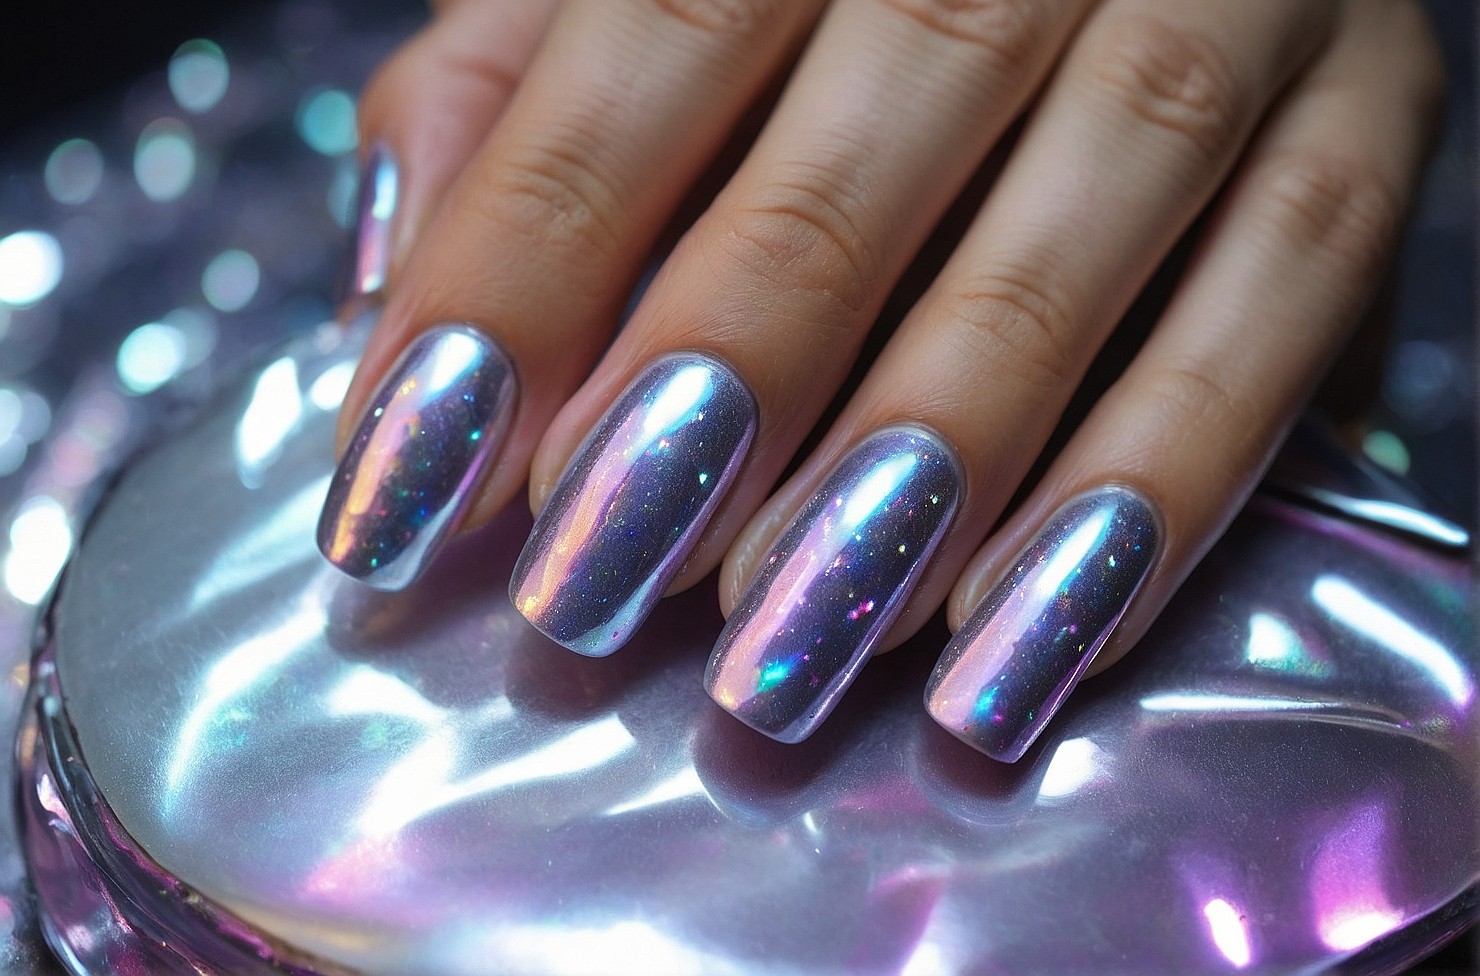
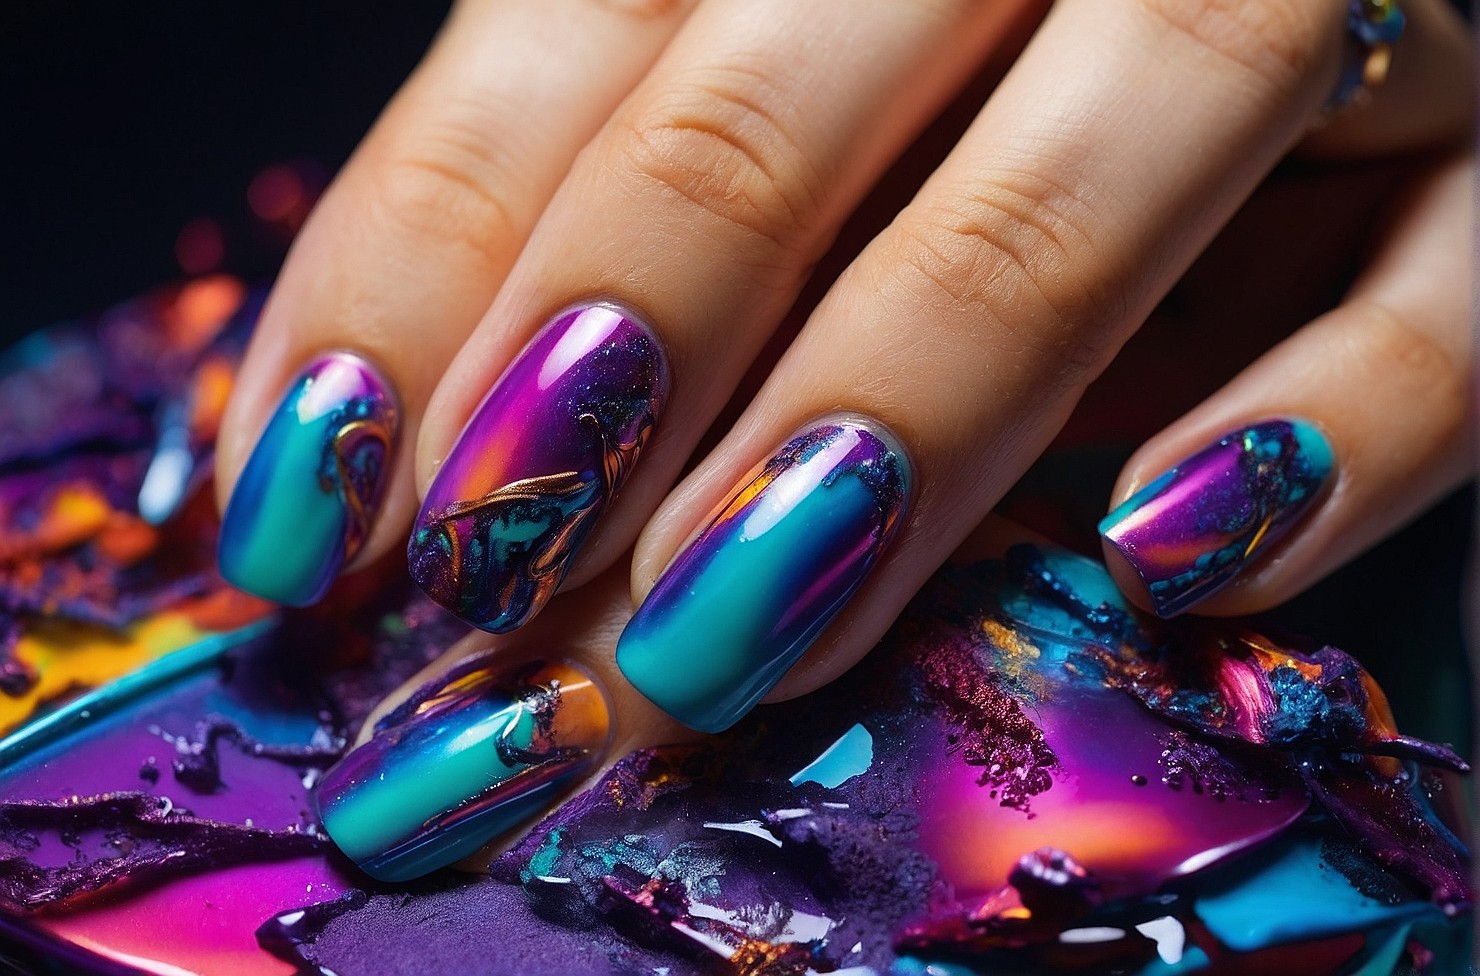
Holographic Nails
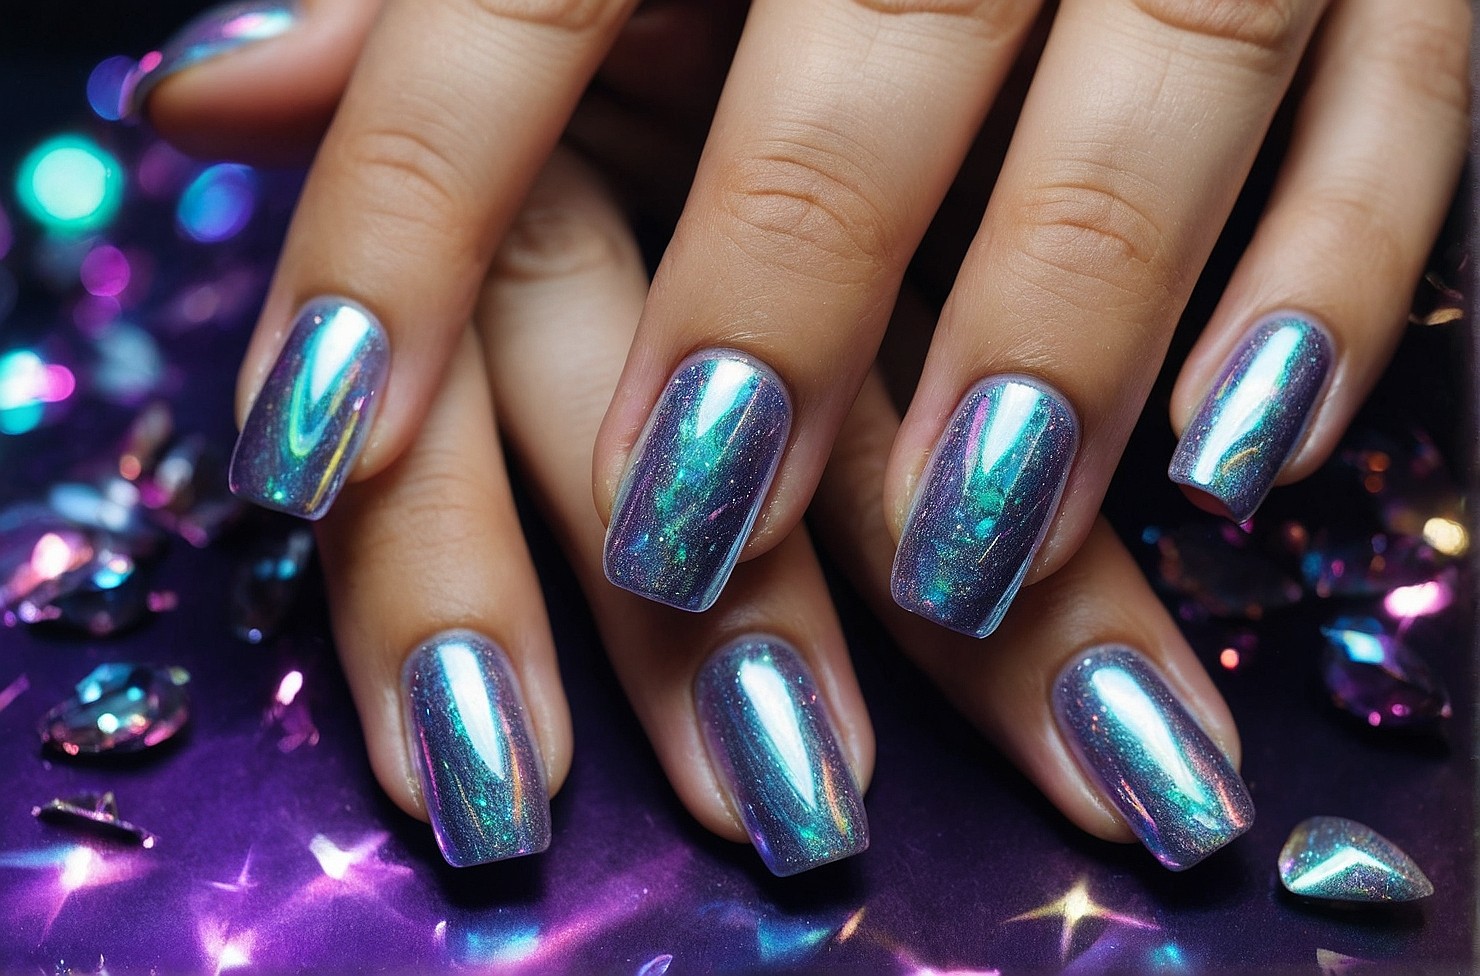
Add a futuristic twist to your nails with holographic nail polish, a trend that’s back and better than ever! Firstly, start with clean, dry nails and apply a clear base coat for a smooth surface. Once dry, apply your holographic nail polish in thin, even coats, allowing each layer to dry completely before adding the next. For a more intense holographic effect, apply multiple coats. Seal in the holographic effect with a clear top coat for durability and shine. Get ready to dazzle with your holographic nails, a futuristic nod to 90s glam!
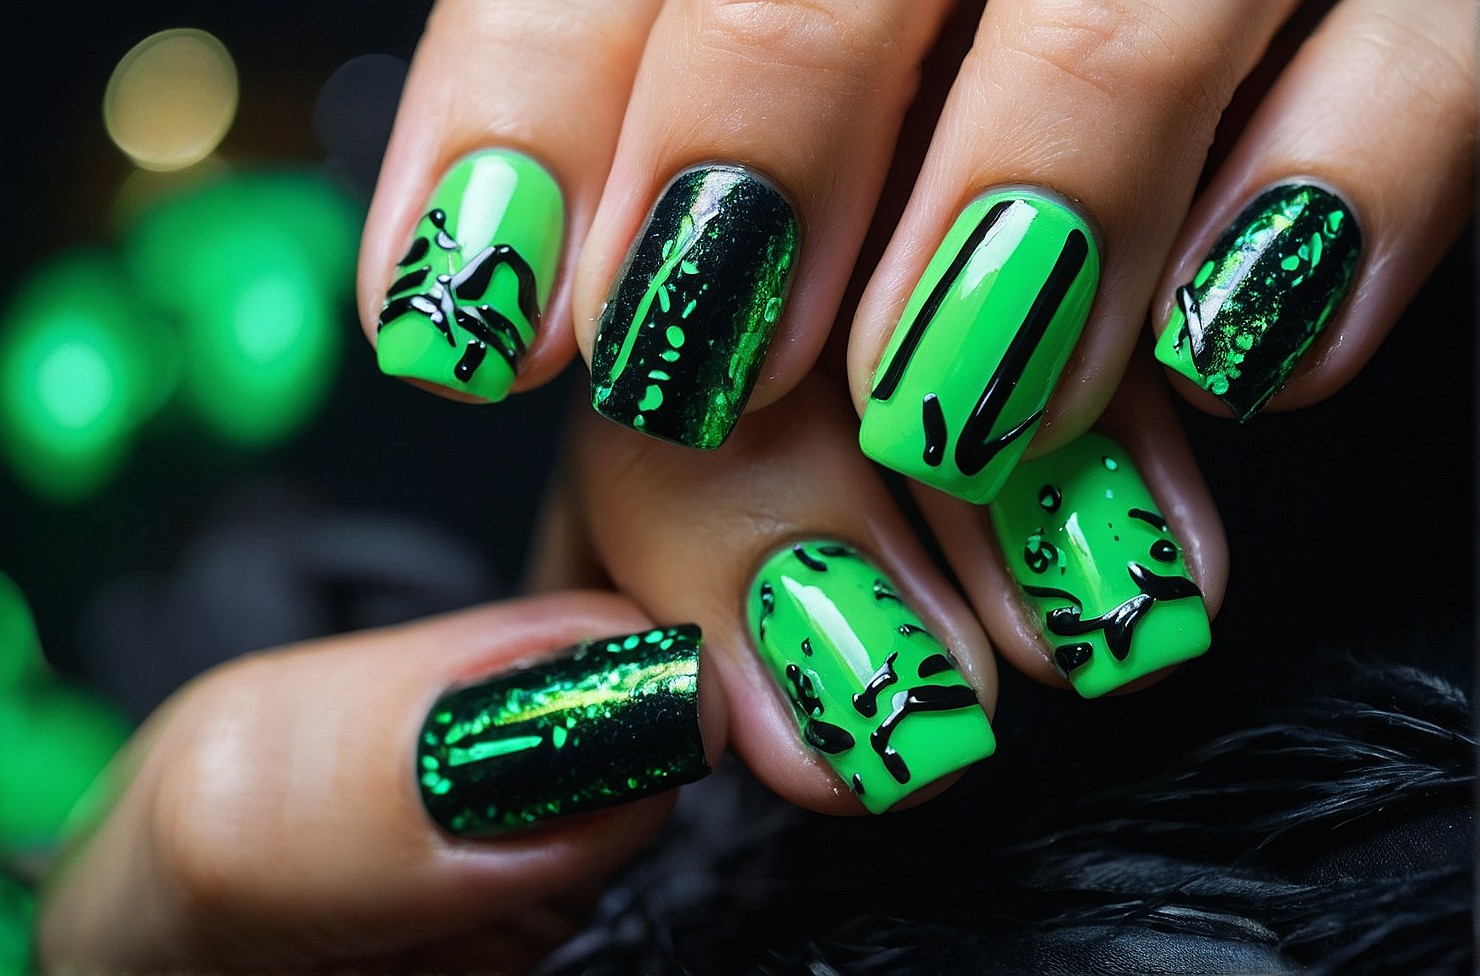
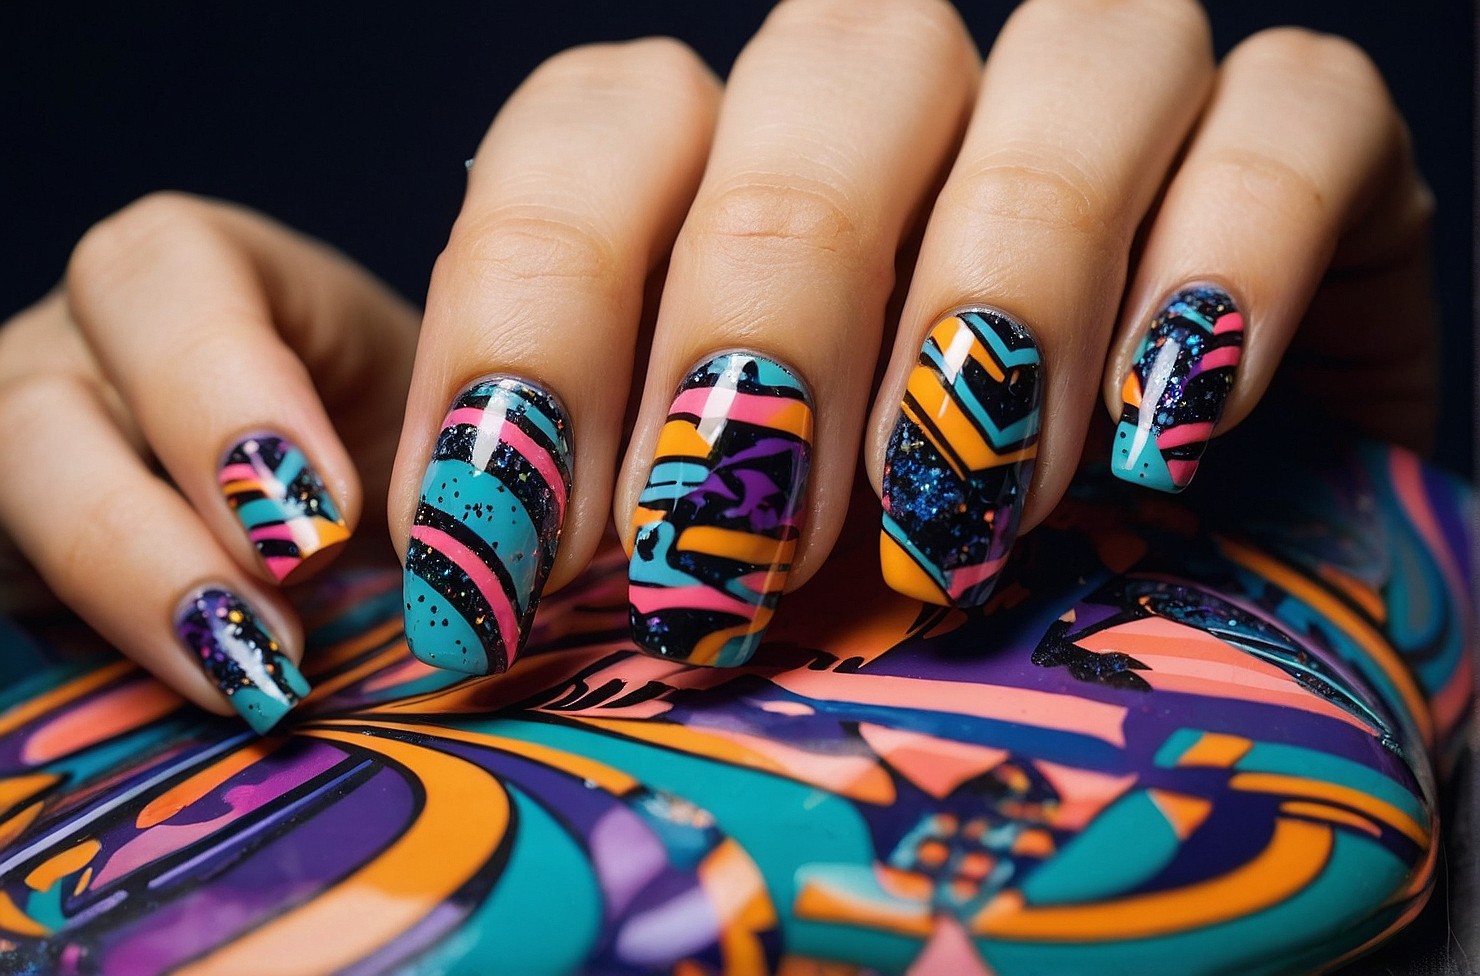
Funky Pattern Nails
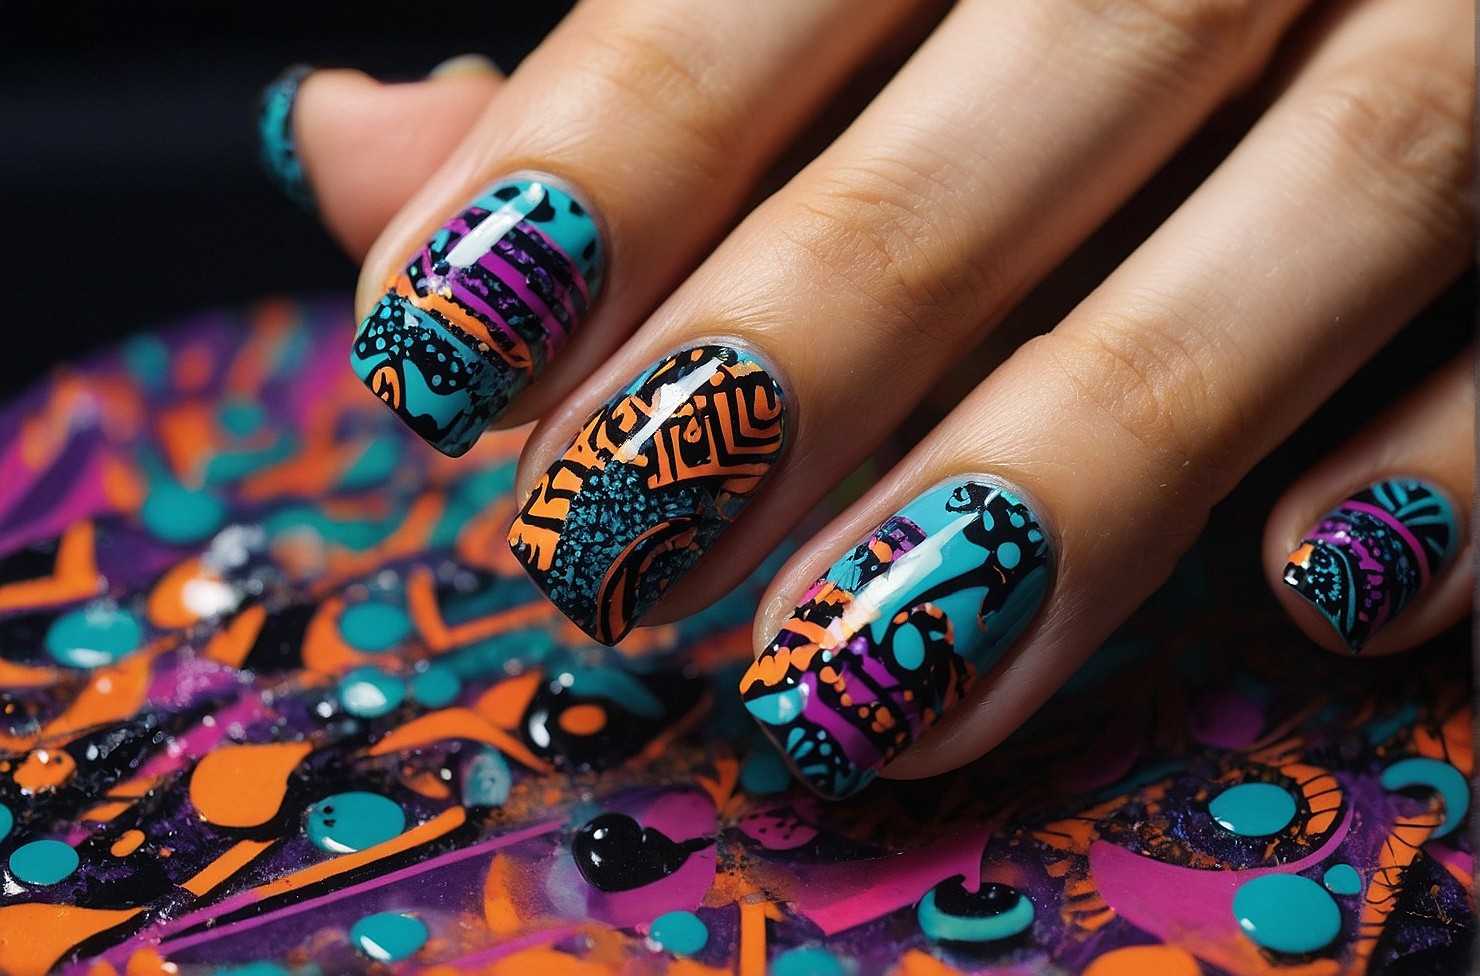
Embrace the funky patterns nail trend that defined the 90s with your creativity! Firstly, choose your favorite nail polish colors for the base. Start with clean, dry nails and apply a clear base coat for protection. Once dry, use nail art brushes, dotting tools, or striping tape to create geometric shapes, abstract designs, or playful motifs. Think bold stripes, grids, squiggles, or polka dots. Mix and match colors and patterns for an eclectic look. Finish with a clear top coat for a glossy finish. Channel your inner 90s rebel and make a statement with your funky patterns!
Metallics 90s Nail Designs
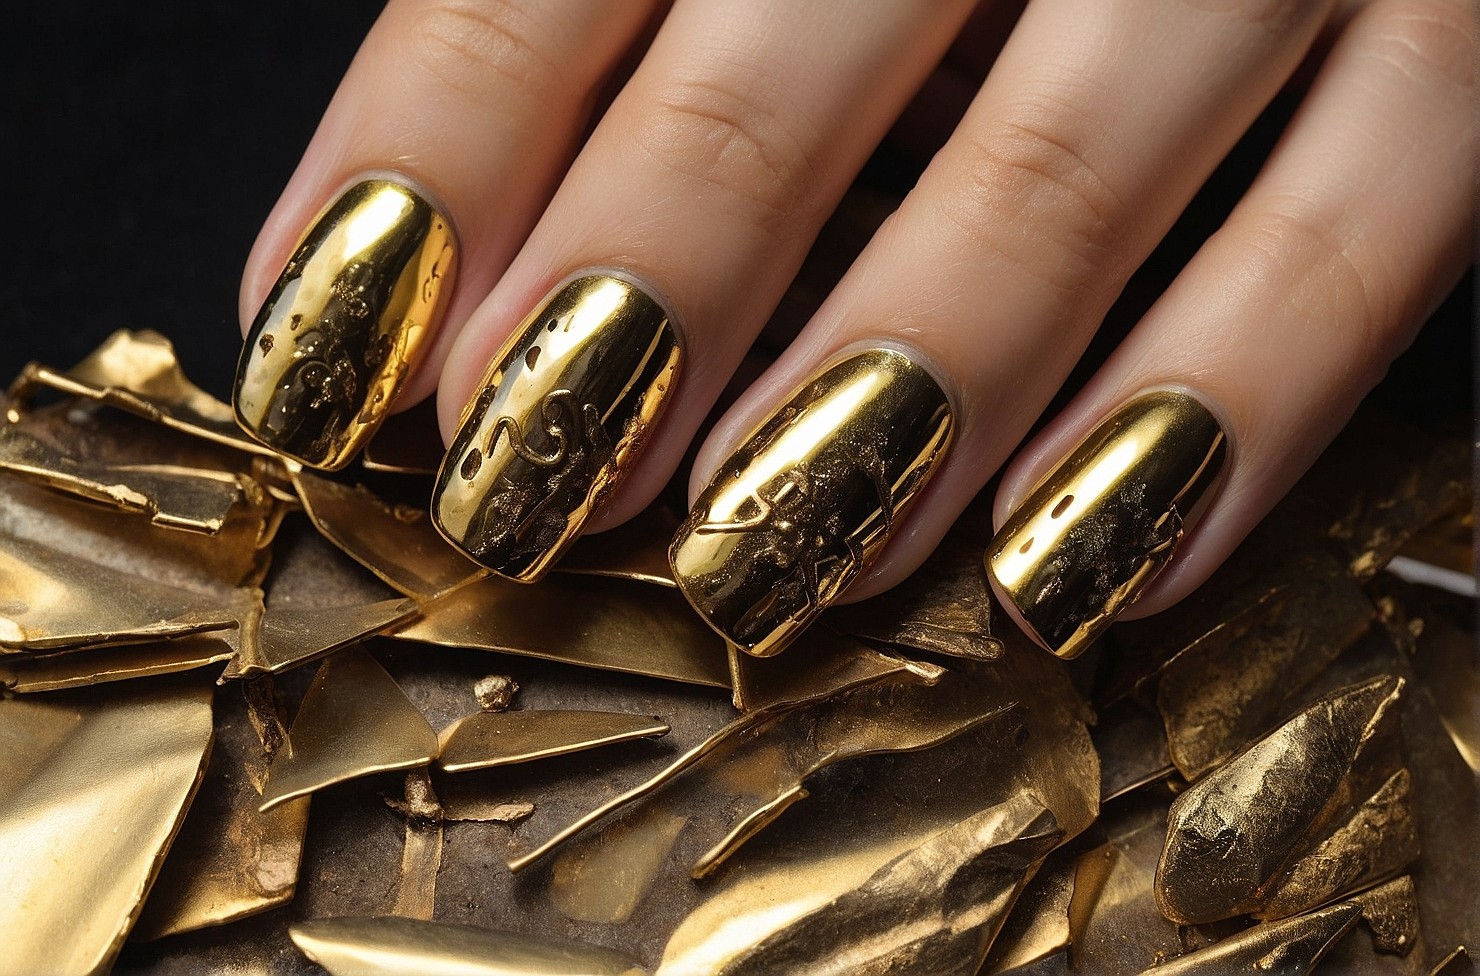
Let’s bring back 90s metallic magic with trendy nail designs! Firstly, start by prepping clean, dry nails and applying a clear base coat for smoothness and protection. Then choose your favorite metallic polish color; silver, gold, or bronze. Apply two coats, letting each dry fully. Get creative with nail art brushes or tape to add shapes or stripes in contrasting metallic shades. Finally, finish with a clear top coat for lasting shine. Shine bright like a 90s star with your metallic nails!
Matte Nail Designs
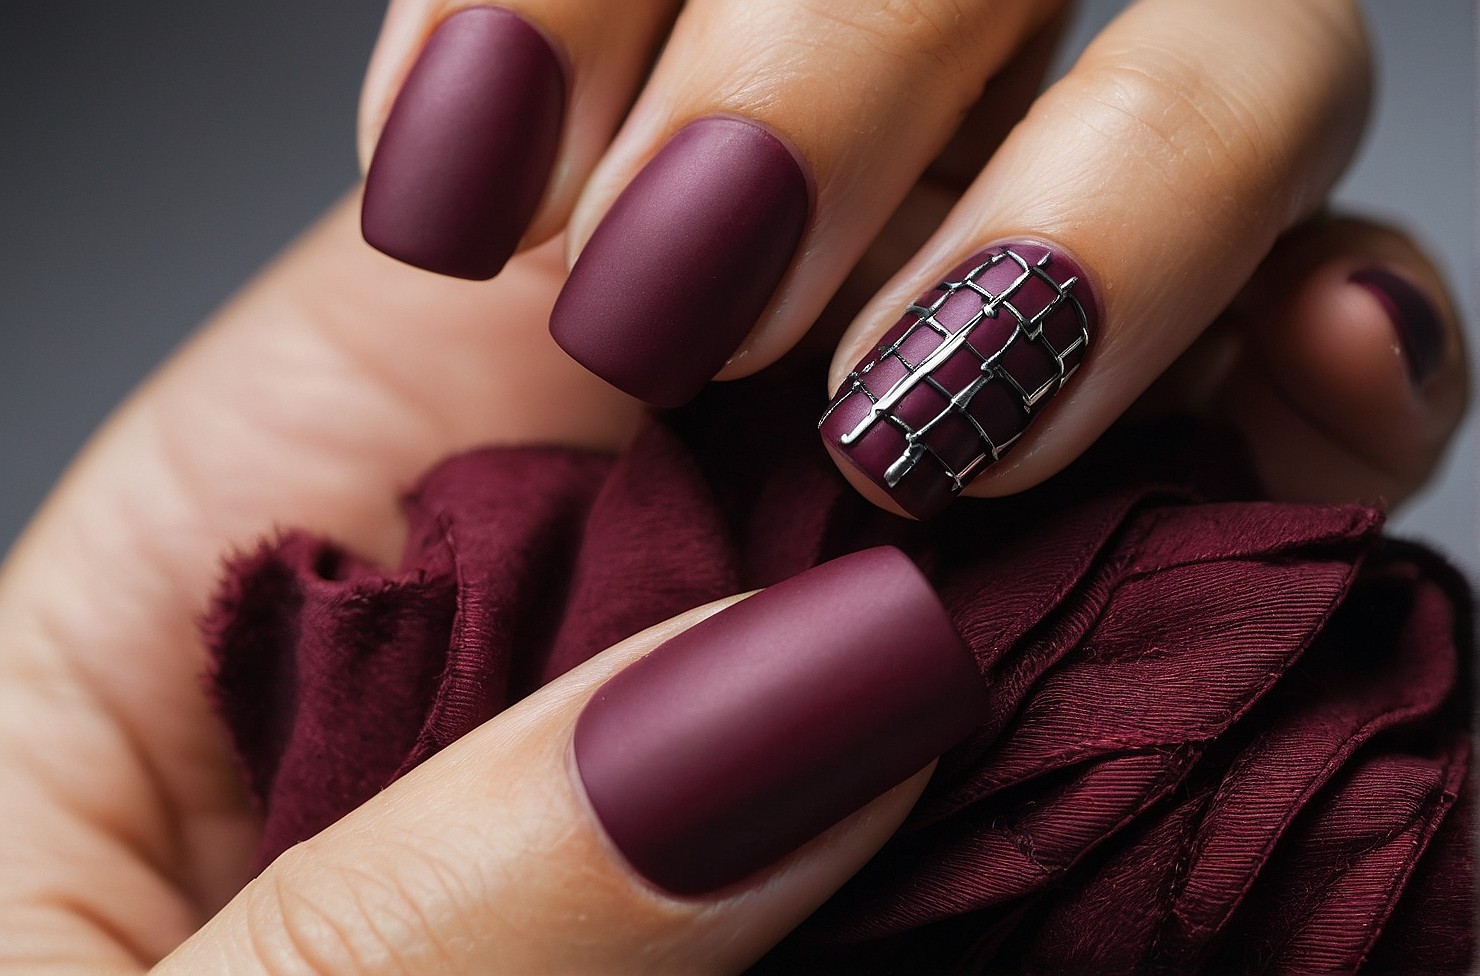
Let’s dive into the timeless trend of matte nails! Firstly, begin by ensuring your nails are clean, dry, and free from any oils or residue. Apply a clear base coat to protect your nails and create a smooth canvas for the matte polish. Once the base coat has dried, it’s time to choose your favorite matte nail polish color. Think back to the 90s with classic shades like deep burgundy, taupe, or muted mauve; perfect choices for capturing that nostalgic vibe. Apply two thin coats of the matte polish, allowing each layer to dry completely before applying the next. Remember, patience is key to achieving that velvety matte finish!
Airbrushed 90s Nail Designs
Let’s take a trip back to the 90s with the iconic trend of airbrushed nail designs! Firstly, choose your favorite nail polish shades, embracing the bold and vibrant hues that were all the rage in the 90s. With your chosen colors in hand, it’s time to wield the airbrush tool and bring your vision to life. Whether you choose for gradients, intricate patterns, or abstract designs, let your creativity soar! Take your time as you apply the colors in layers, building up the design gradually for a flawless finish. Once your airbrushed masterpiece is complete, allow it to dry completely before applying a clear top coat to seal in the design and add a glossy shine.
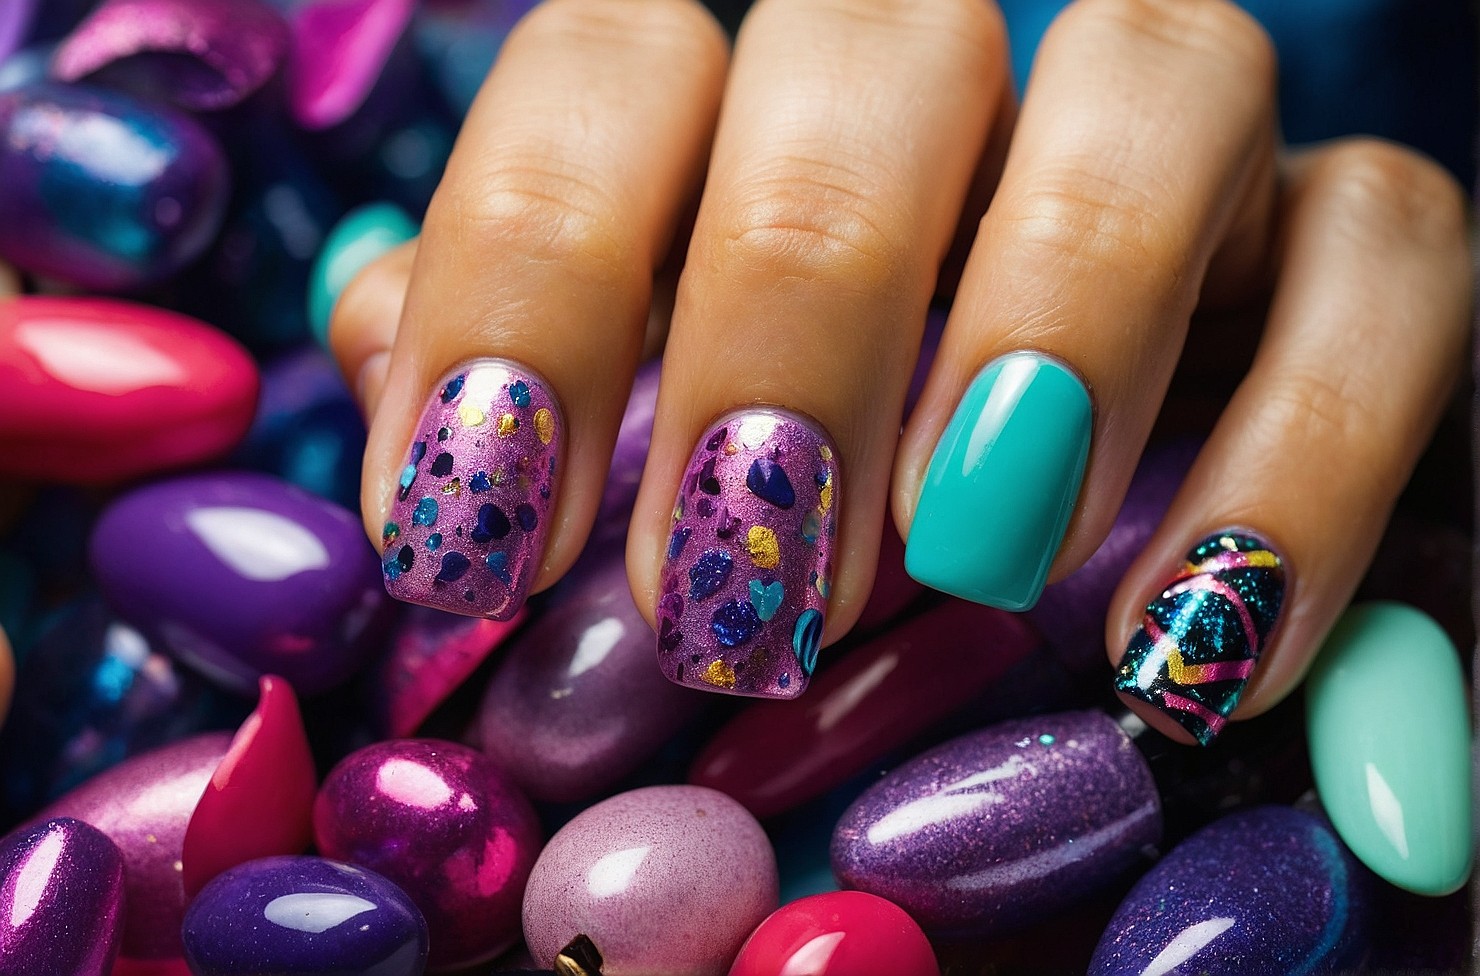
Mismatched 90s Nail Designs
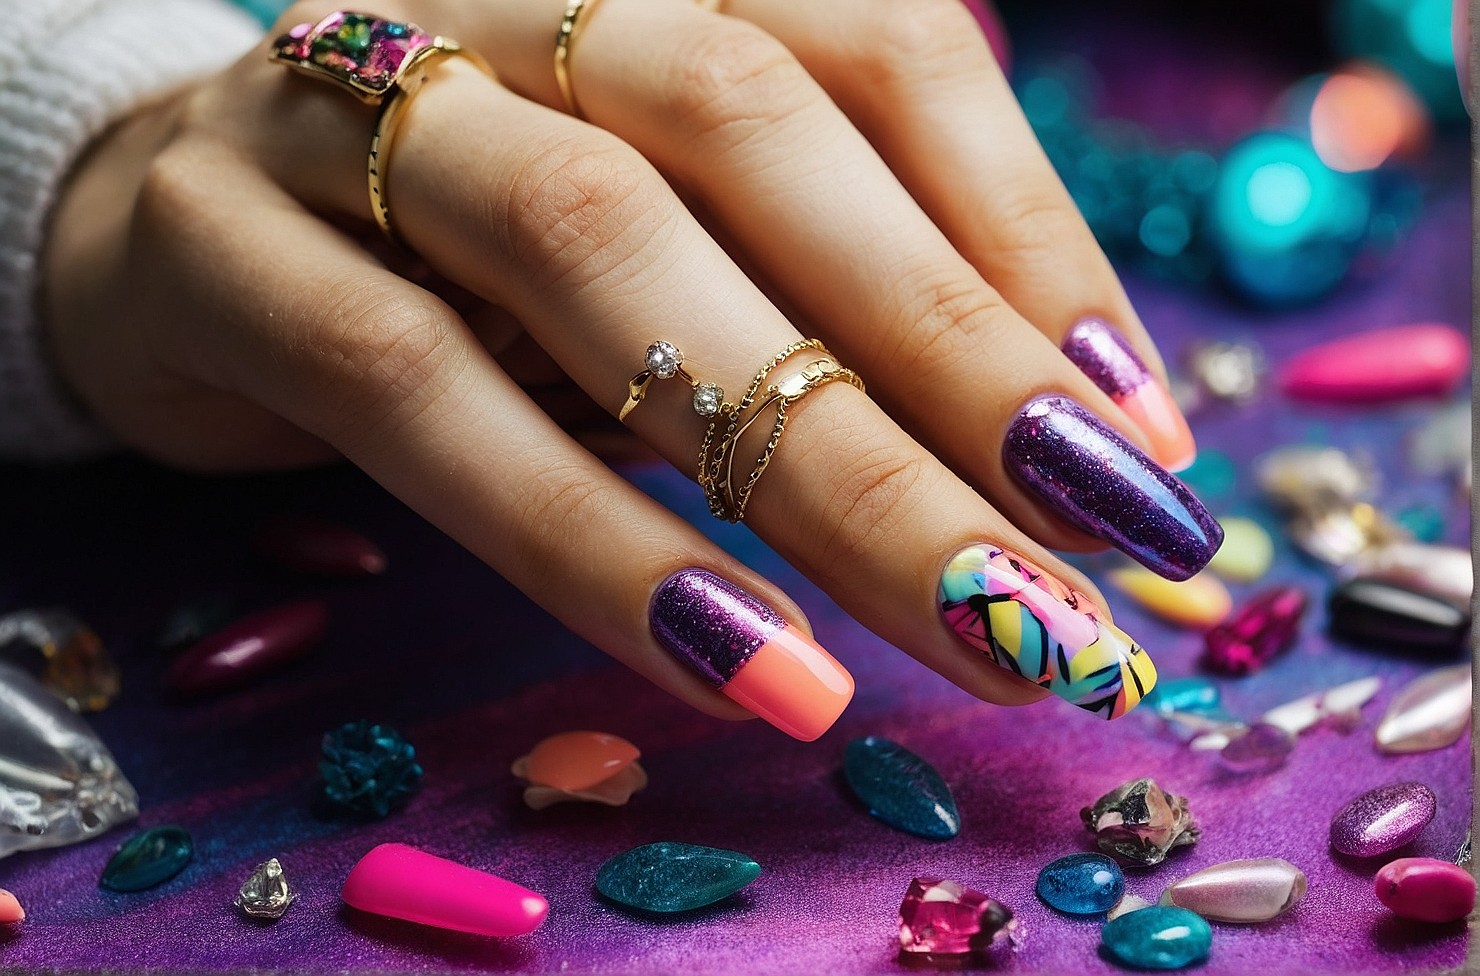
Get ready to rock the mismatched nails trend from the 90s! Firstly, choose a variety of your favorite nail polish colors, patterns, and finishes. Start with clean, dry nails and apply a clear base coat. Paint each nail a different color or design, mixing and matching to create a playful look. Try stripes, dots, animal prints, or geometric shapes. Let each coat dry completely before moving to the next nail. Finish with a clear top coat for shine. Admire your fun and whimsical mismatched manicure, a nod to 90s nail art!
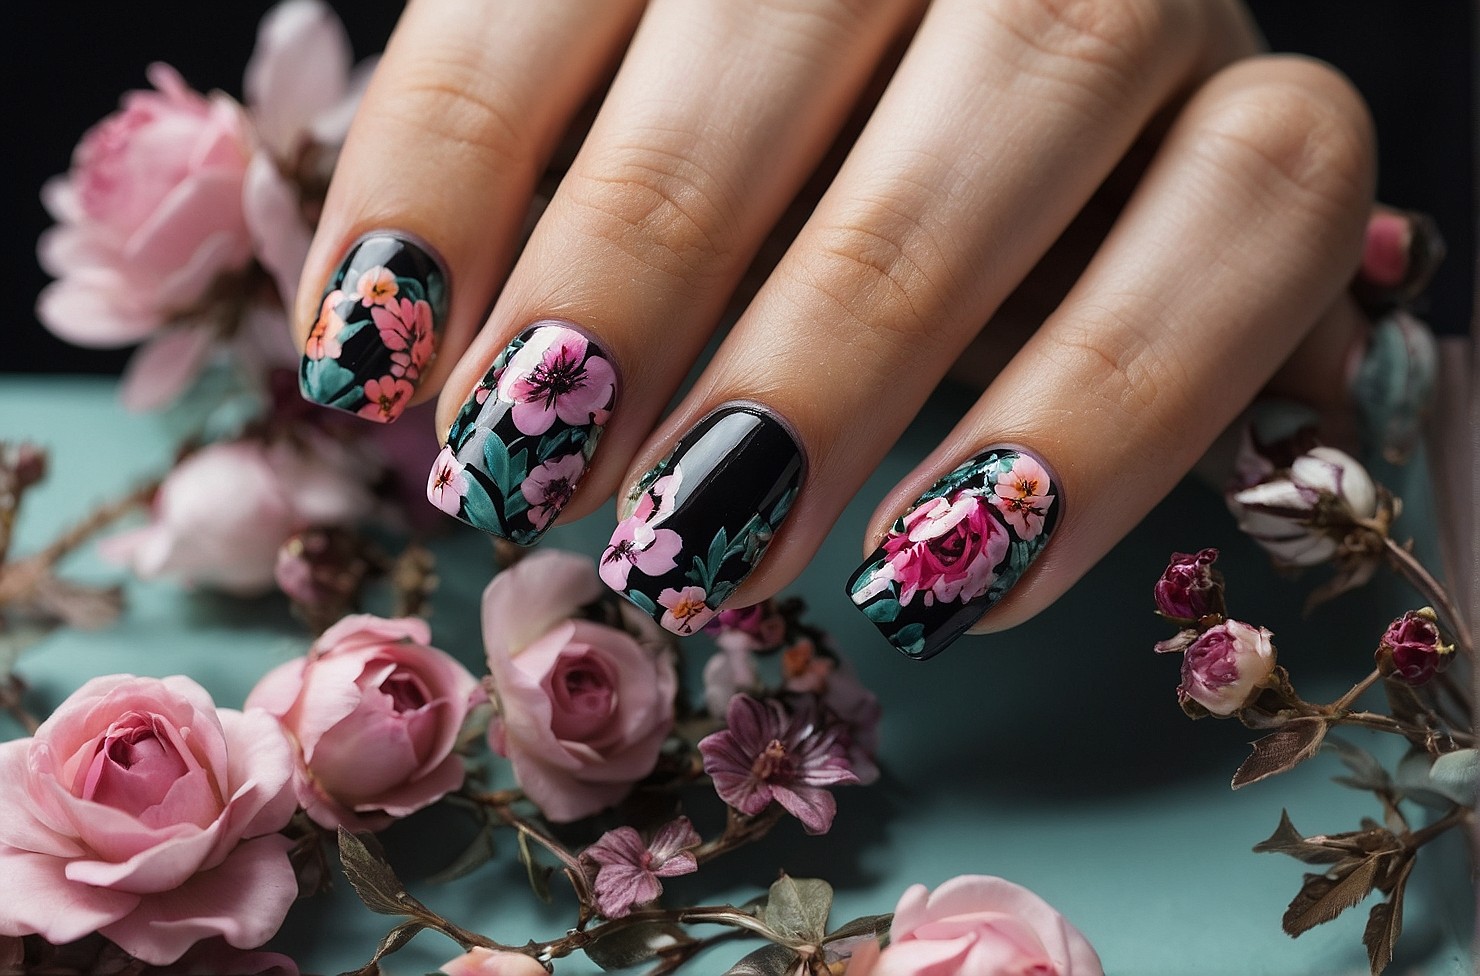
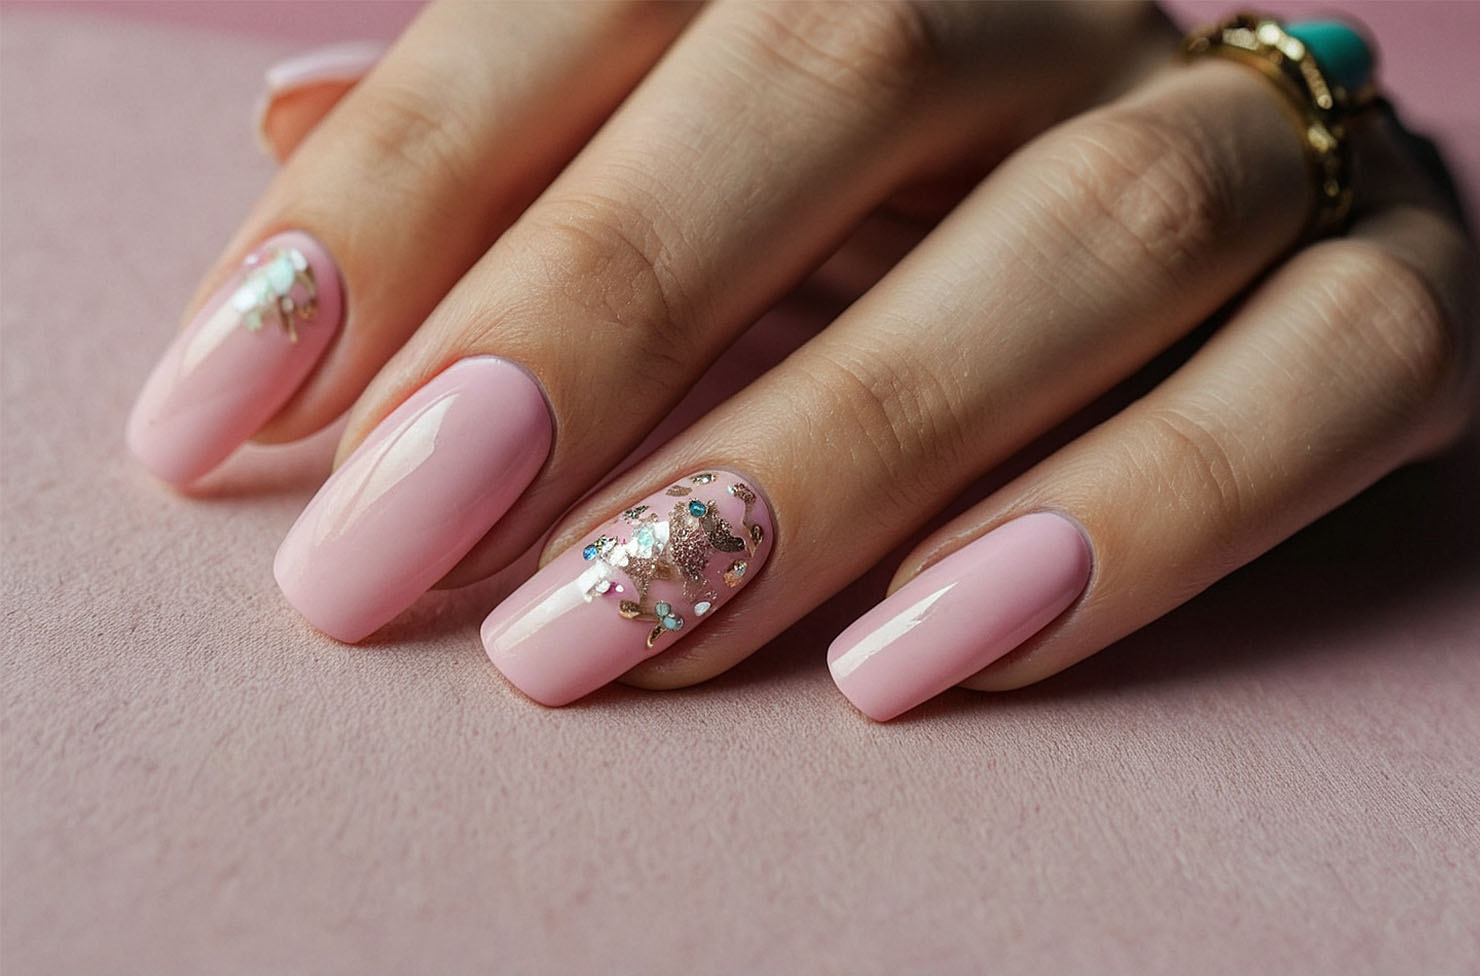
Fruit and Floral Accents 90s Nail Designs
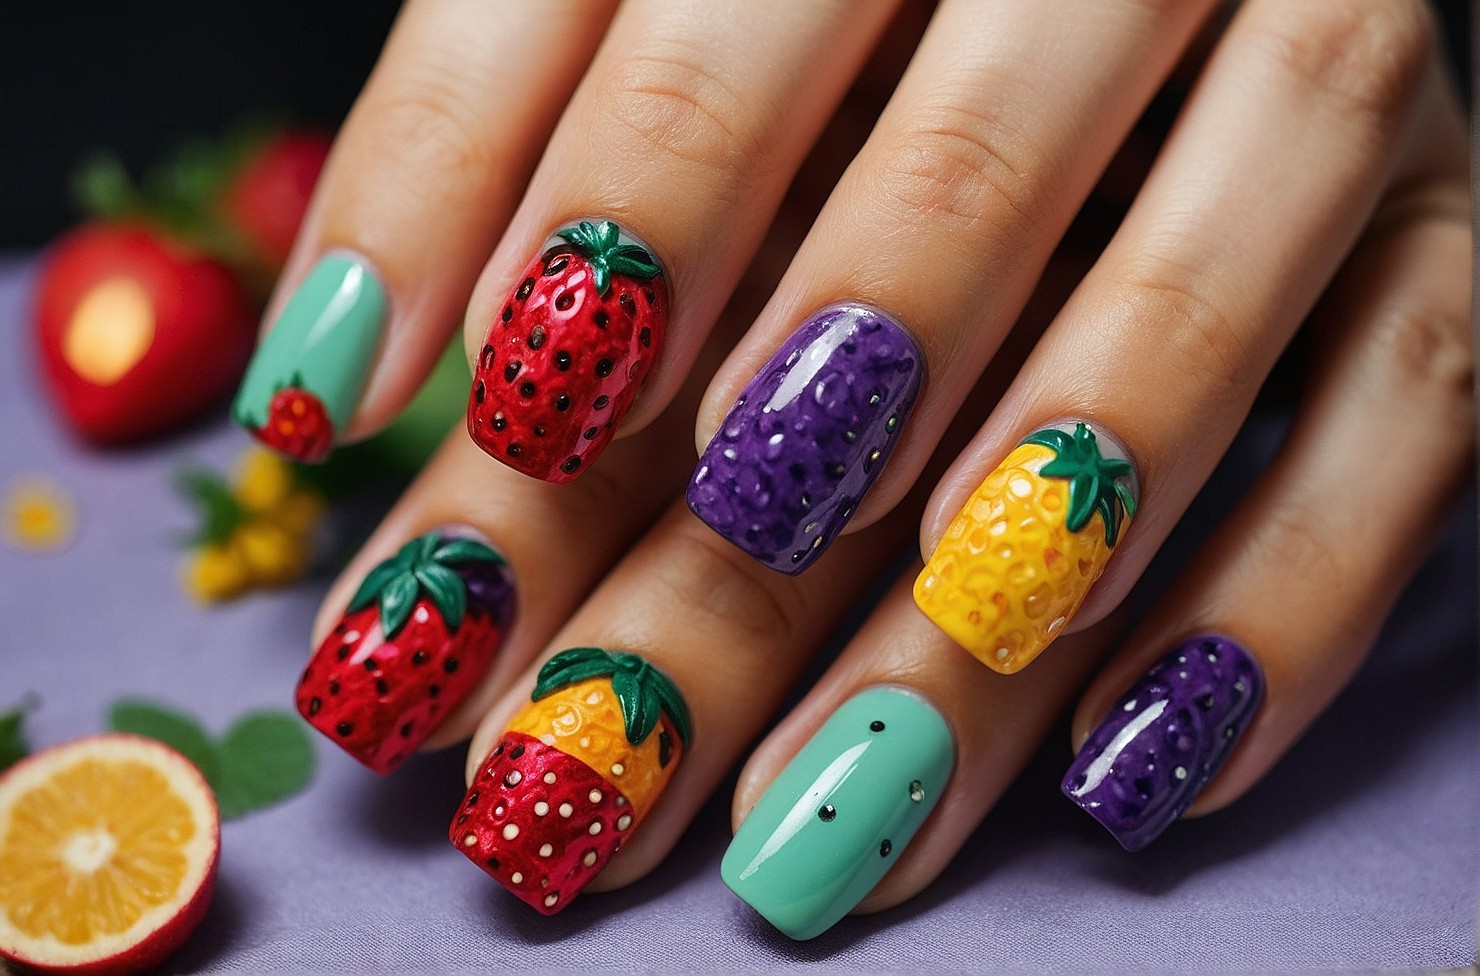
Add a touch of whimsy to your nails with fruit and floral accents, a delightful 90s trend that’s making a comeback! Firstly, start with clean, dry nails and apply a clear base coat. Choose vibrant nail polish colors reminiscent of ripe fruits and blooming flowers. Then, paint your nails with a contrasting base coat color like pink, yellow, or blue. Use thin nail art brushes or dotting tools to create intricate fruit and floral designs on select nails or fruit and floral stickers. Let your creativity flow as you paint strawberries, cherries, roses, or daisies. Once dry, finish with a clear top coat for shine. Enjoy your sweet and summery nails, a playful tribute to 90s nail art!
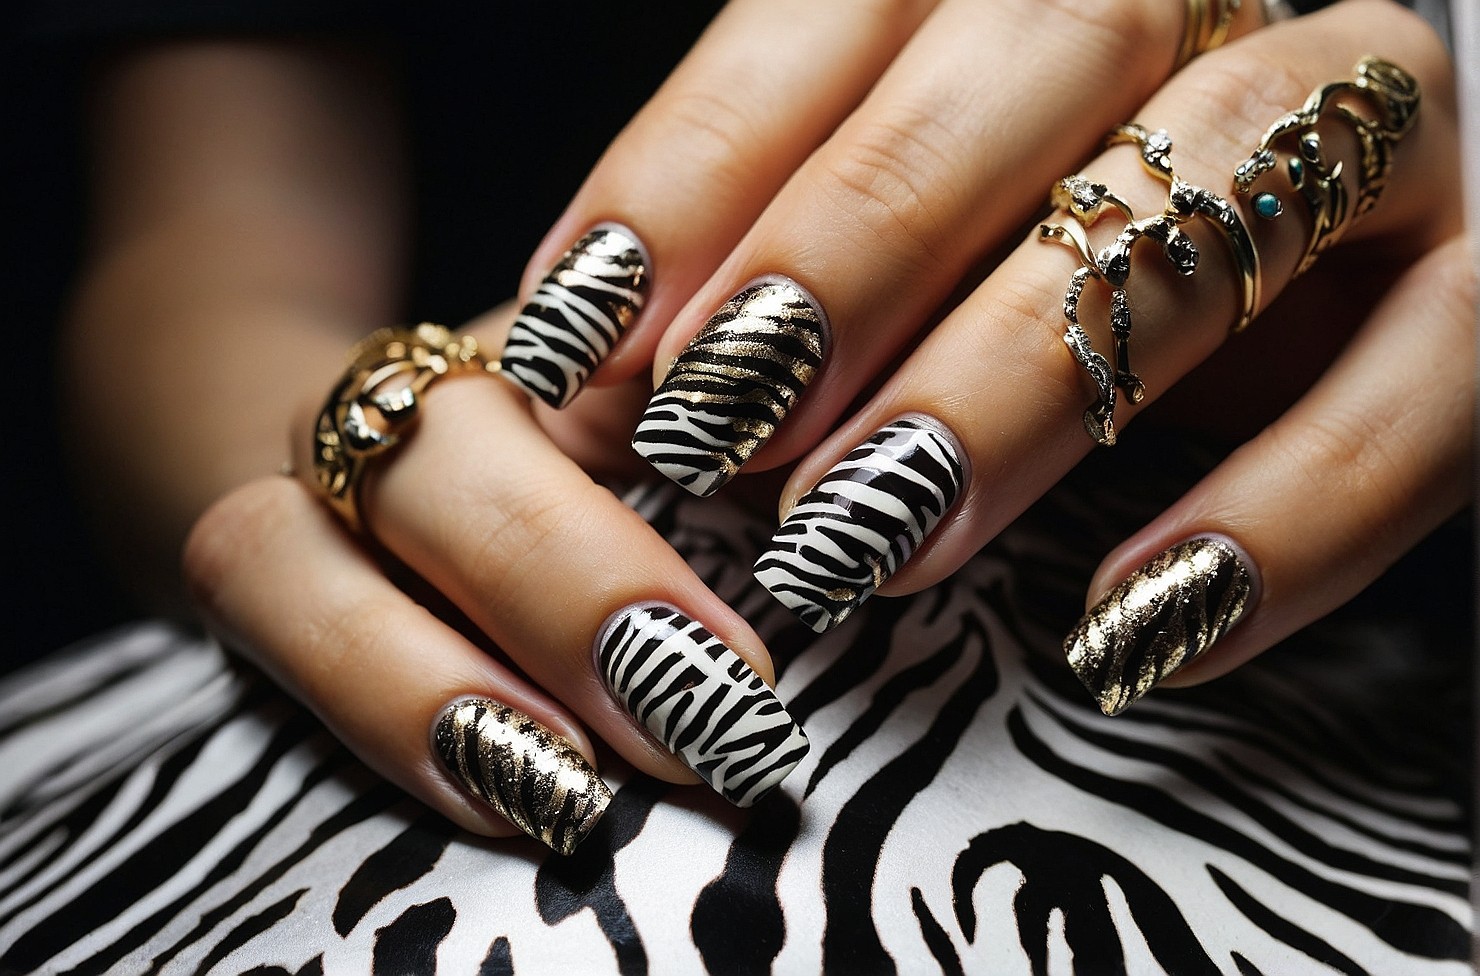
Animal Print 90s Nail Designs

Get fierce with animal print nails, a trend from the 90s that’s back in style! Firstly, prep your nails by cleaning, trimming, and shaping them. Apply a clear base coat for protection. Choose your favorite animal print pattern, like leopard spots or zebra stripes. Use a thin brush or dotting tool to create the design. Aim for an organic and irregular pattern. Try different colors—classic black and brown or bold neon hues. Finally, let the designs dry, then finish with a clear top coat for shine. Show off your fierce animal print nails, a timeless trend from the 90s!
Collage Nail Designs
Get creative with design collage nails, a fun trend from the 90s! Firstly, prep your nails by cleaning and trimming them. Apply a clear base coat for protection. Gather nail art supplies like polish, decals, stickers, and rhinestones. Mix and match designs and elements on each nail to create a unique collage. Have fun with florals, shapes, abstract designs, or tiny stickers. Let your creativity shine! Once dry, finish with a clear top coat for shine. Admire your one-of-a-kind design collage nails, a playful homage to the eclectic spirit of 90s nail art!
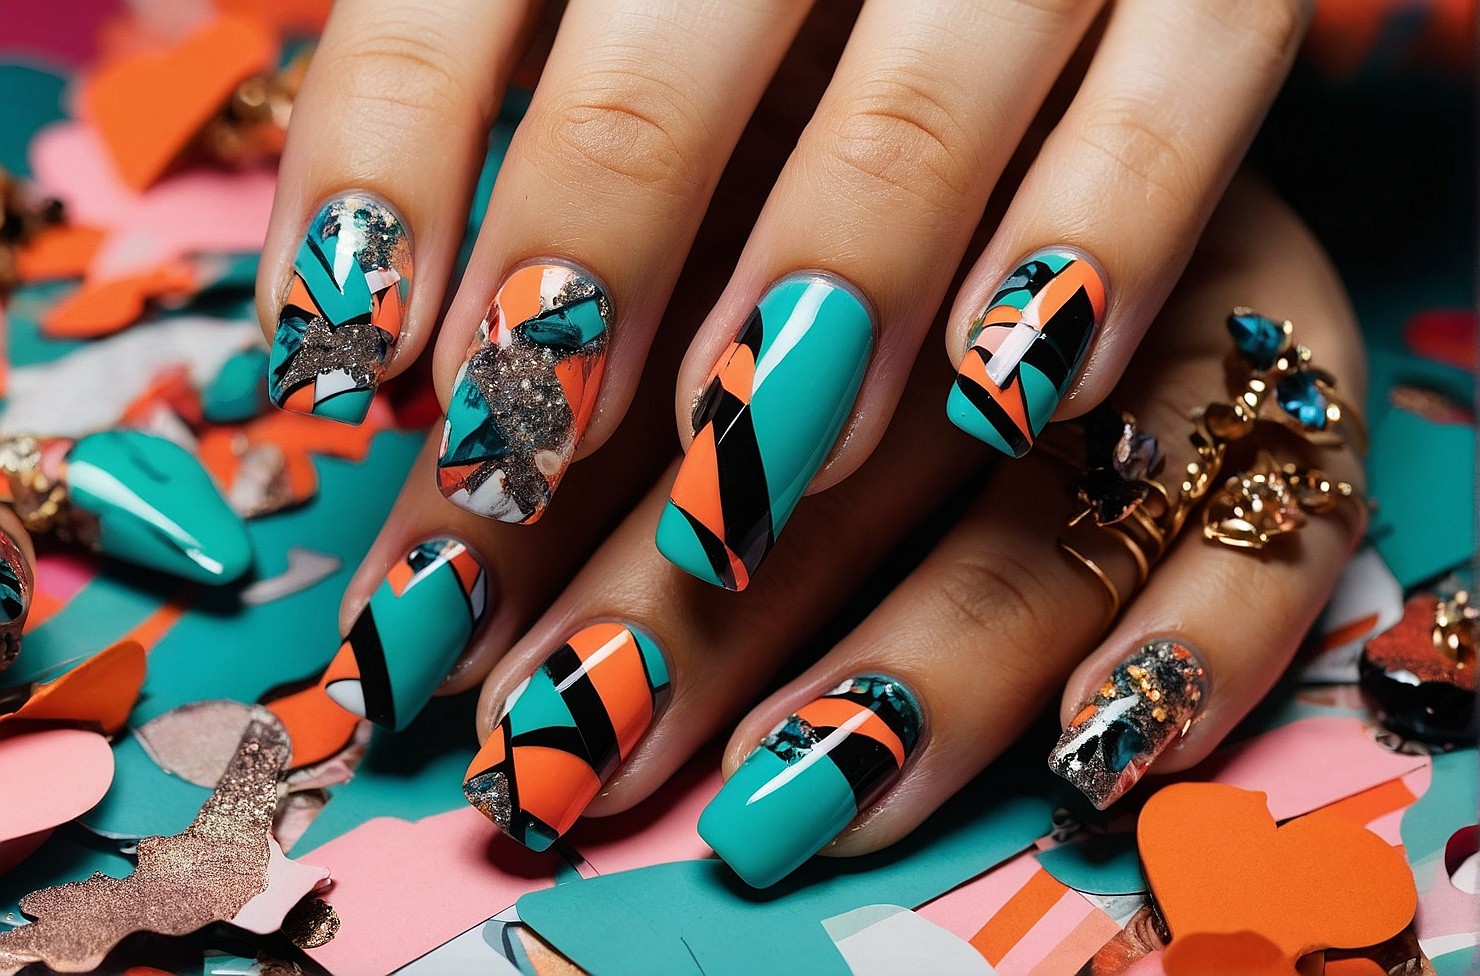
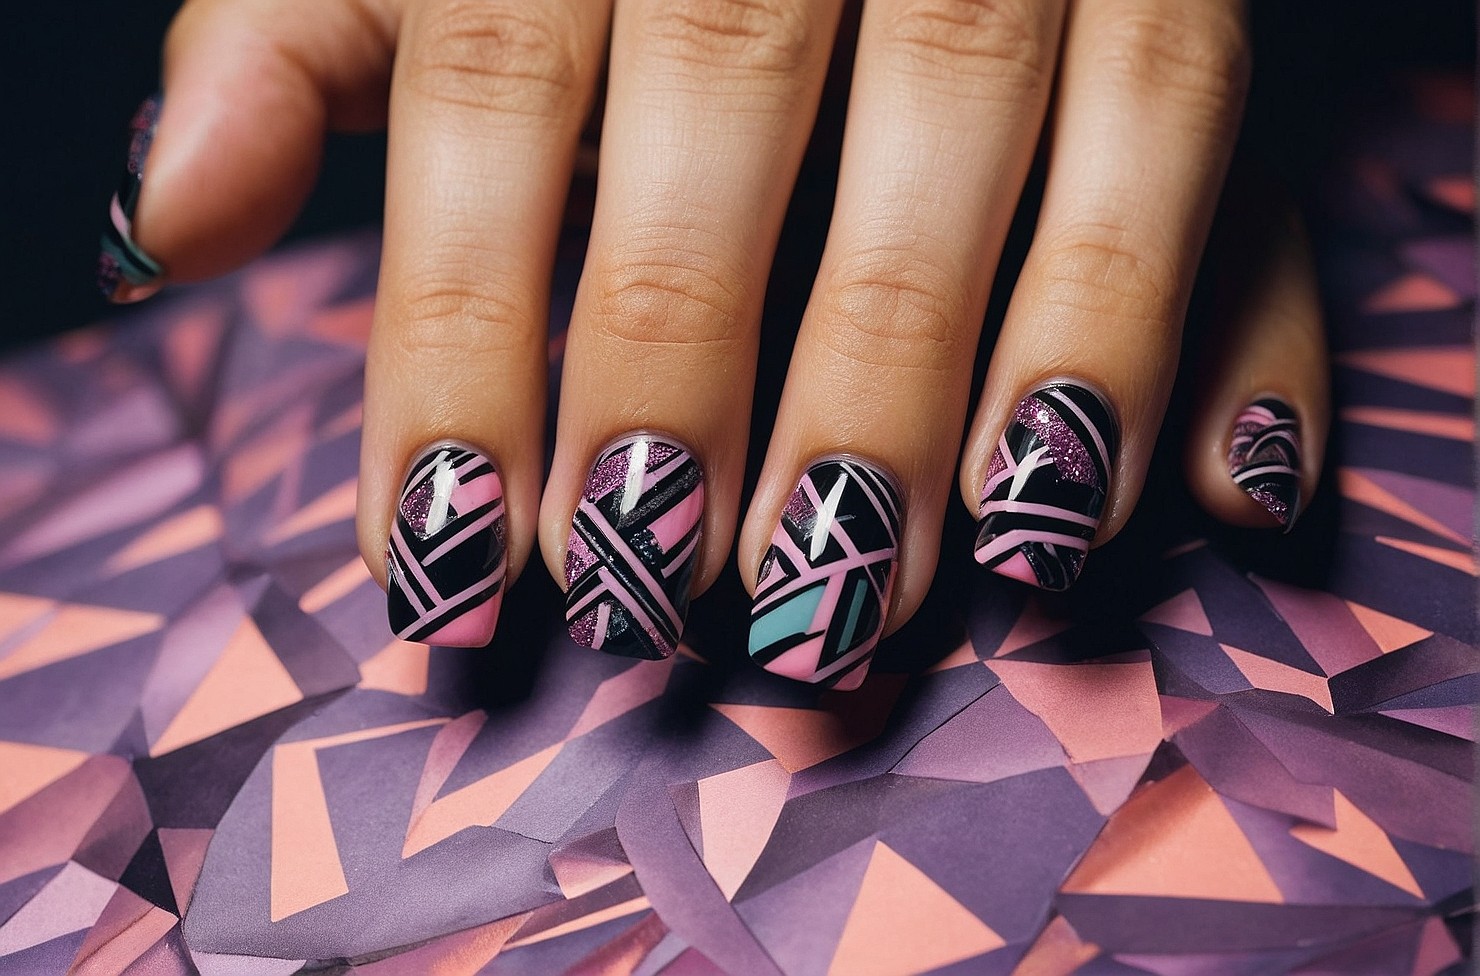
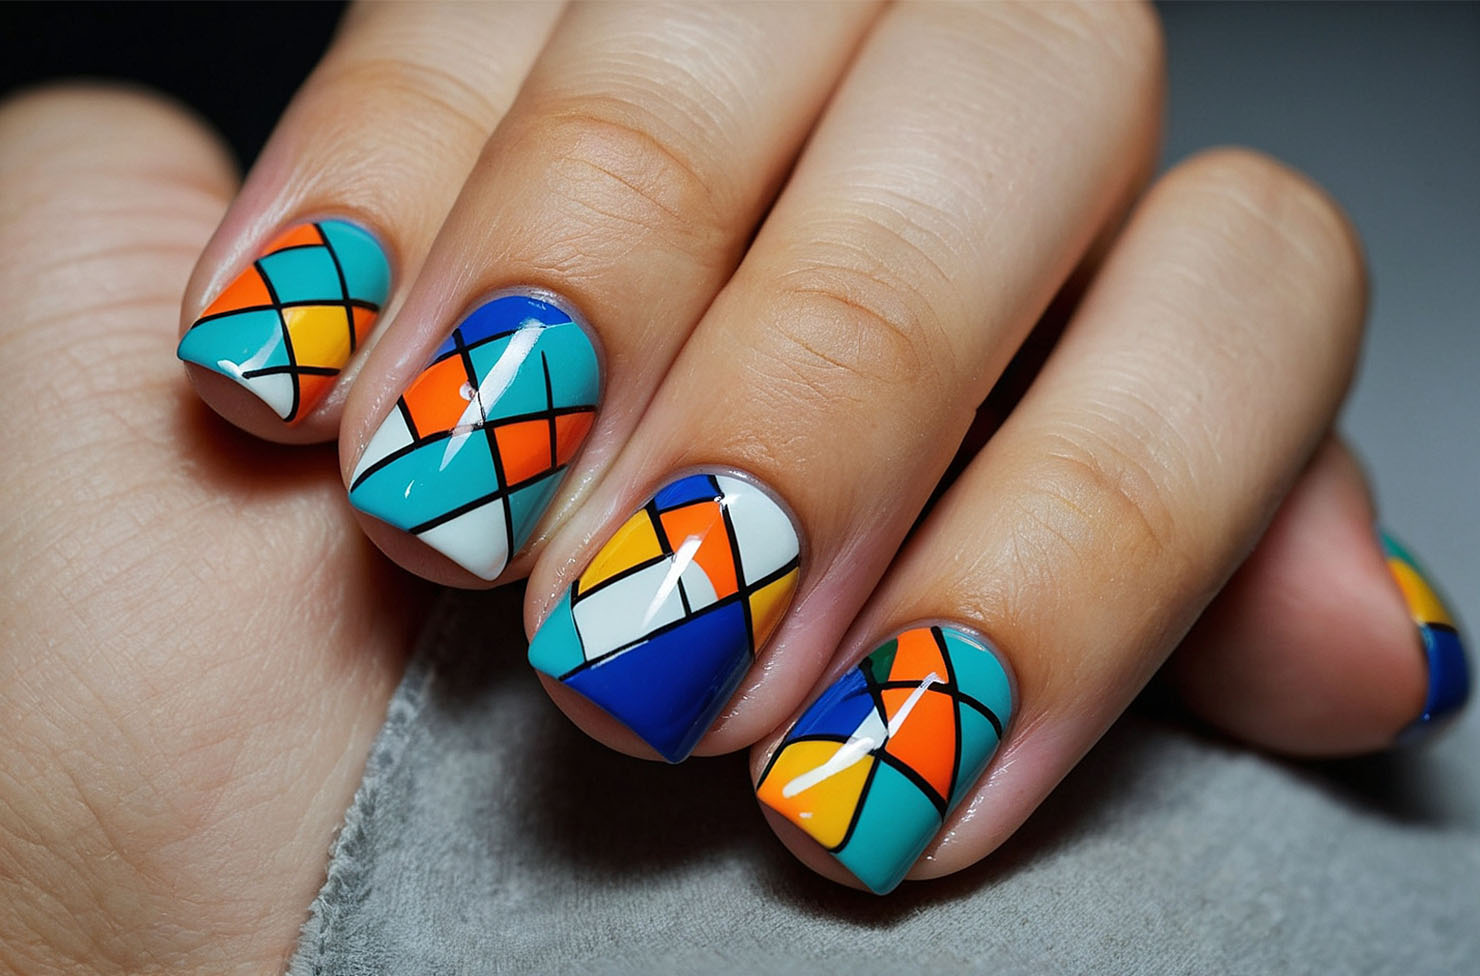
Geometric Patterns Nail Designs
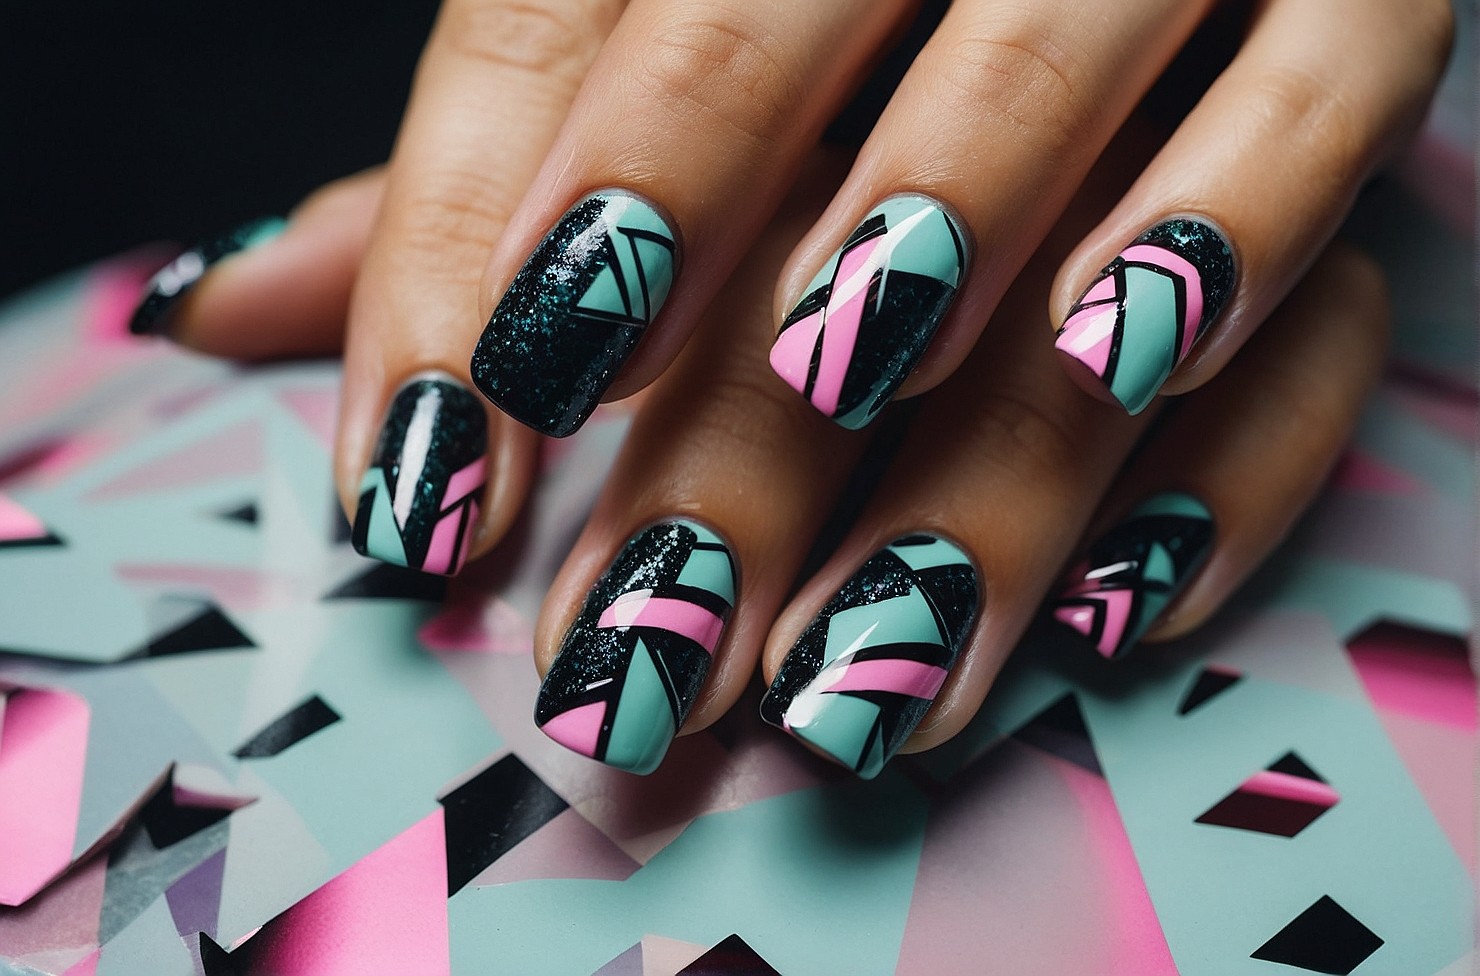
Rock retro vibes with geometric patterns nails, a chic trend from the 90s! Firstly, prep your nails by cleaning, drying, and trimming them. Then apply a clear base coat for protection. Choose your favorite nail polish colors; think bold neons, pastels, or jewel tones. Use thin brushes or tape to create geometric shapes like triangles or squares. Get creative with colors and patterns. Finally, let them dry, then finish with a clear top coat for shine. Now you can admire your sleek and stylish geometric patterns nails!
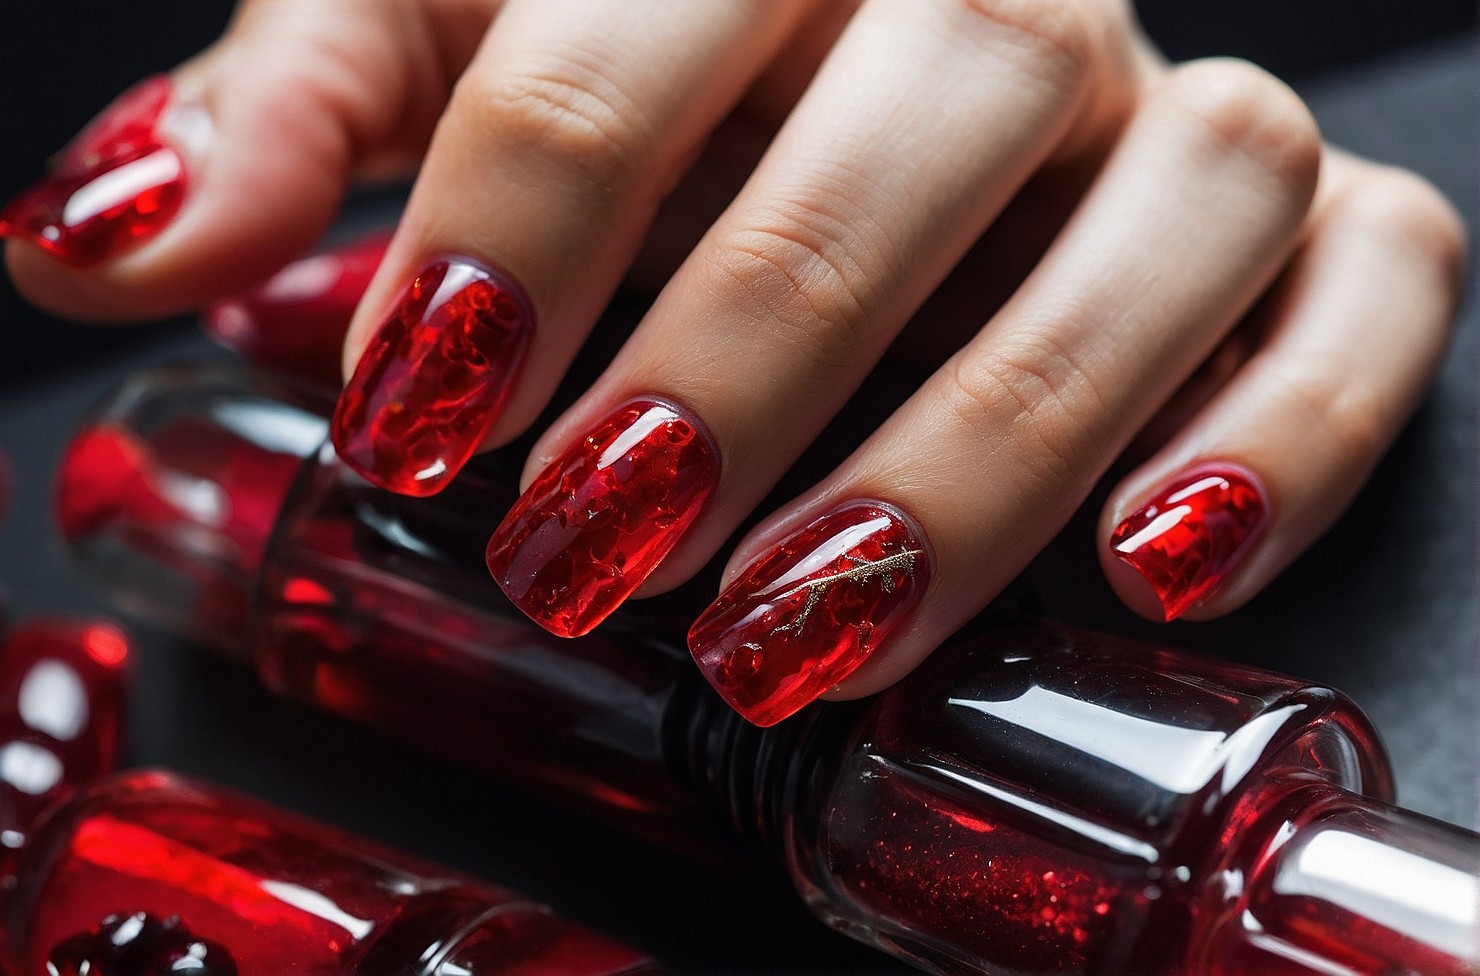
Jelly Nail Designs
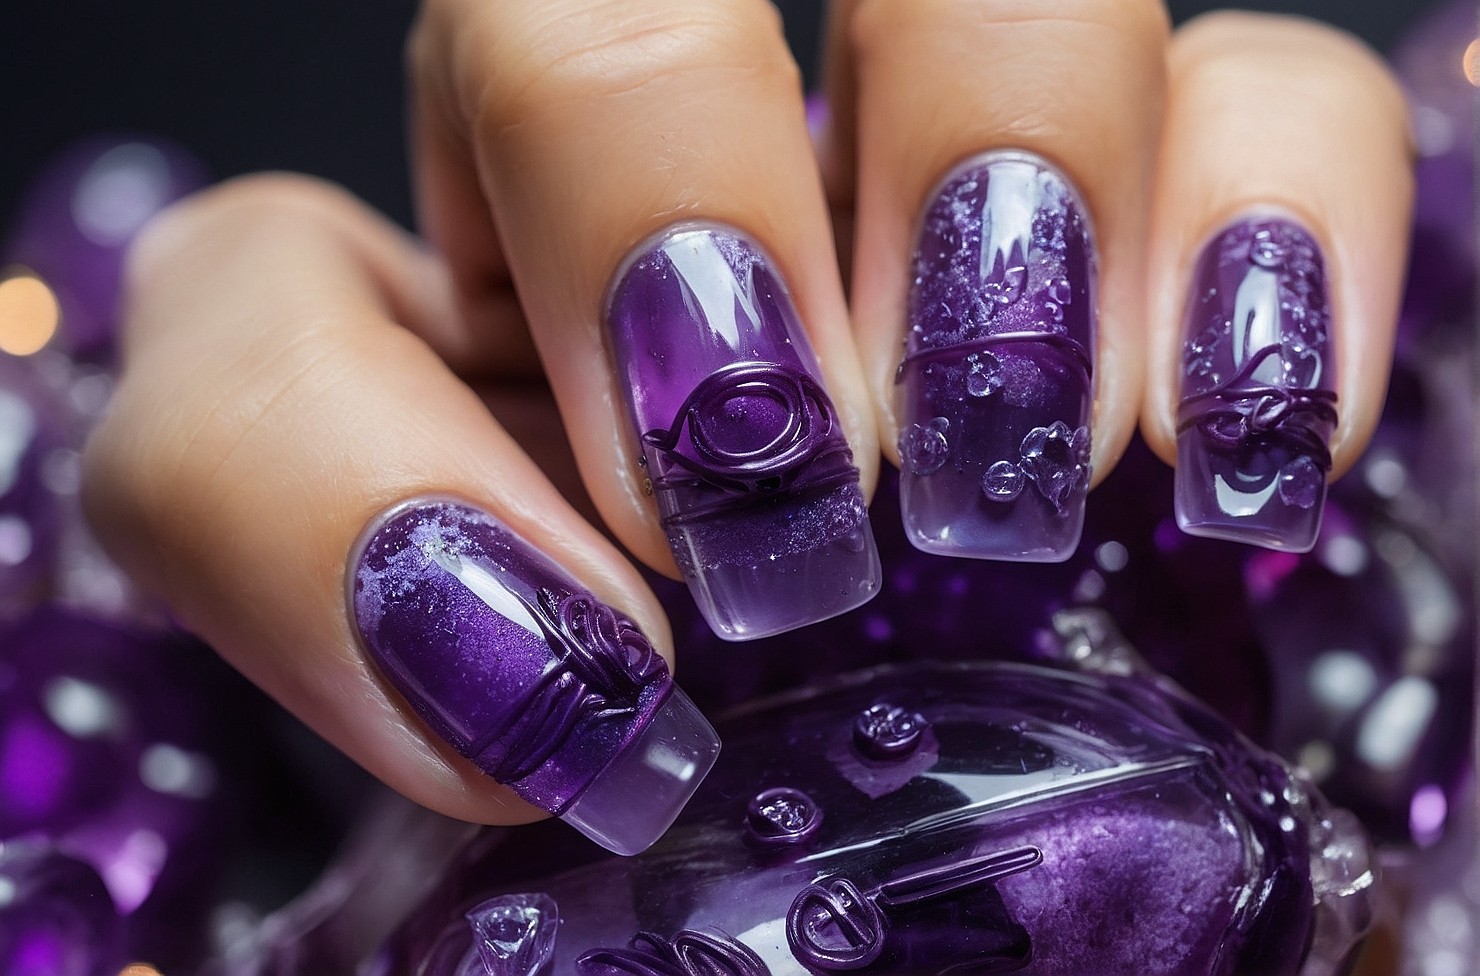
Transport yourself back to the 90s with the fun and playful trend of jelly nails! Firstly, prep your nails by cleaning, drying, and trimming them. Then apply a clear base coat for protection. Choose your favorite jelly nail polish colors; translucent shades like candy pinks, blues, or purples. Apply two thin coats, letting each dry completely. Don’t worry if it looks streaky at first—it’ll get more opaque with each layer. Once you’ve achieved your desired level of opacity, finish with a clear top coat for shine.
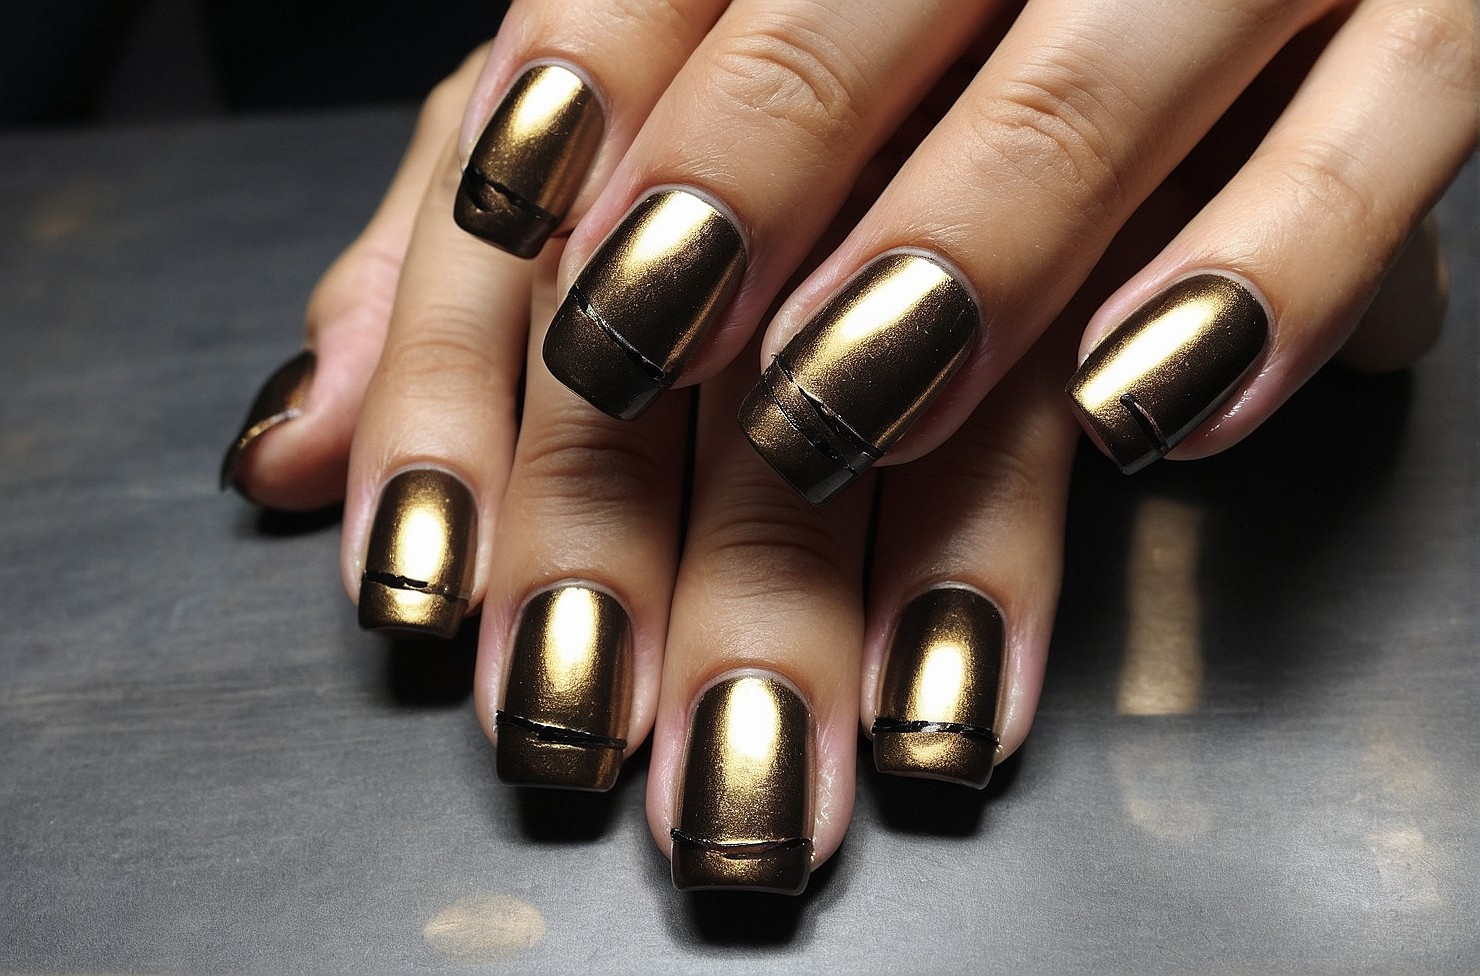
Chrome Nail Designs
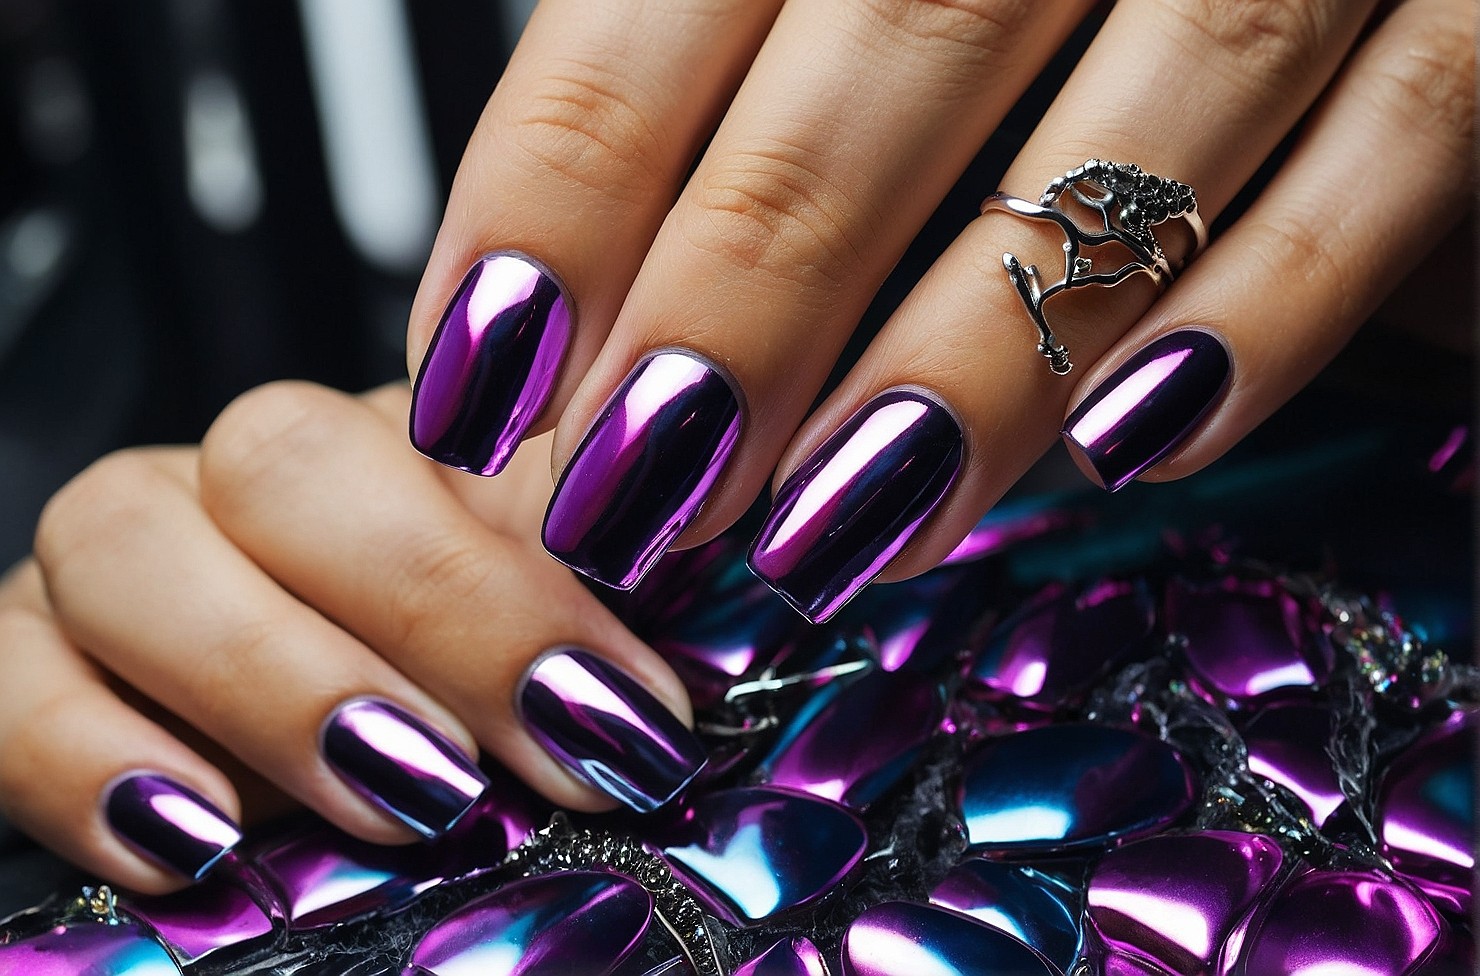
Try out the metallic trend of the 90s with chrome nails! Prep your nails by cleaning, drying, and trimming them. Then apply a clear base coat for protection. Choose your favorite chrome powder, classic silver, dazzling gold, or bold holographic shades are all excellent choices. Use a sponge or brush to pat the powder onto your nails while the base coat is still tacky. Buff the powder in circular motions for a reflective finish. Clean up any excess powder around the edges. Finish with a clear top coat for shine. Admire your stunning chrome nails, a glamorous throwback to the metallic trend of the 90s!

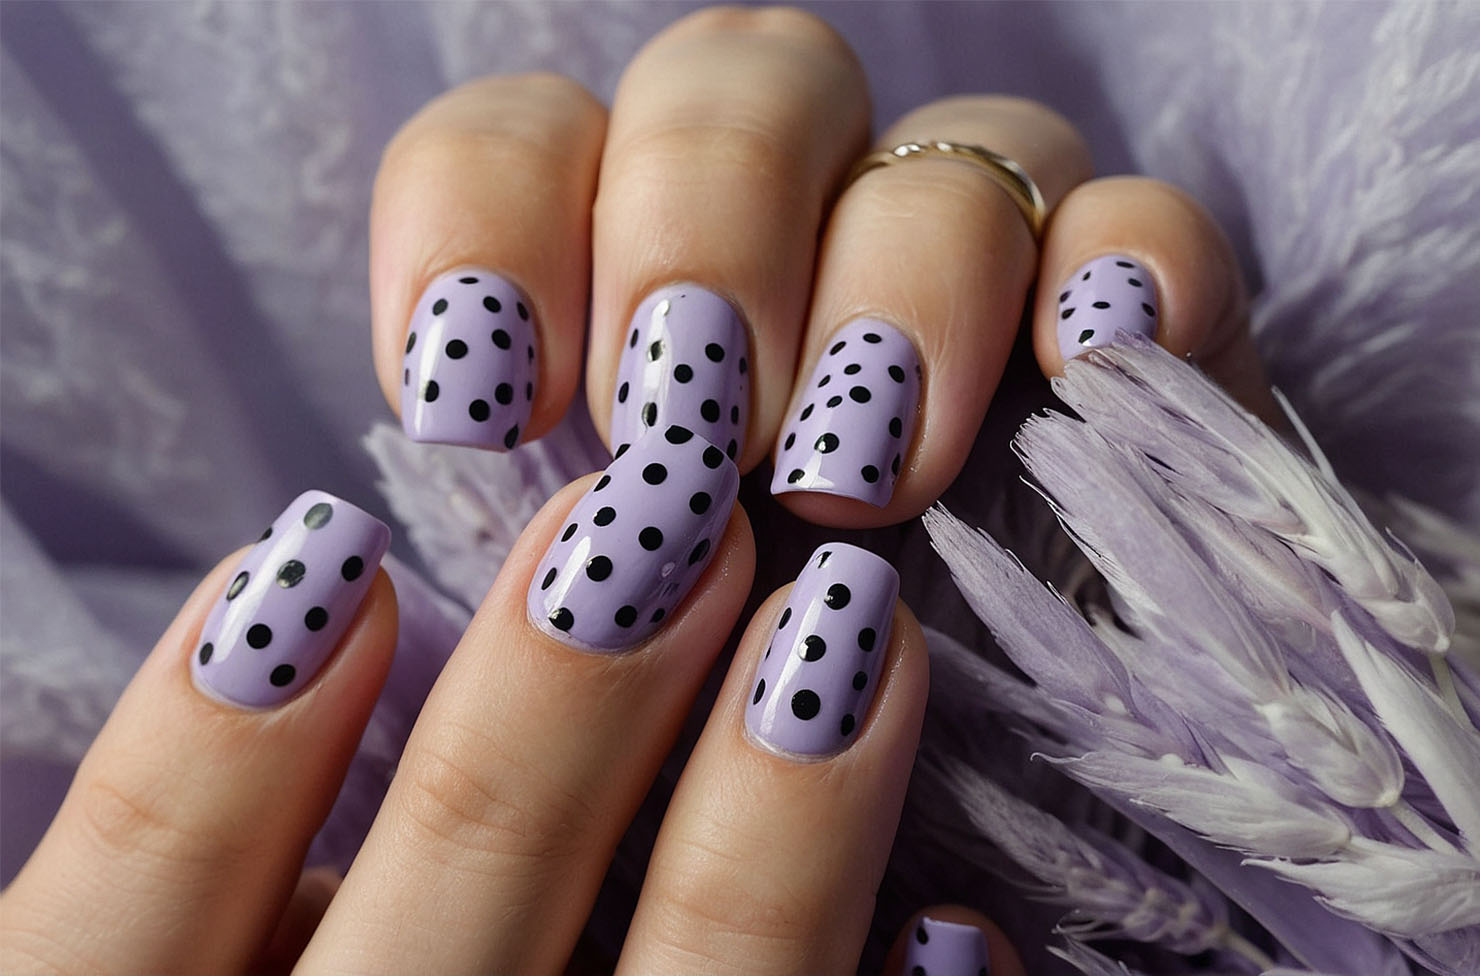
Confetti Print Nail Designs
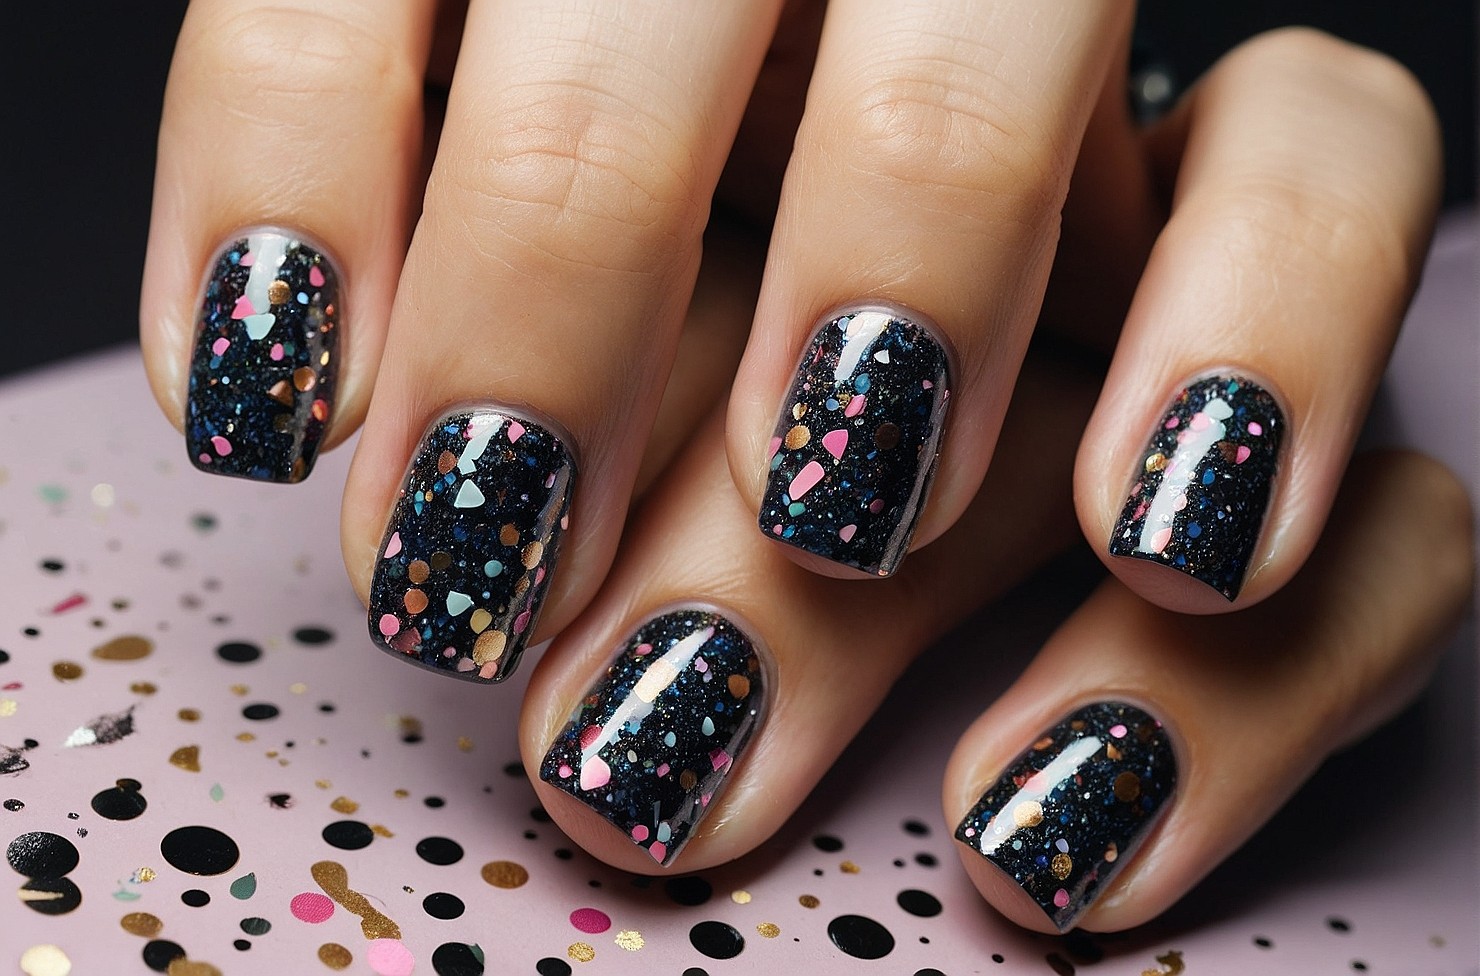
Get ready to party like it’s the 90s with confetti print nails! Prep your nails by cleaning, drying, and trimming them. Apply a clear base coat for protection. Choose bright nail polish colors for the confetti effect, bright and bold shades work best for this playful look. Use a thin brush or dotting tool to create small dots and shapes on each nail. Get creative with colors and placement. Once your confetti design is complete, allow it to dry completely before finishing with a clear top coat to seal in the artwork and add shine.

Retro Tortoiseshell Nail Designs
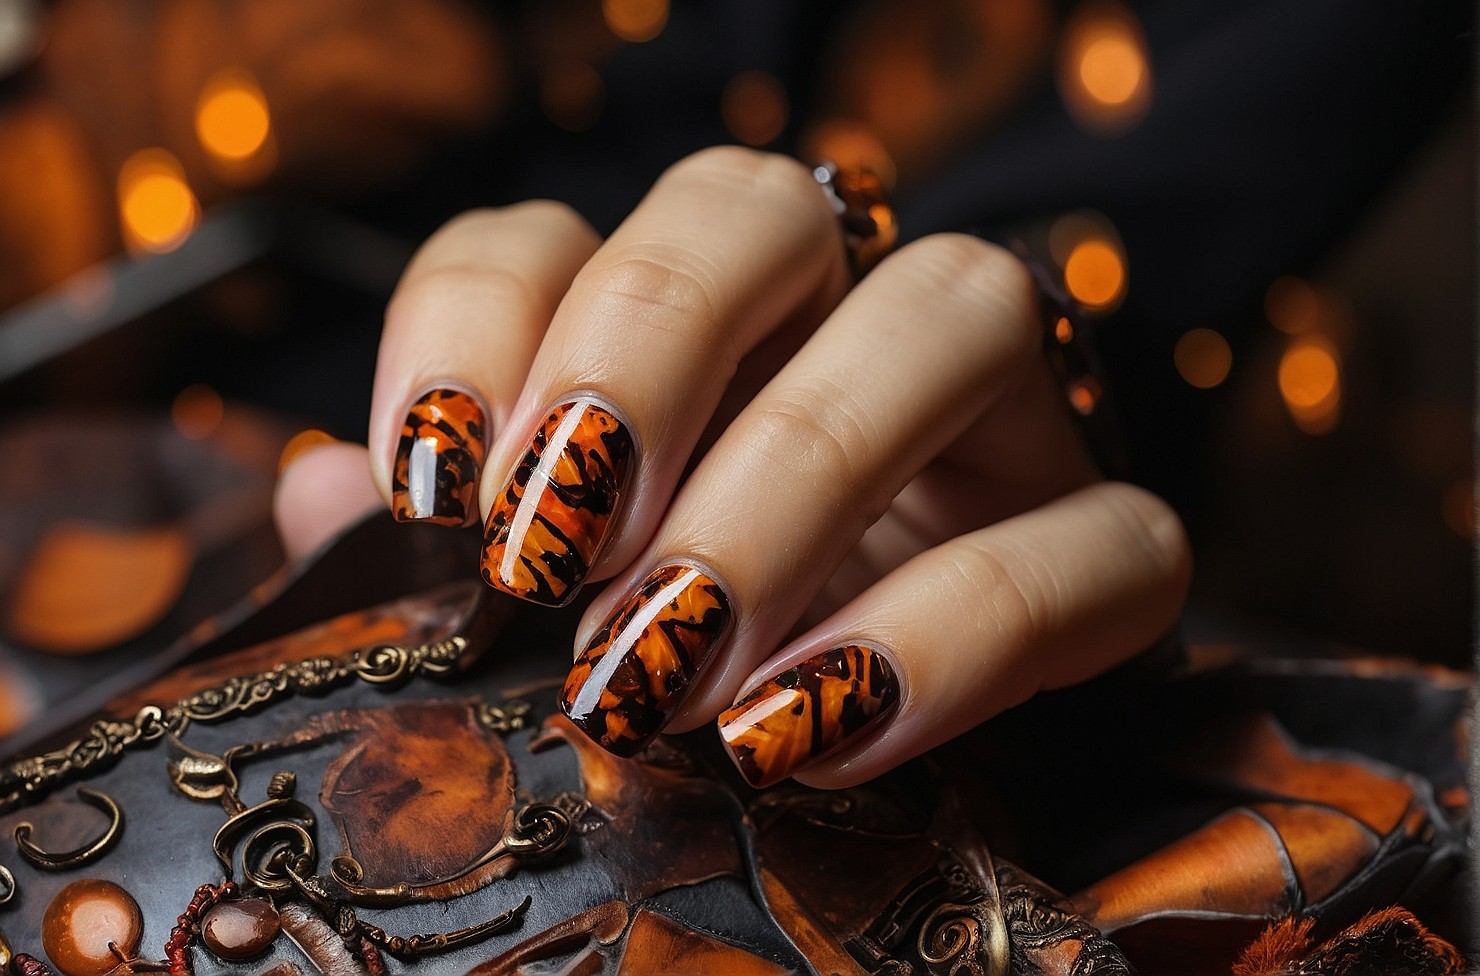
Step back in time with retro tortoiseshell nails, a chic and sophisticated trend straight from the 90s! Prep your nails by cleaning, drying, and trimming them. Apply a clear base coat for protection. select your favorite nail polish colors to mimic the classic tortoiseshell pattern, think warm browns, rich oranges, and deep yellows. Using a thin nail art brush or dotting tool, carefully create irregular splotches and patches of color on each nail to mimic the natural variation of tortoiseshell.Let your creativity flow as you layer different colors and blend them together to achieve a realistic tortoiseshell effect. Let it dry, then finish with a clear top coat for shine.

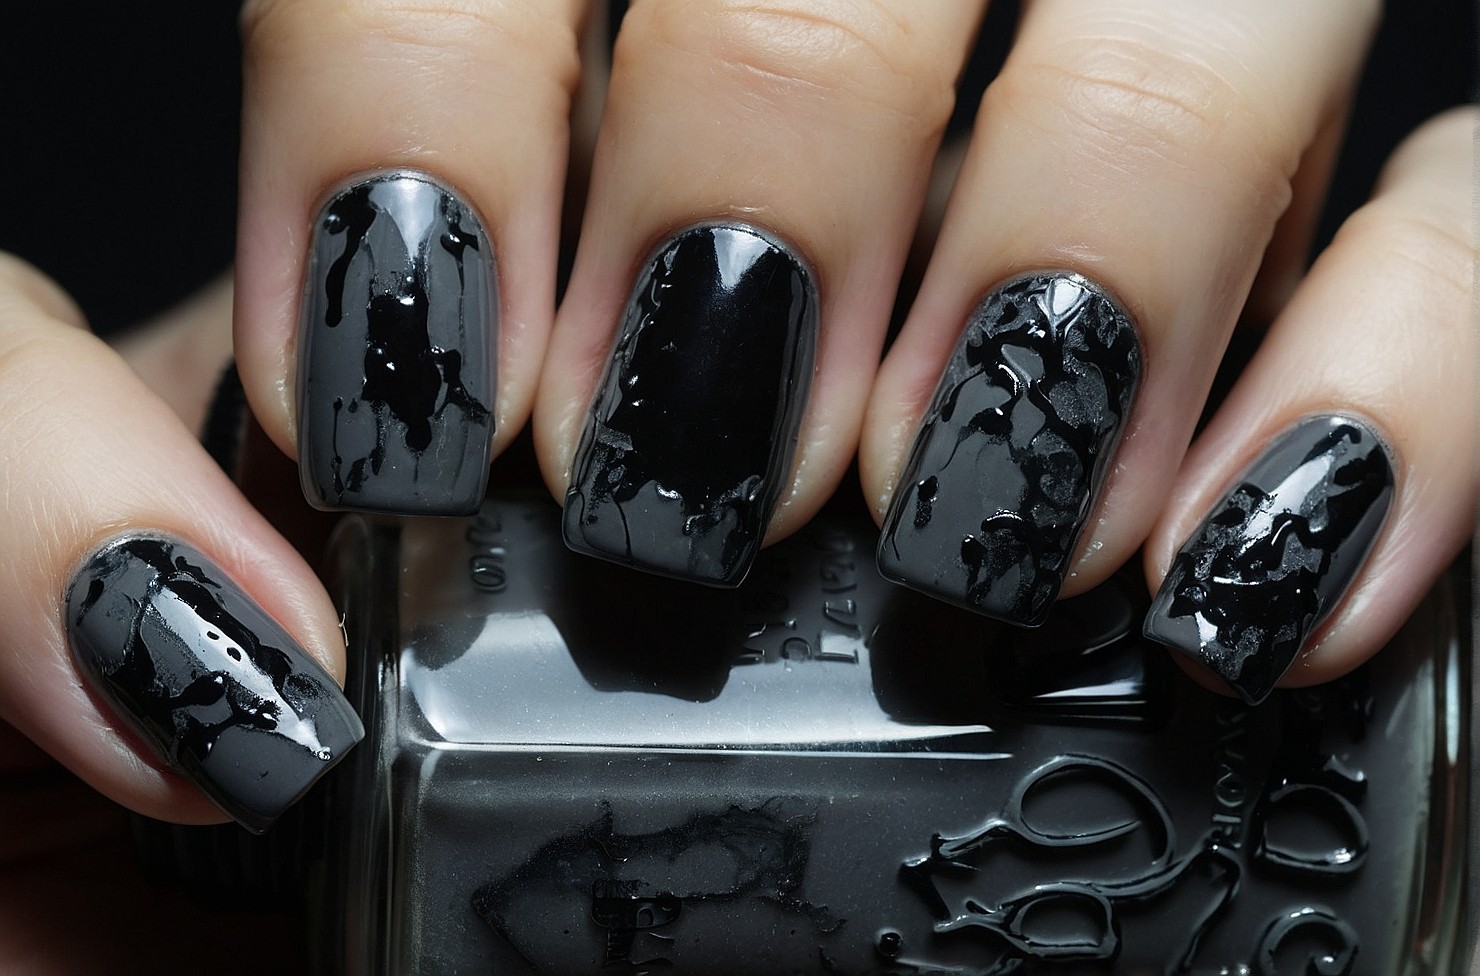
Grunge Nail Designs
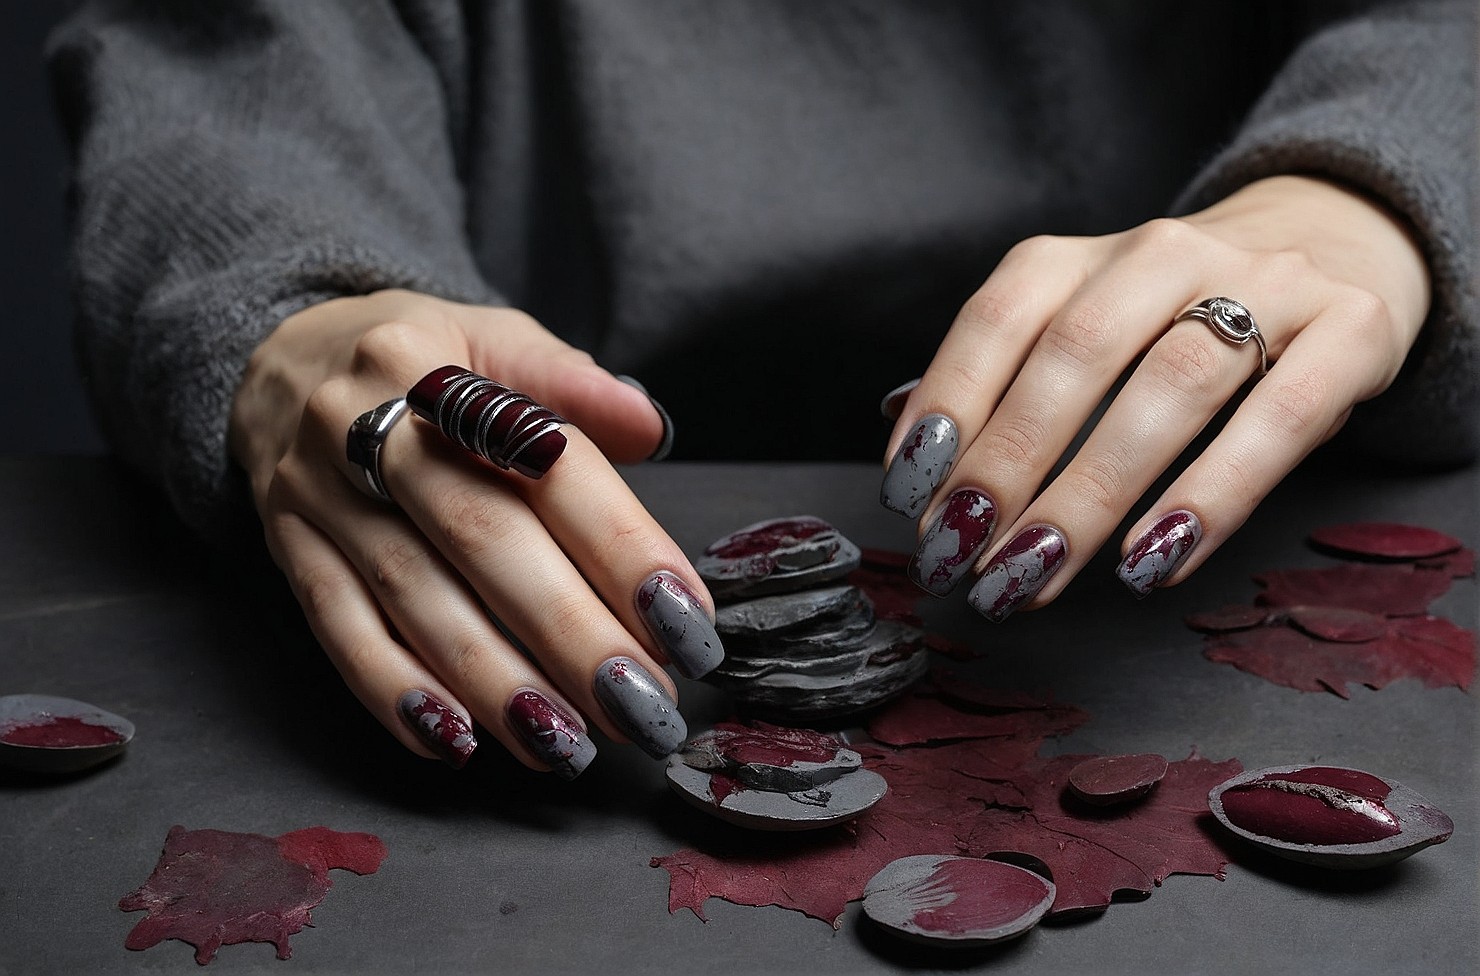
Embrace the edgy and rebellious spirit of the 90s with grunge nail designs! Prep your nails by cleaning, drying, and trimming them. Apply a clear base coat for protection. Choose your favorite nail polish colors to capture the dark and moody aesthetic of grunge, think deep blacks, dark greys, and rich burgundies. Using a thin nail art brush or dotting tool, create abstract shapes, smudges, and distressed effects on each nail to evoke the grunge vibe. Embrace imperfections for a raw look. Let it dry, then finish with a clear matte top coat. Now you have effortlessly cool and rebellious grunge nails!
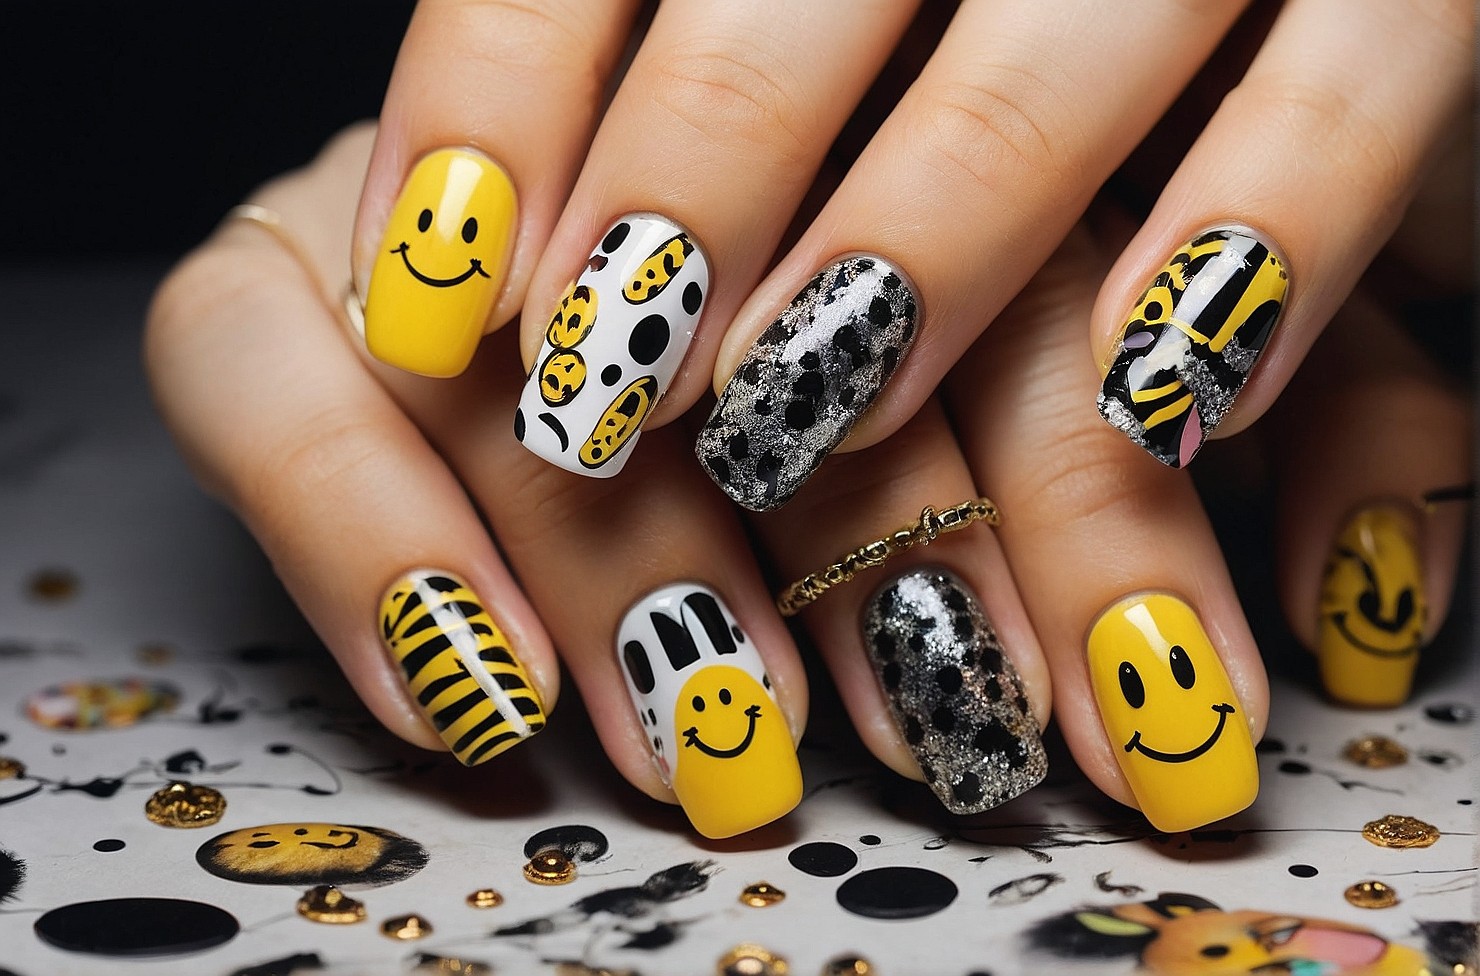
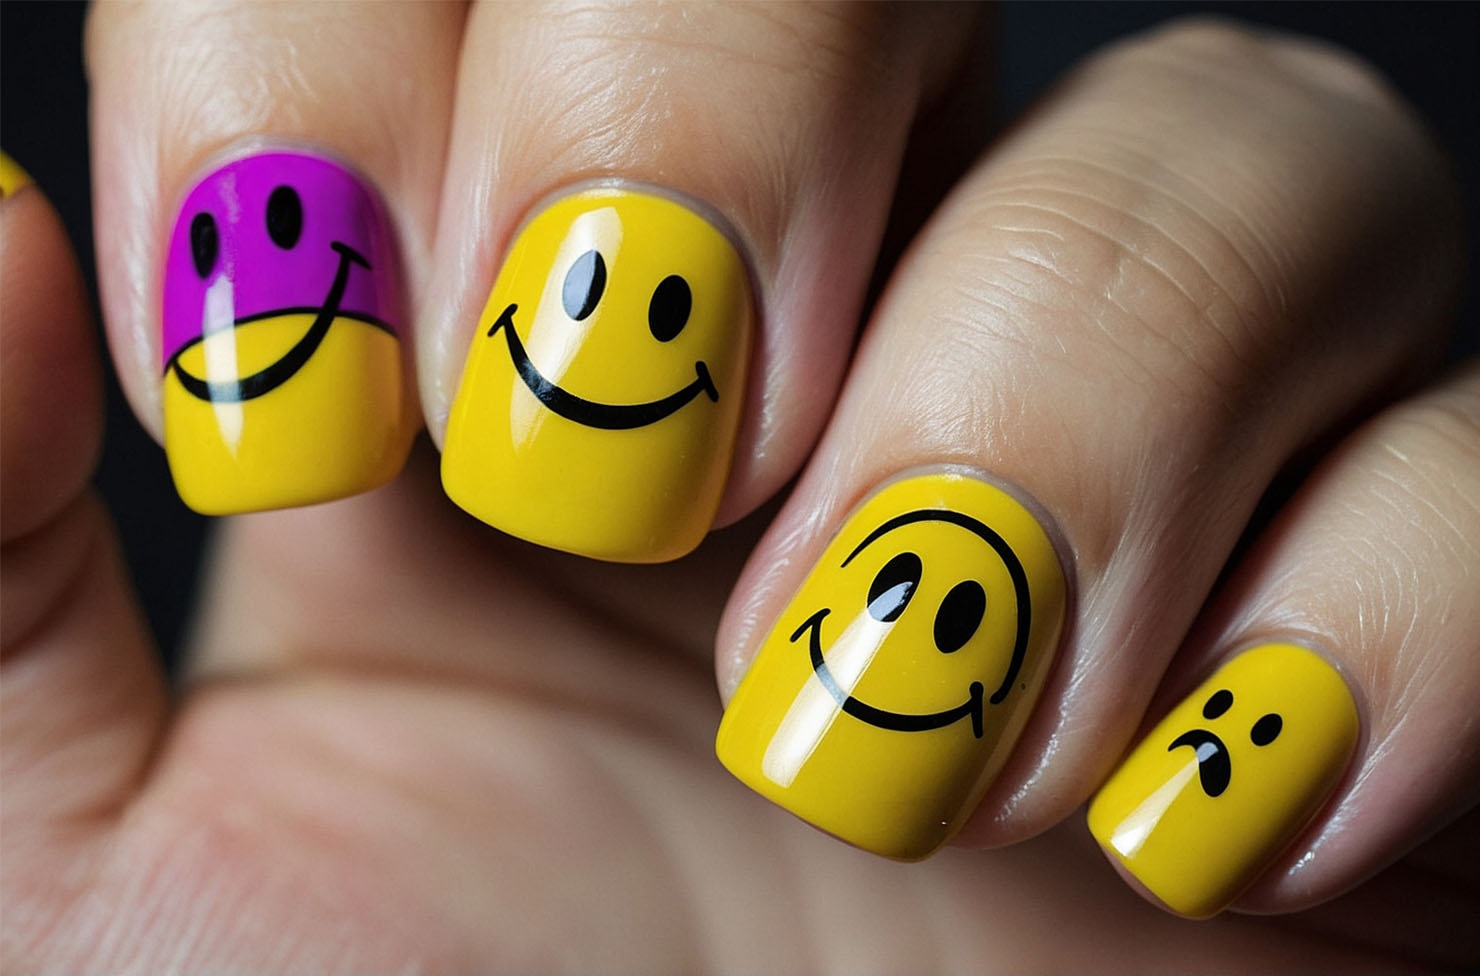
Smiley Face Nail Designs

Get ready to spread some 90s nostalgia with smiley face nails! Prep your nails by cleaning, drying, and trimming them. Apply a clear base coat for protection. Use yellow for the faces and black for the details. Create a yellow circle on each nail for the face, then add eyes and a smile with black polish. Feel free to get creative with expressions; go for classic smiles or mix it up with winks and tongue-sticking-out faces! Let it dry, then finish with a clear top coat.
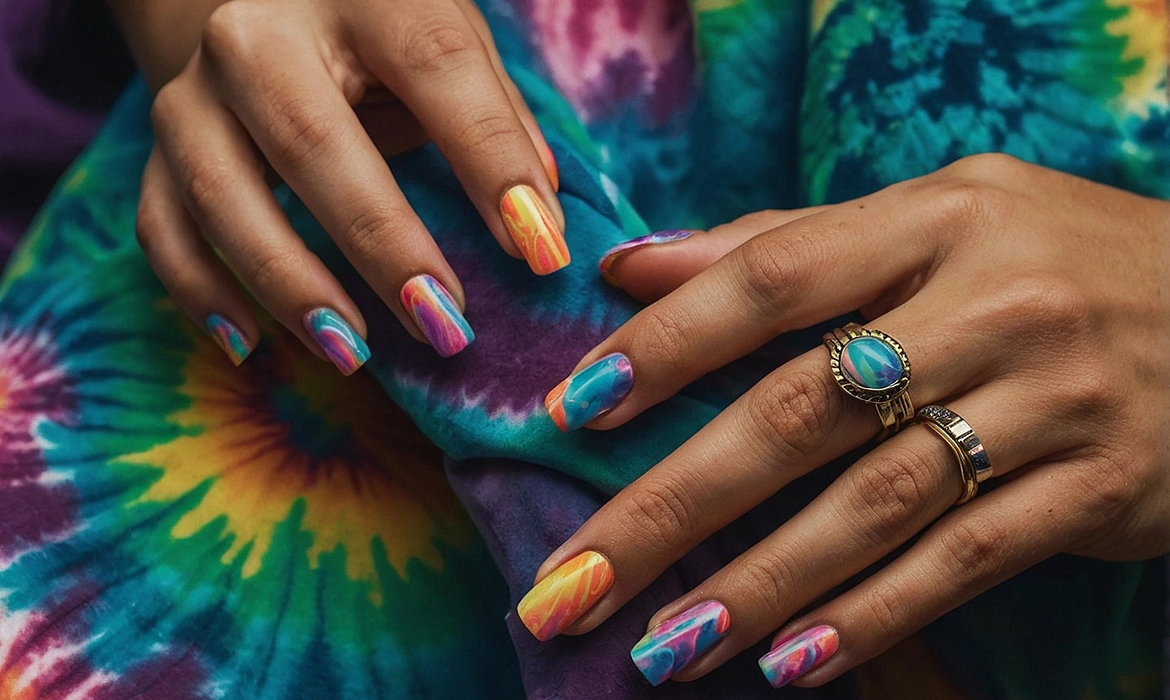
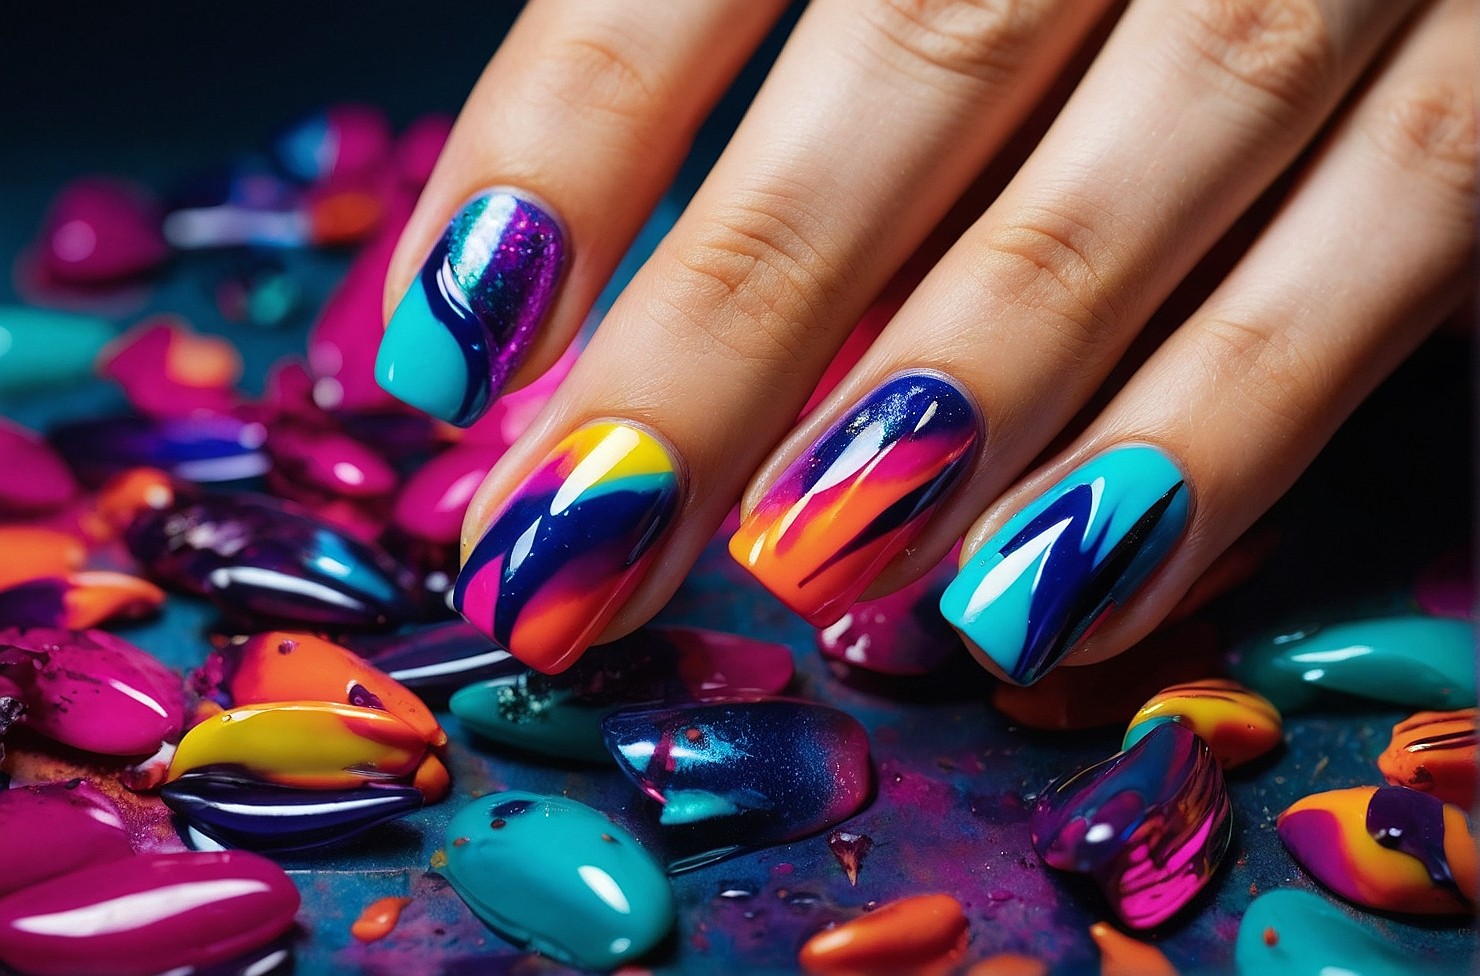
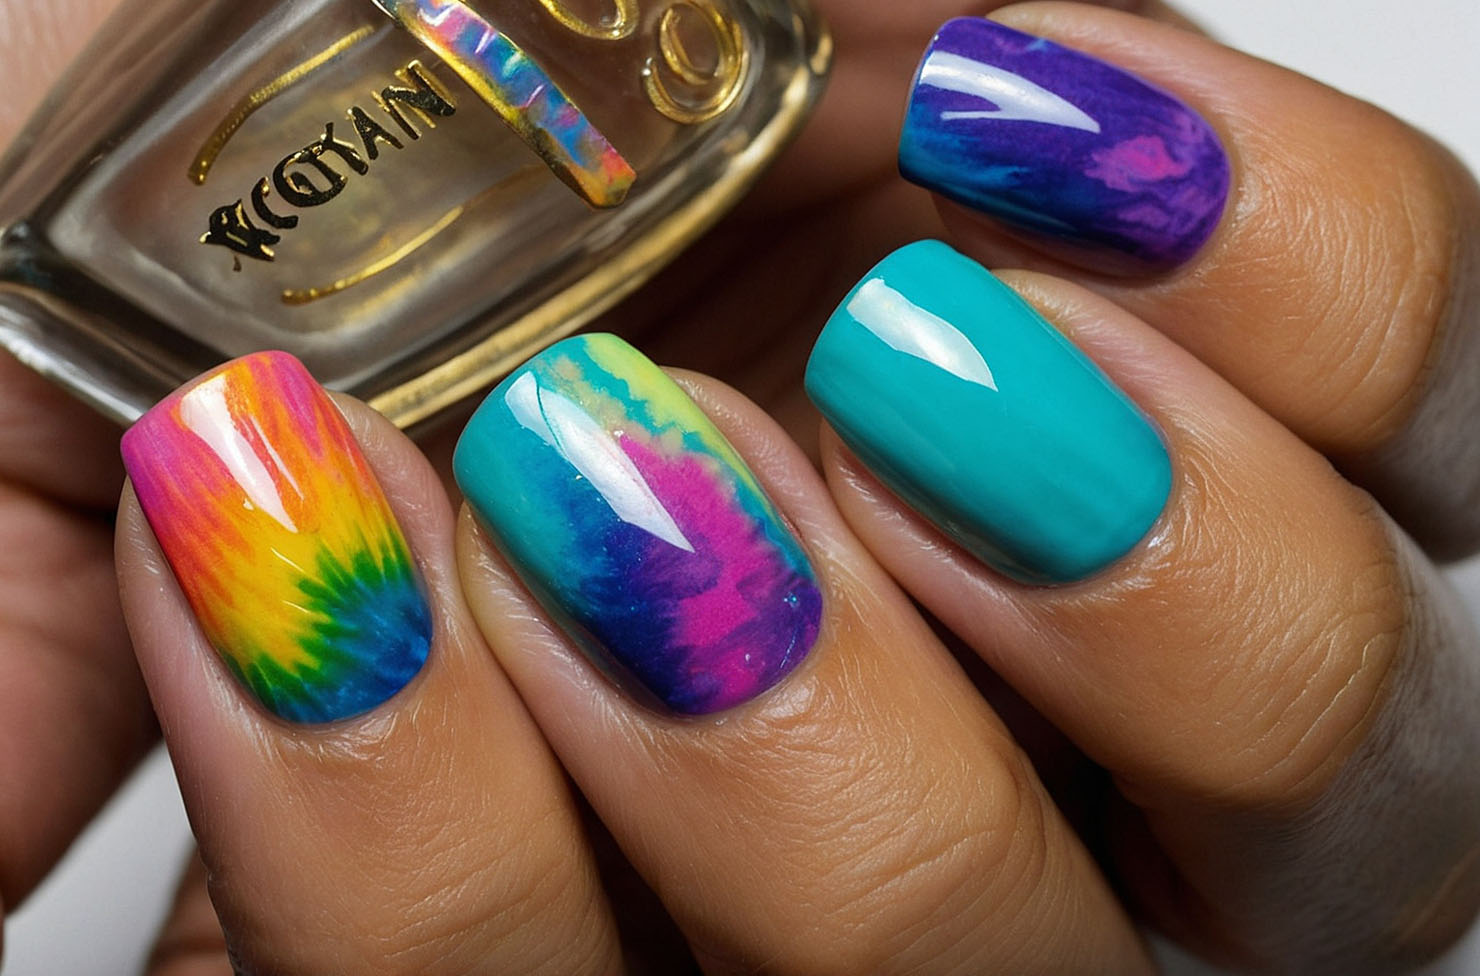
Tie Dye Nails
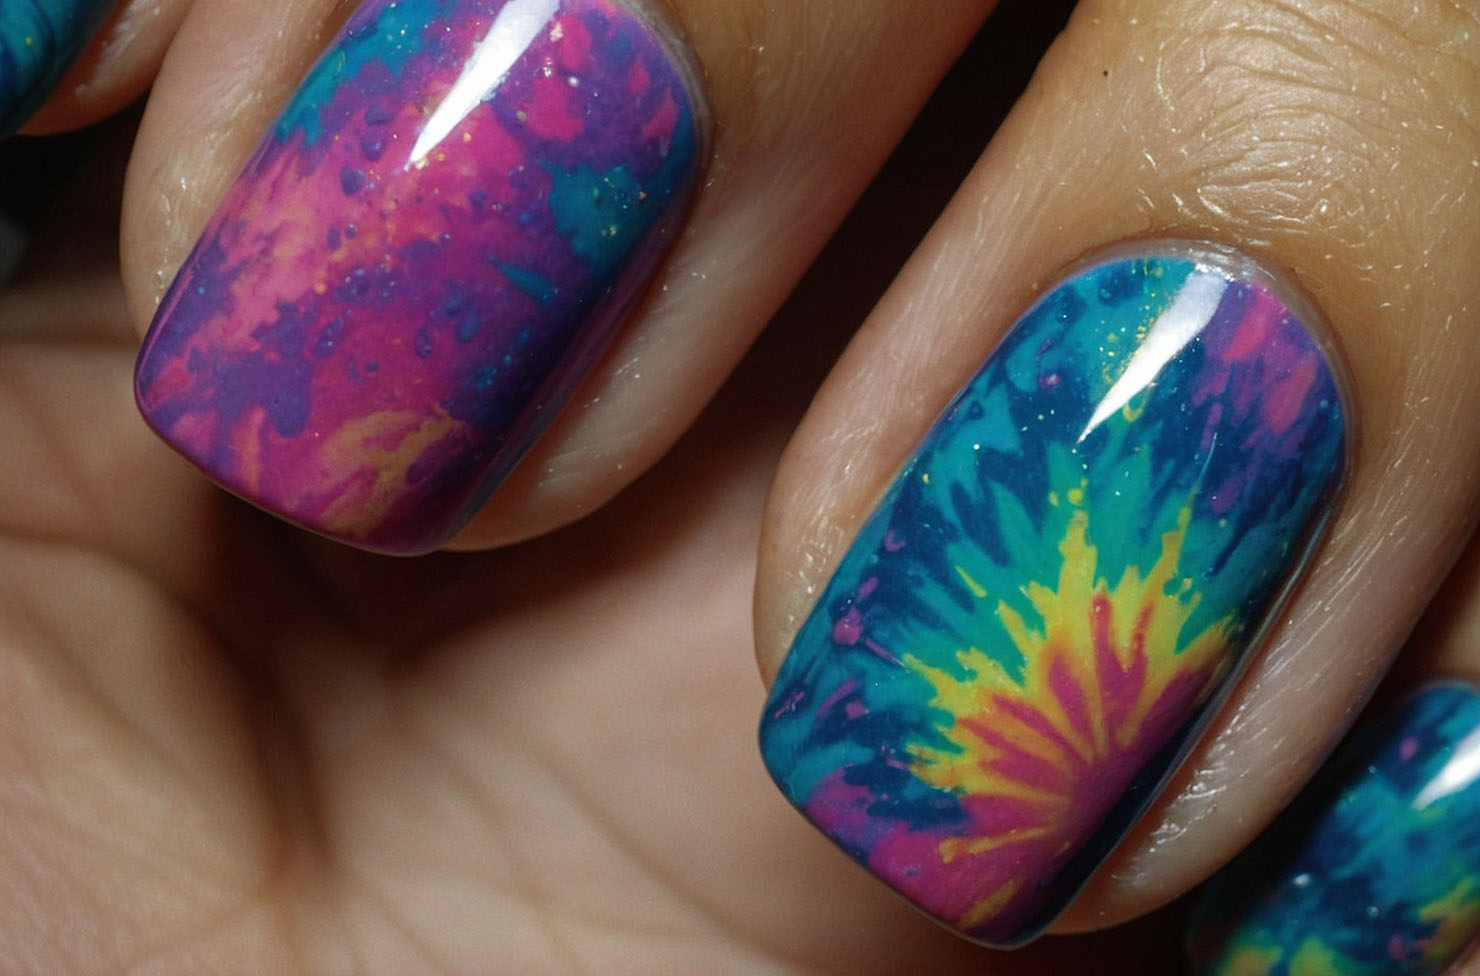
Try out the groovy vibes of the 90s with tie dye nails! Prep your nails by cleaning, drying, and trimming them. Apply a clear base coat for protection. Choose bright colors like pink, blue, purple, and green. Use a thin brush or dotting tool to randomly apply dots or patches of each color on each nail, slightly overlapping them. Don’t worry about precision. Tied dye is all about embracing the free-spirited and organic nature of the design! Once done, blend the colors together with a toothpick dipped in nail polish remover. Let it dry, then finish with a clear top coat. Here is your vibrant and psychedelic tie dye nails!
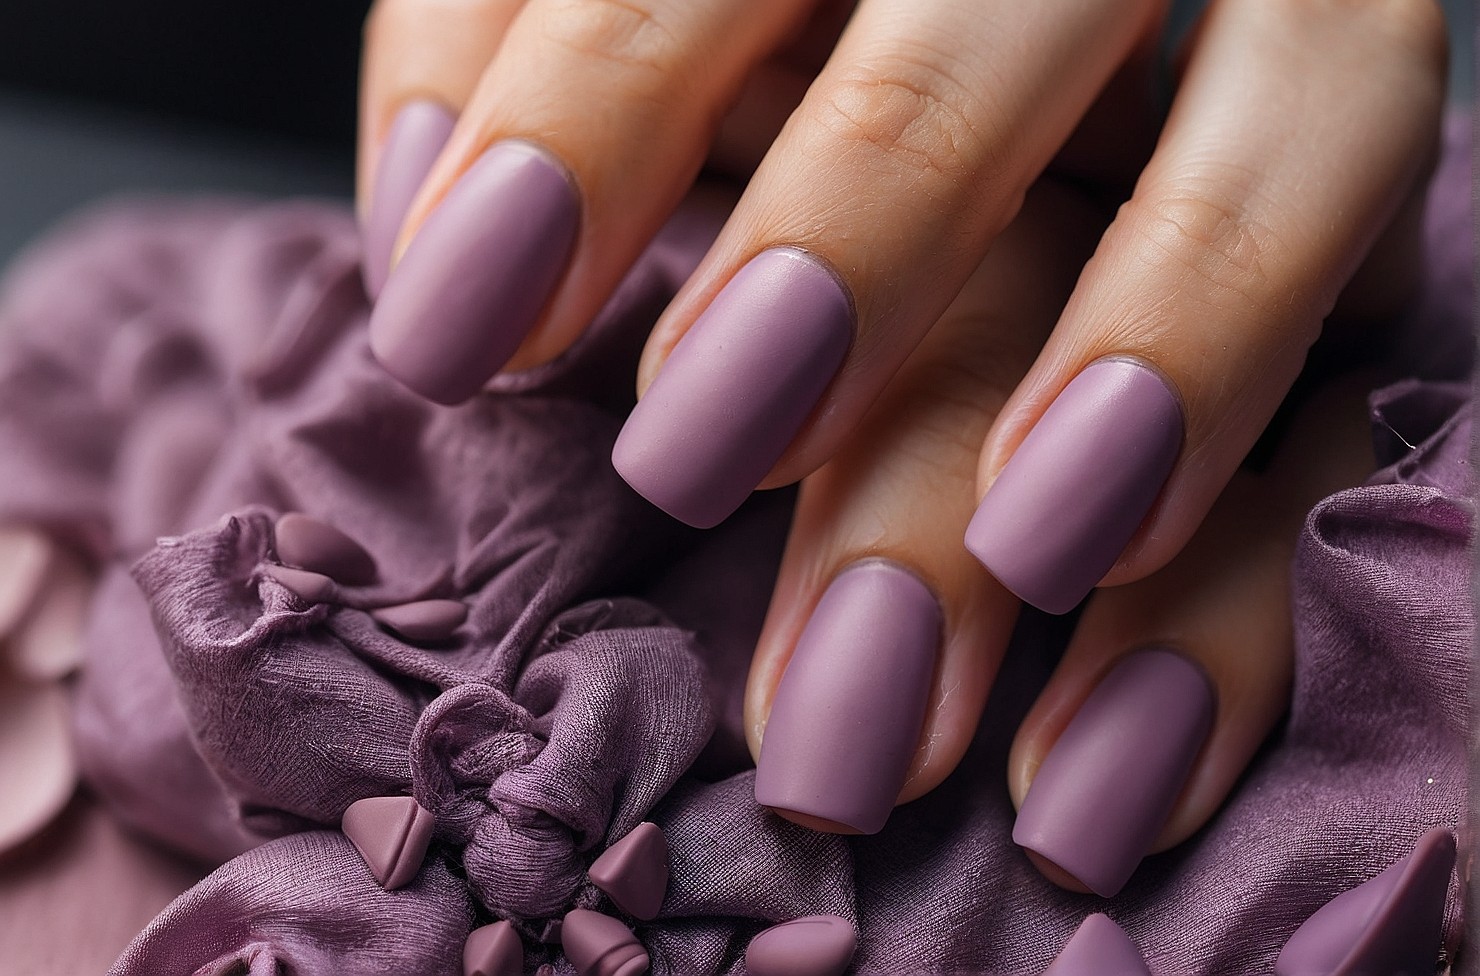
Retro Pastel Nails
Embrace the soft and dreamy aesthetic of the 90s with retro pastel nails! Prep your nails by cleaning, drying, and trimming them. Apply a clear base coat for protection. Choose soft shades like pink, blue, lavender, and mint green, they are perfect for achieving that retro pastel vibe. Apply two thin coats of each color, letting them dry between coats. Get creative with designs using contrasting colors—try polka dots or stripes. Alternatively, keep it simple with a single color on each nail for a chic and minimalist look. Finish with a clear top coat.
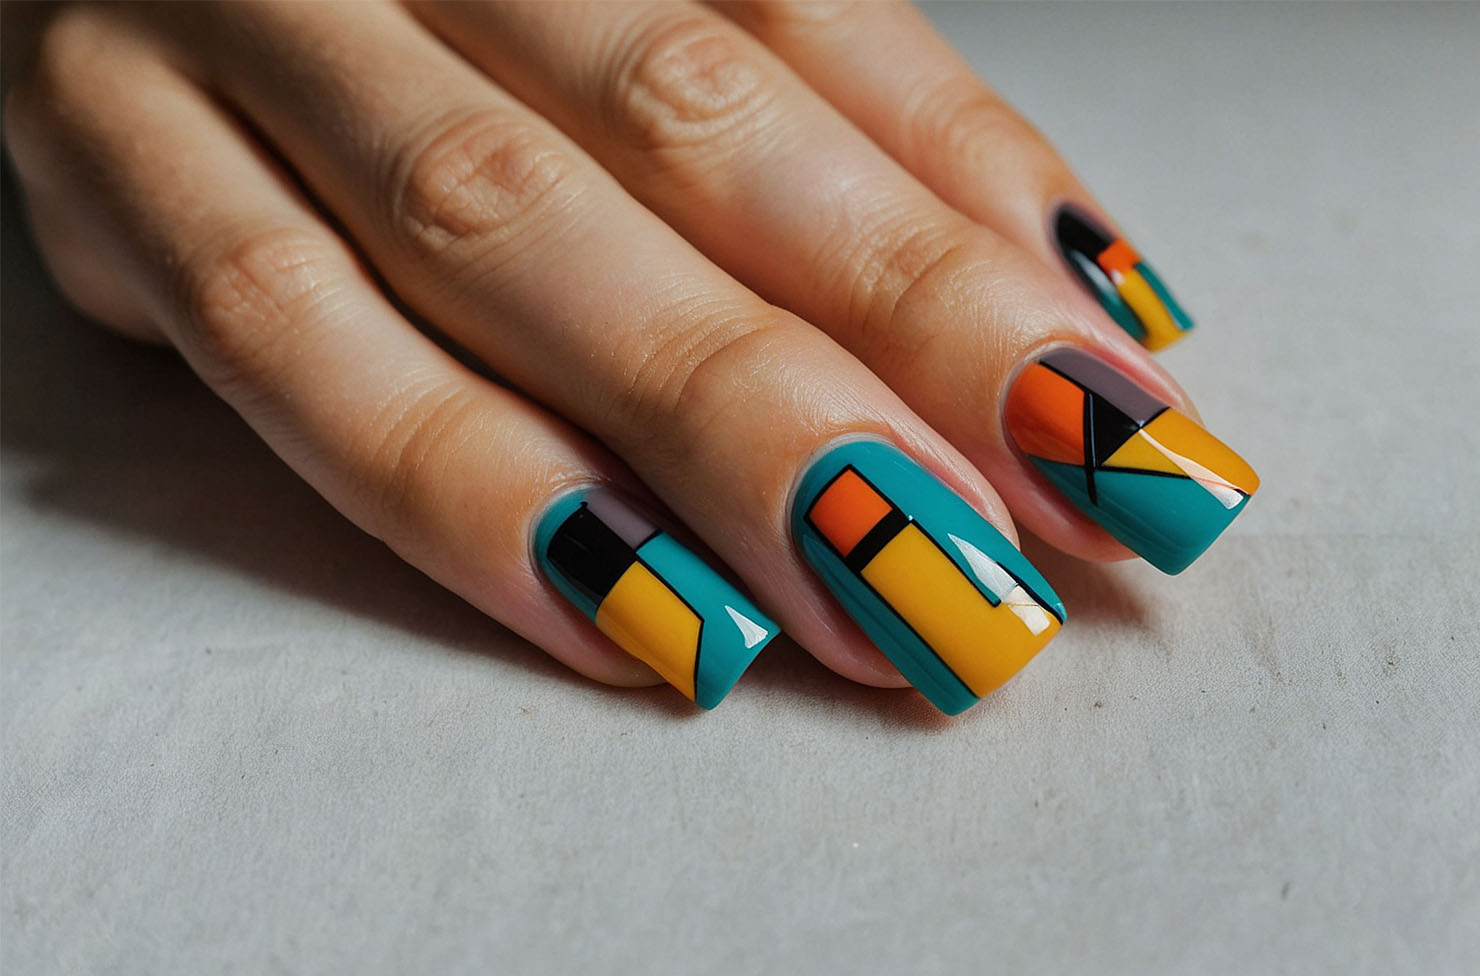
Color Block Nails
Ready for some 90s flair? Get ready to rock the bold and vibrant style of the 90s with color block nails! Prep your nails by cleaning and trimming them, then apply a clear base coat. Pick bold colors like red, blue, yellow, and green for your color block design, they work perfectly for this retro look. Using a thin nail art brush or striping tape, carefully create clean lines and geometric shapes on each nail to divide them into sections for the color blocks. Fill in each section with your chosen colors, alternating for contrast. Let the polish dry and add a second coat for opacity. Finish with a clear top coat for shine.
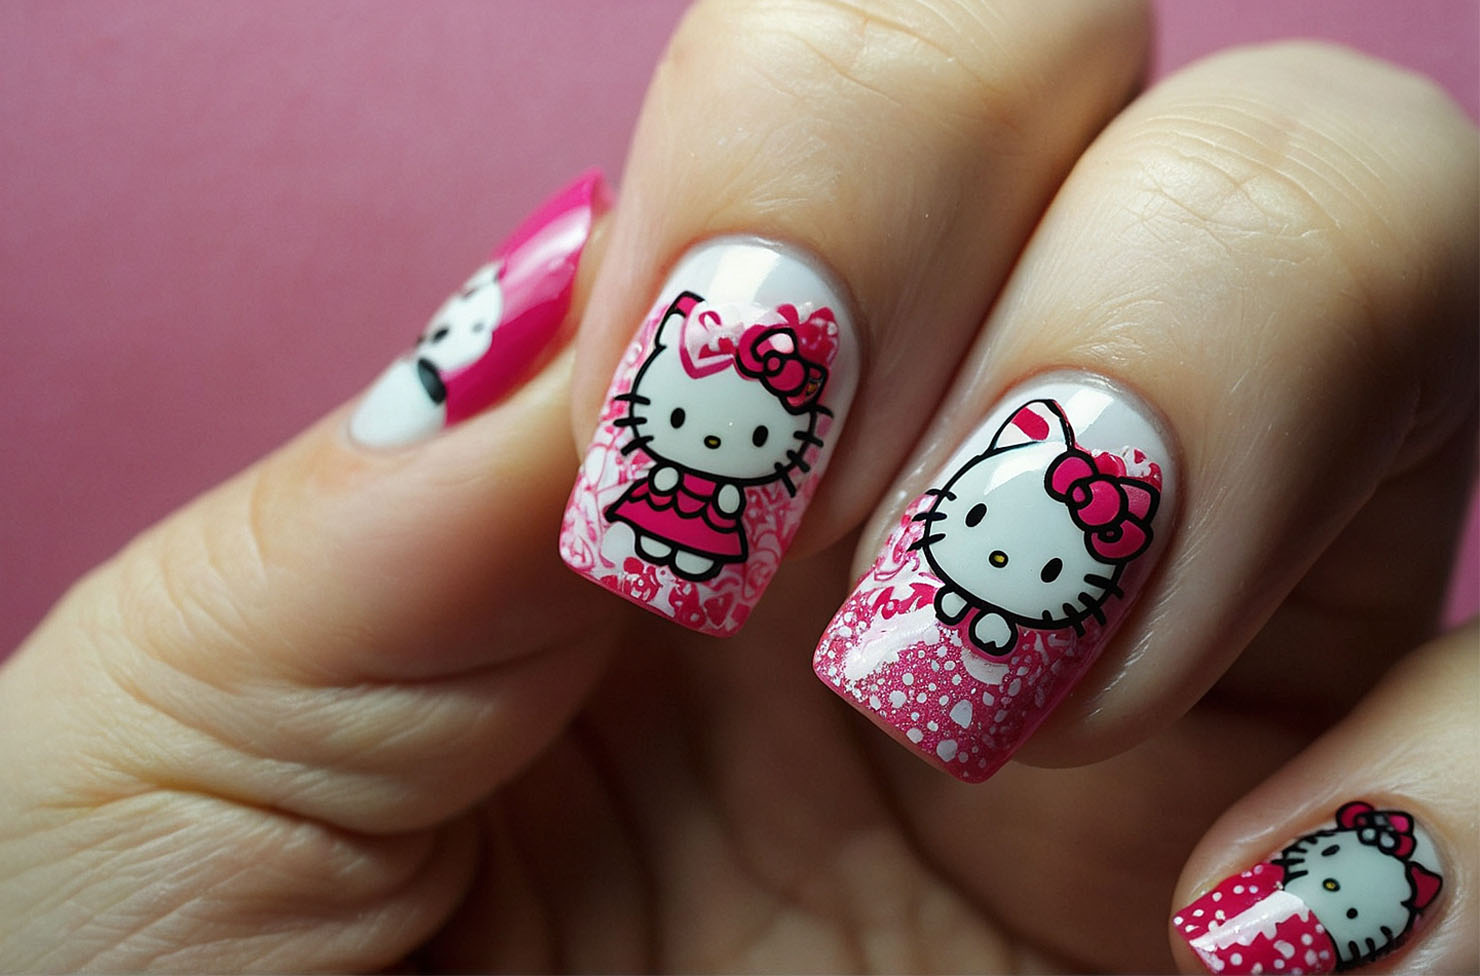
Hello Kitty Nails
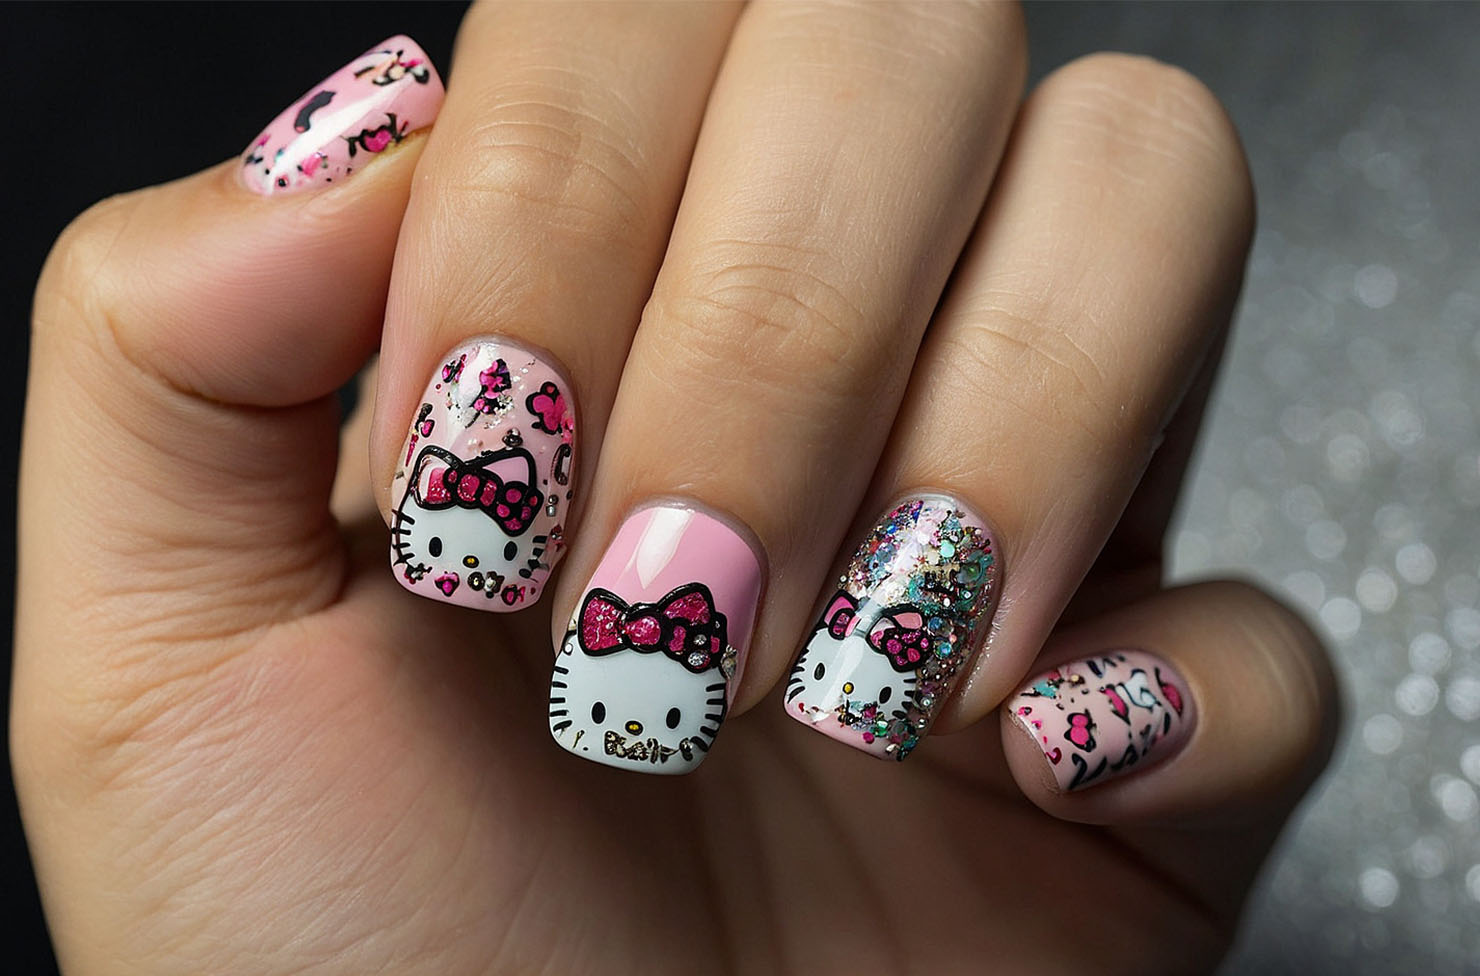
Ready for some cute Hello Kitty nails? Prep your nails by cleaning and trimming them, then apply a clear base coat. Choose soft pastel colors like pink, white, and yellow for her iconic look. Use a thin brush or dotting tool to create her face on each nail, oval for the head, two dots for eyes, a triangle for the nose, and a pink bow. Or, use stickers for an easier option. Let your designs dry, then finish with a clear top coat for shine. A fun and nostalgic beloved character of the 90s!
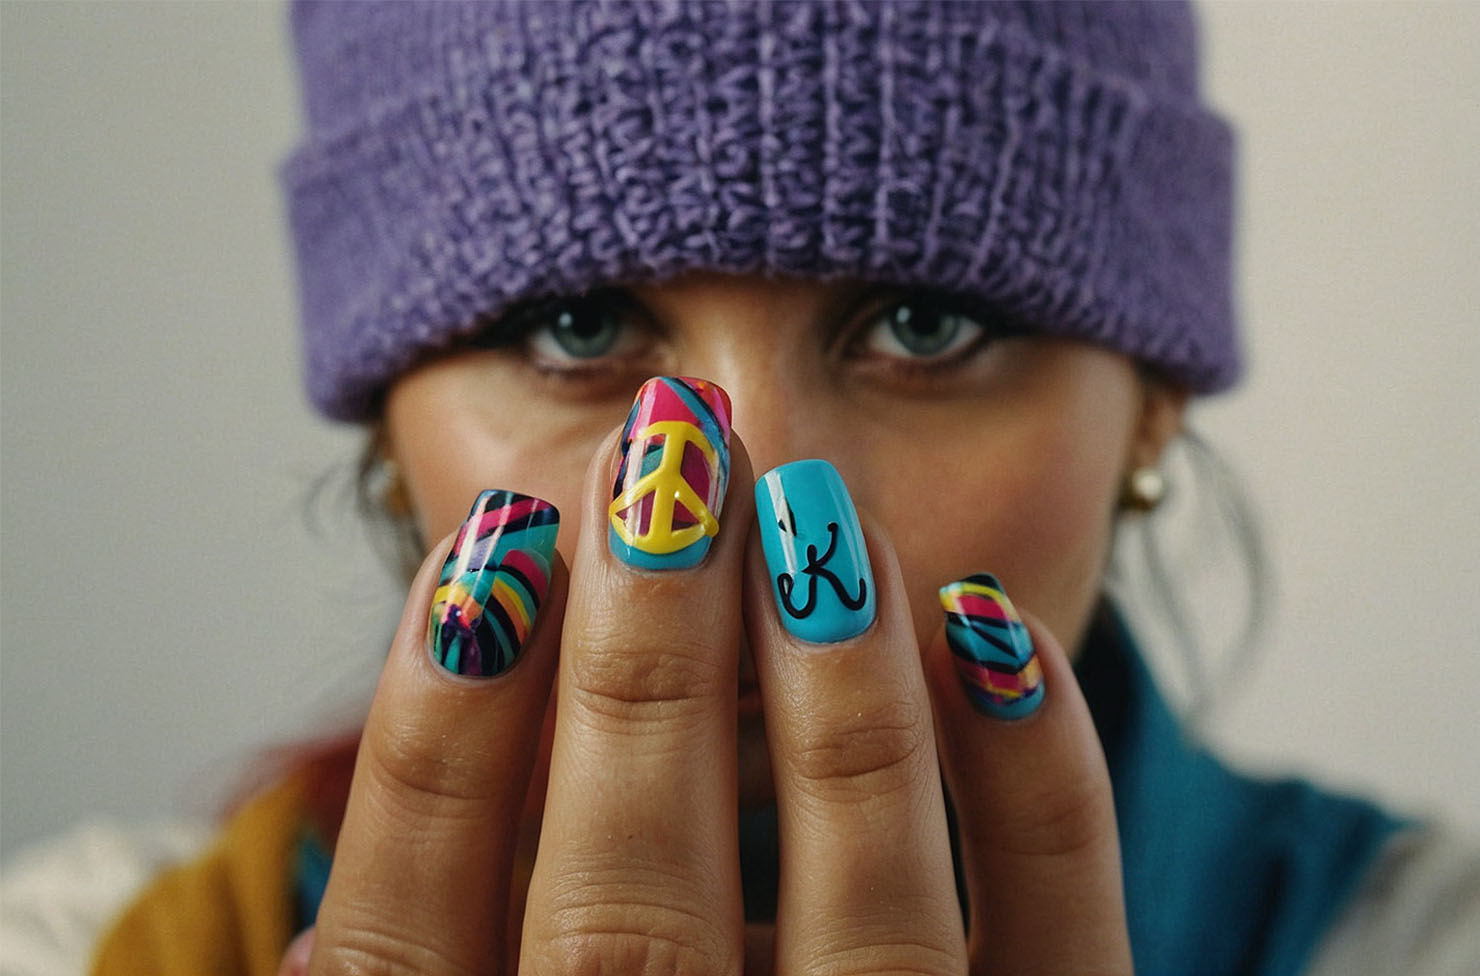
Peace Sign Nails
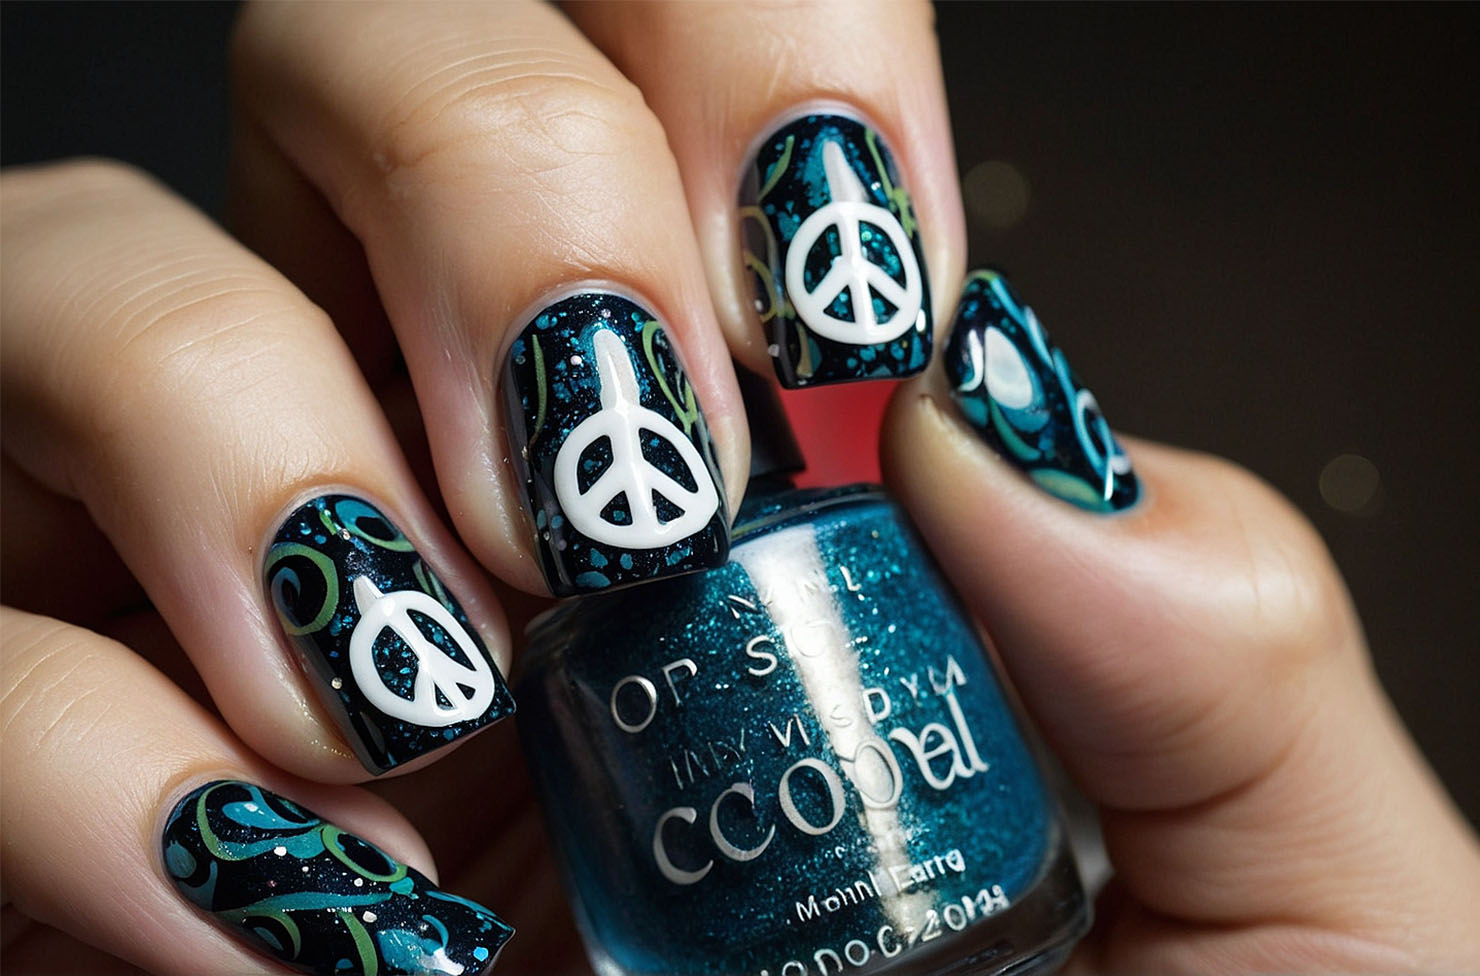
Embrace the peace, love, and groovy vibes of the 90s with peace sign nail designs! Prep your nails by cleaning, drying, and trimming them, then apply a clear base coat. Choose your favorite nail polish colors to create the peace signs; bold and vibrant hues like turquoise, hot pink, and sunshine yellow are perfect for capturing the retro feel. Use a thin brush or dotting tool to draw the peace sign on each nail, start with a circle, then add lines to form the symbol. Let your designs dry, then finish with a clear top coat for shine.
Glow in the Dark Nails
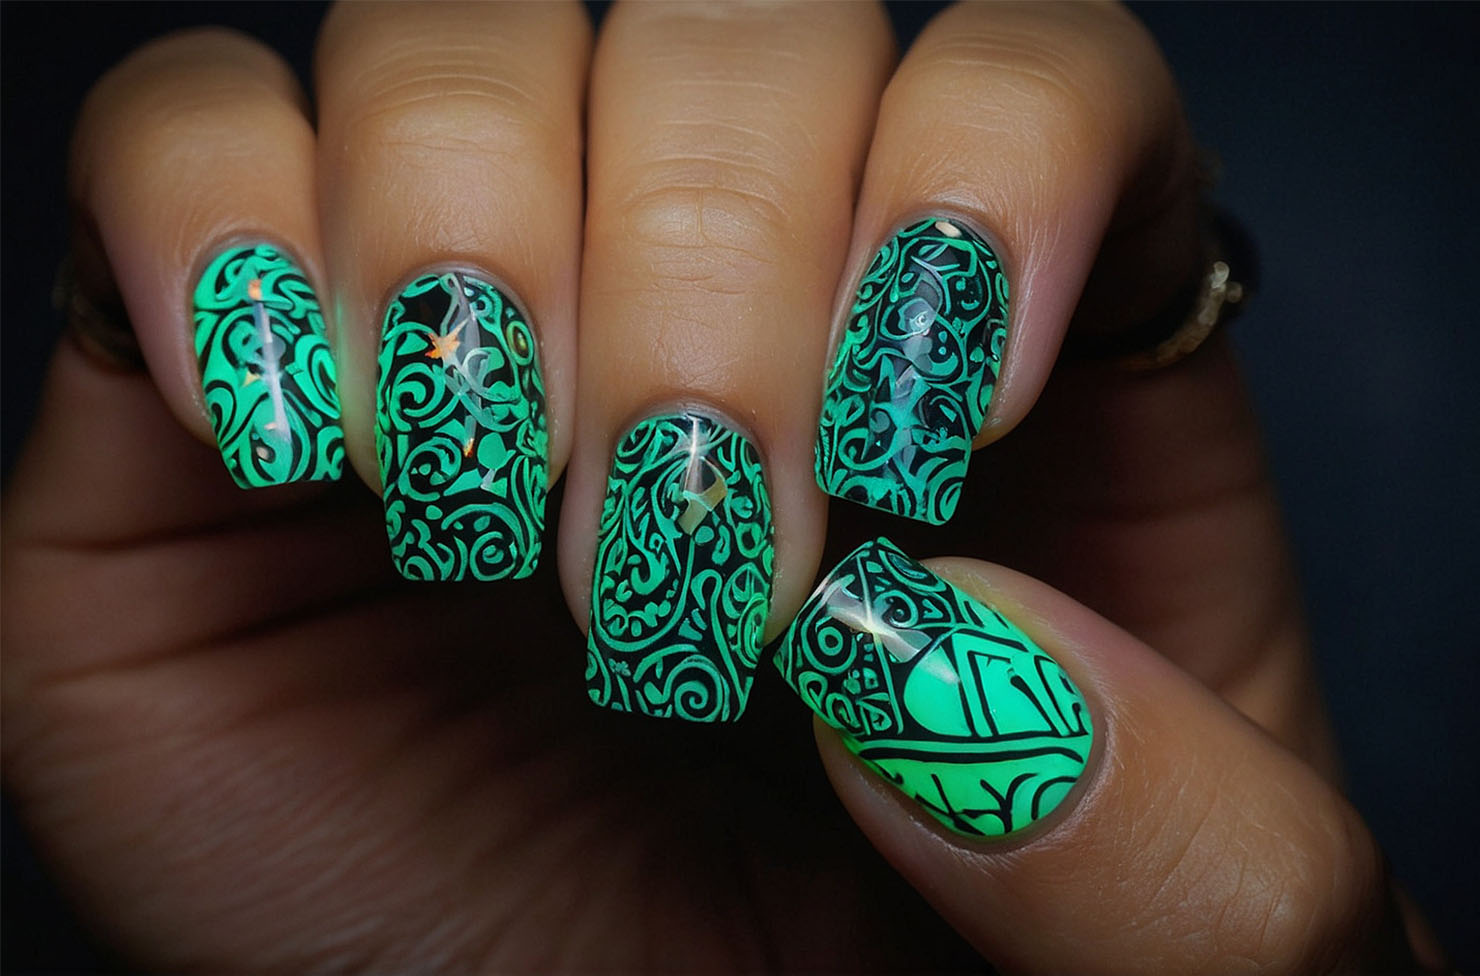
Illuminate your nails with the retro charm of glow-in-the-dark designs straight from the 90s! Start by prepping your nails; clean, dry, and trimmed. Apply a clear base coat and then your favorite glow-in-the-dark polish. Whether it’s a vibrant neon shade or a soft pastel hue, the choice is yours! Add two thin coats, letting each layer dry. Charge up the glow effect by exposing your nails to bright light. Watch as your nails light up the night! Then, watch as your nails light up the night with their mesmerizing glow! For an extra pop, add fun designs or patterns using contrasting regular nail polish or nail art pens. Finish with a clear top coat for shine.

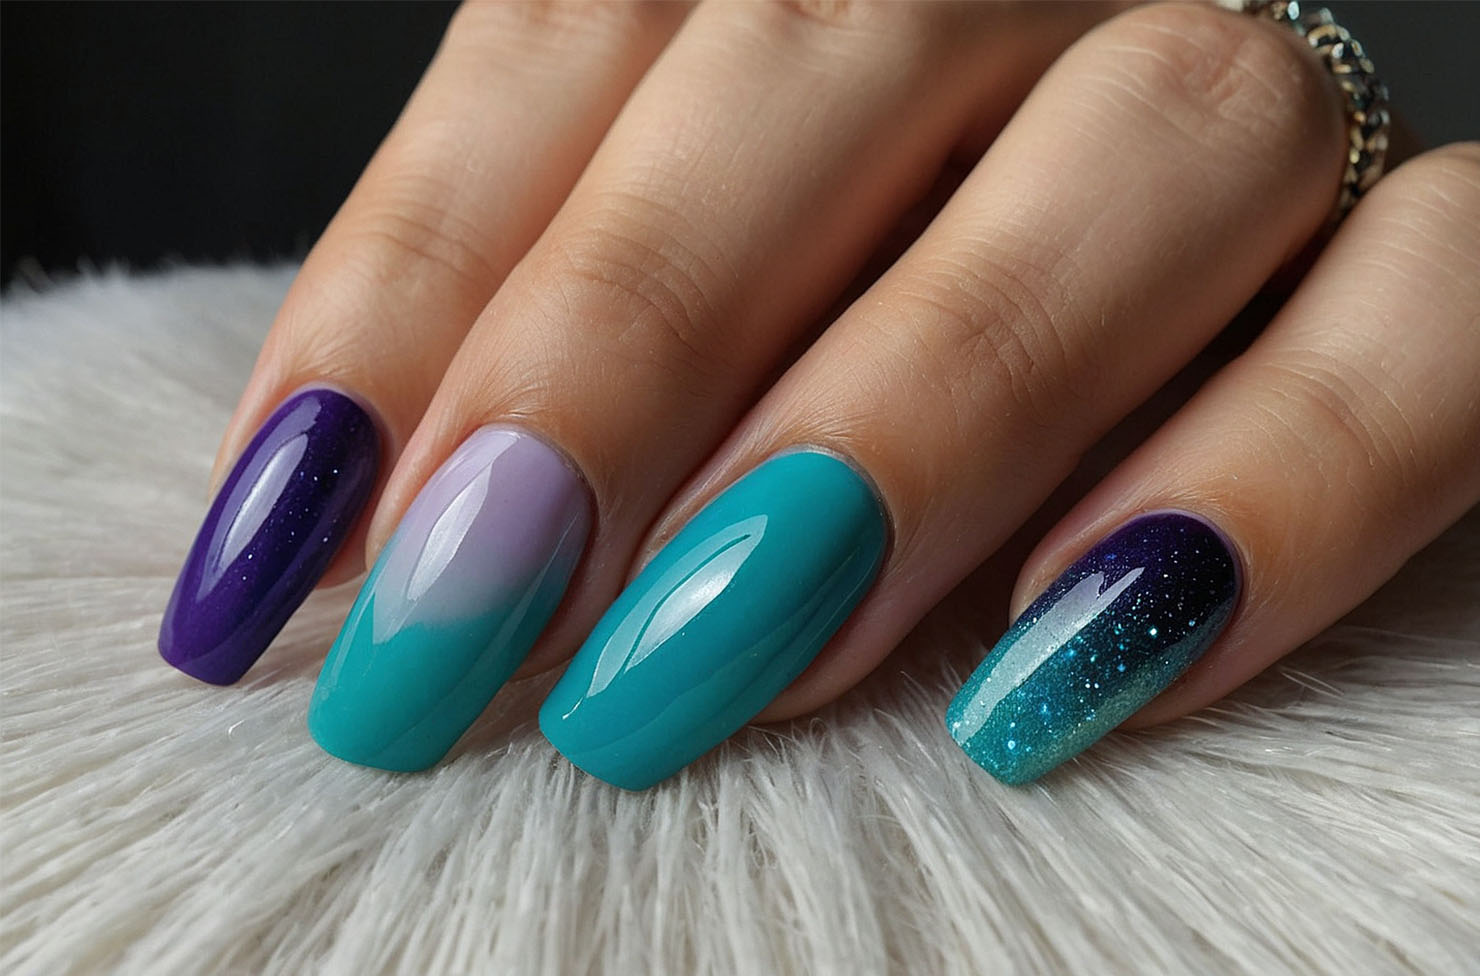
Ombre Nails
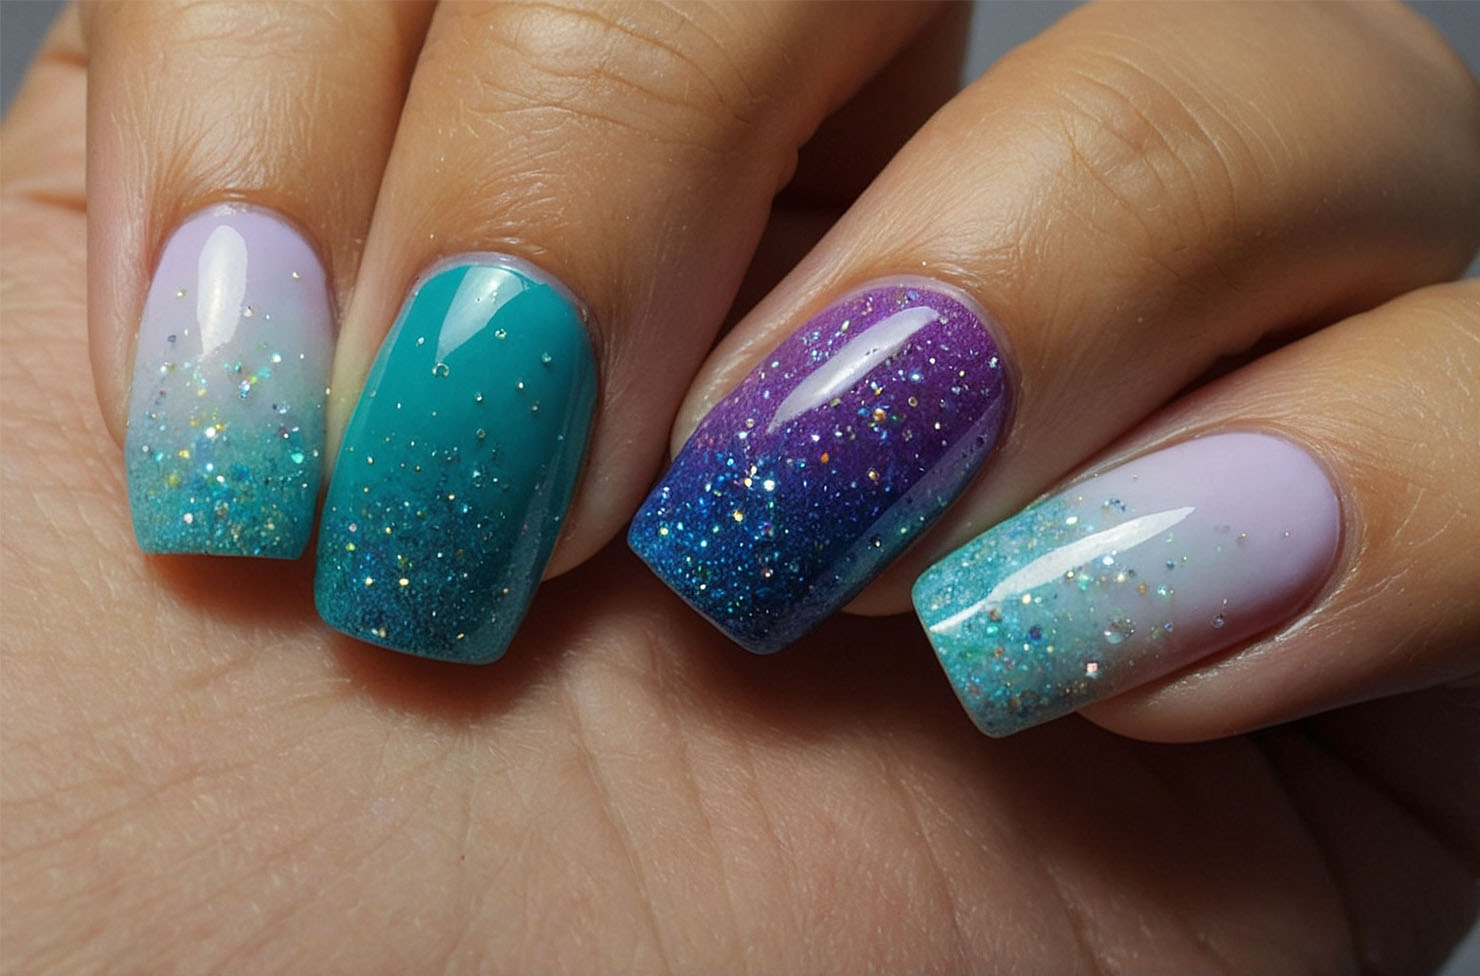
Try out the classic ombre nail trend from the 90s! Prep your nails by cleaning and trimming them, then apply a clear base coat. Choose your favorite nail polish colors for the ombre effect. Whether you choose shades of pink, blue, purple, or any other color combination, the key is to select colors that blend seamlessly together. Apply stripes of each color onto a sponge in the order you want them on your nails. Gently press the sponge onto each nail, rolling it slightly from side to side to blend the colors together and create the ombre effect. Repeat this process for each nail, reapplying polish to the sponge as needed. Clean up any excess polish around your nails with remover. Finish with a clear top coat for shine.
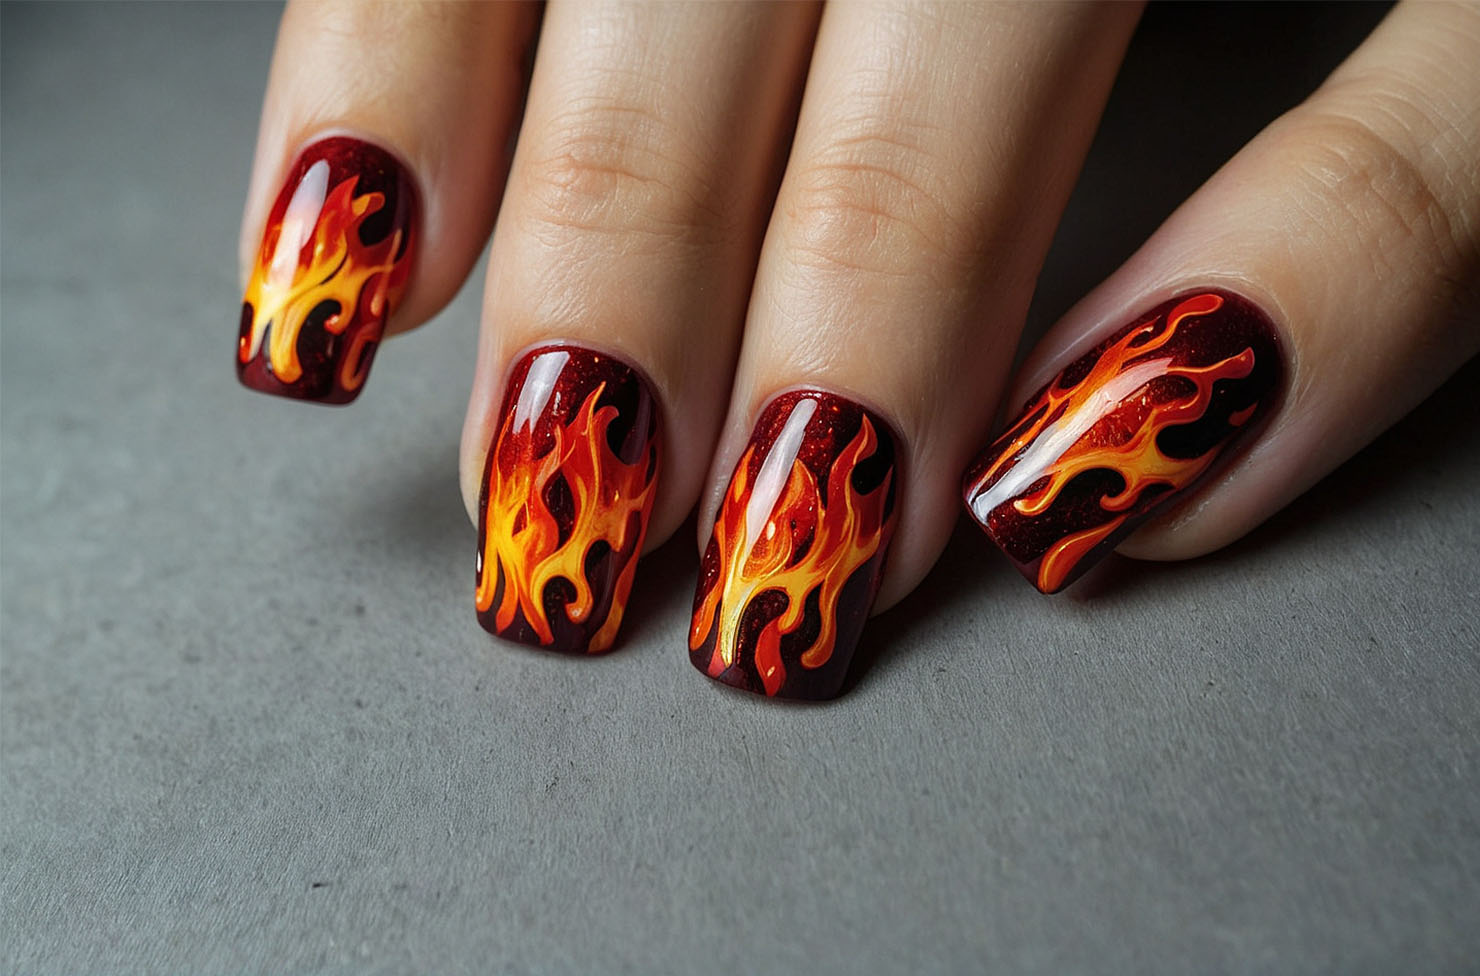
Flames 90s Nail Designs
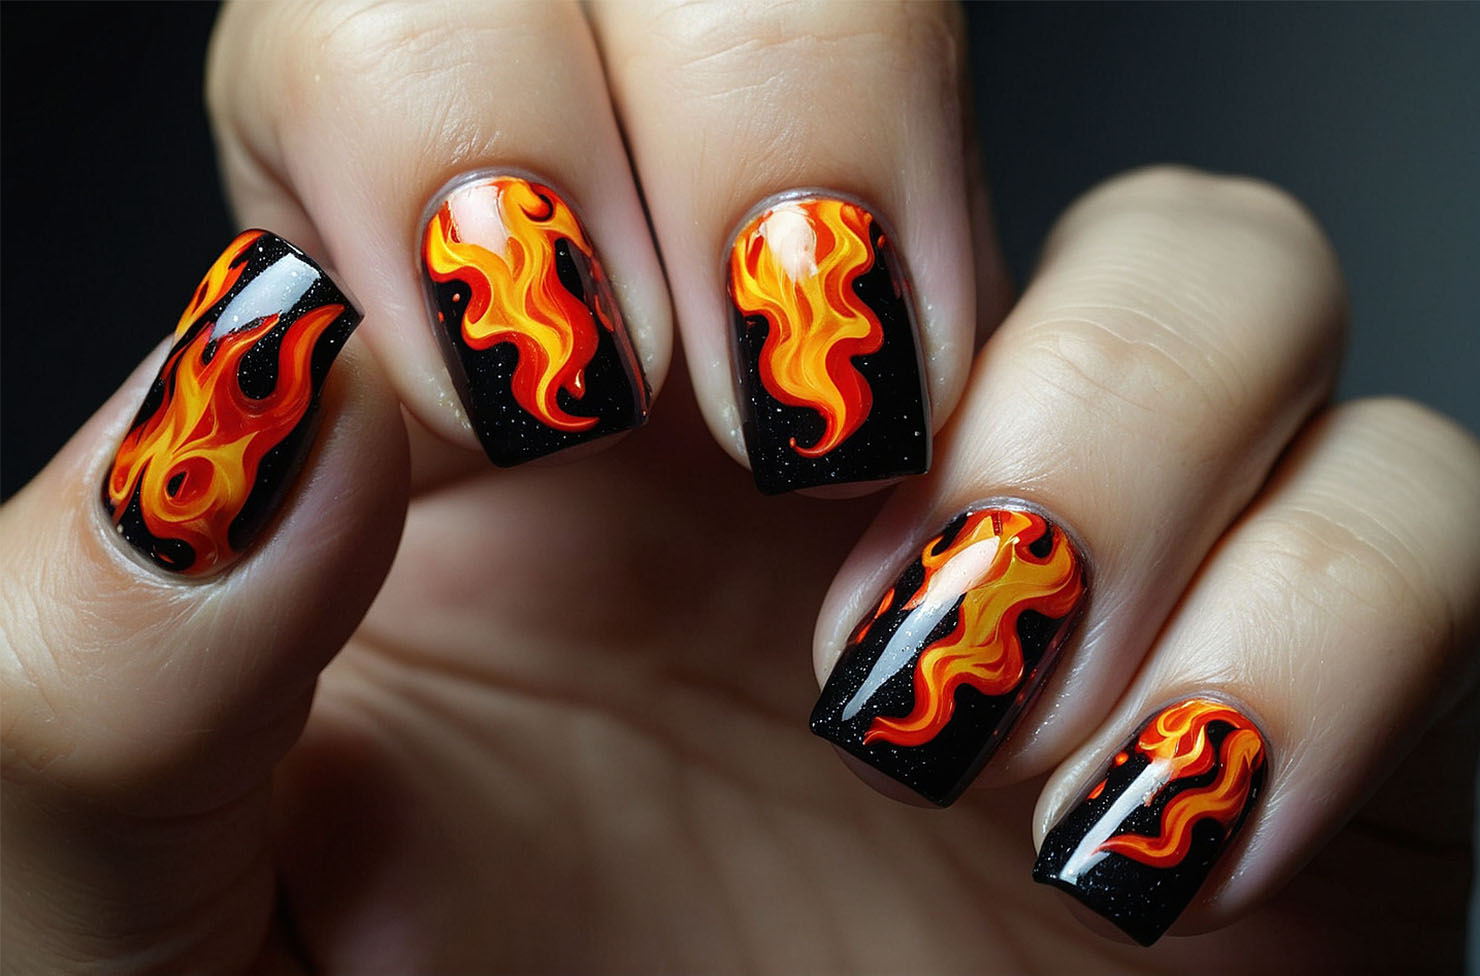
Get ready to ignite your nails with fiery flames, a bold and edgy trend straight from the 90s! Prep your nails by cleaning, drying, and trimming them. Apply a clear base coat, then choose fiery nail polish colors; vibrant shades of red, orange, and yellow work best for capturing the fiery look. Using a thin nail art brush or dotting tool, carefully create flame shapes on each nail, starting from the base and tapering off towards the tip. Let your creativity flow as you experiment with different flame designs; whether you opt for classic flames, abstract flames, or even multicolored flames, the choice is yours! Once dry, seal with a clear top coat.
FAQ
What was the nail trend in the 90s?
The 1990s are known for their neon colors and bright hues. So, bright colors and daring fashion choices were the most recognizable styles of the day. These bright nails are also the easiest style to achieve at home. So, to make it come to life, all you need is the right polish.
Was black nail polish popular in the 90s?
Following the growth of music culture in the 1970s, 1980s, and 1990s through grunge, punk, and metal, black nail polish became very fashionable.
What was a popular color in the 90s?
Nails in black, maroon, blood red, and cocoa were popular. They came in short, natural finishes as well as almond claws. It made little difference what shape it took as long as it had a Gothic, gloomy appearance.
Finally, we have come to the end of the “Polished Perfection: 90s-Inspired Nail Designs Making a Comeback” article. Additionally, I found this video on youtube “Beginner 90’s Nail Design”. You can see the video down below. Moreover, you should definitely check the things I have found for you. You can see all the links in the article. I hope you found this article helpful and enjoyed it as much as I did. Lastly, don’t forget “Wear to express, not to impress”.
In addition, you can follow us on Pinterest, YouTube and Instagram for information and photos. See you next article!
Stay Stylish!
Adsterra

Leave a Comment